
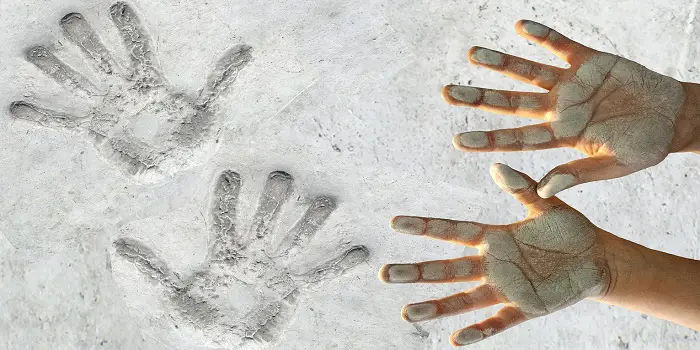
Skim coating is a thin layer of joint compound (aka drywall mud) that smooths out rough or damaged surfaces, fills cracks, and gets the wall ready for a flawless paint job.
Drywall mud can stick just fine to wood surfaces like plywood or OSB—as long as they have a bit of texture for the mud to grip.
If the plywood is painted, make sure the paint is flat, not shiny, because smooth or glossy finishes don’t give the mud anything to hold onto. In that case, lightly sanding the surface first will help the compound bond better.
A quick scuff with medium-grit sandpaper and a clean, dust-free surface can make all the difference between a smooth, lasting skim coat and one that peels off later.
That said, drywall mud has its limits. It’s meant for indoor, dry spaces only.
Don’t use it on anything that might get wet—like kitchen backsplashes, bathroom walls near showers, or outdoor surfaces. Moisture will make it crumble and peel faster than you can say “redo.”
So, if you’re refinishing an indoor plywood wall or prepping a project for paint, go ahead and skim it—but prep the surface well, apply thin coats, and keep it far from moisture.
Done right, you’ll end up with a smooth, paint-ready surface that looks like new drywall.
What's Here in the Article:
Skim Coating Plywood Surfaces (Step-by-Step)
If you want plywood to look like a smooth drywall finish, skim coating with drywall mud is a great way to do it — provided the surface is interior and dry.
Below I’ll walk you through everything: tools, prep, mixing, application, sanding, and finishing, with technical details so you don’t guess.
Treat this like a recipe: follow the order and you’ll save time (and rework).
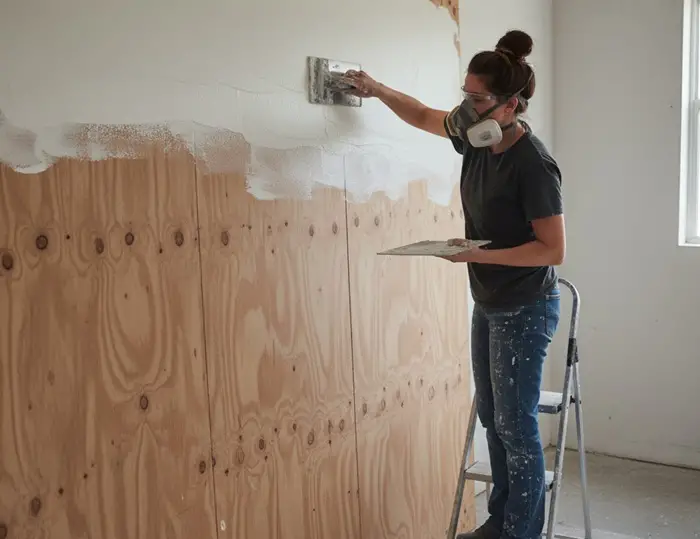
1- Prep: the make-or-break stage
Before you skim coat plywood, a few prep steps can make a big difference in the final result.
First, make sure your plywood is suitable — it should be for interior use only, not for exteriors, shower surrounds, or any surface that will get wet.
Check the panels for loose veneer, delamination, or large gaps, and repair or replace any damaged pieces.
Next, clean the surface thoroughly. Remove dust, grease, wax, or any other contaminants.
A quick vacuum and wipe with a damp cloth works well — just make sure the wood is dry before moving on.
If the plywood has a glossy or very smooth finish, lightly sand it with 120-grit sandpaper to give the mud something to grip.
Before applying the skim coat:
- Fill gaps and fastener heads – countersink screws or nails, fill with wood filler or setting compound. For gaps larger than 3–4 mm, use a base layer of setting compound to prevent shrinkage.
- Prime or seal – bare or porous plywood can suck moisture from the mud and cause cracking. A thin coat of PVA or bonding primer improves adhesion and ensures controlled drying. Let it fully dry according to manufacturer instructions.
With these prep steps, your skim coating will go on smoother and last longer.
2- Mix the compound correctly
Getting the compound mixed just right is key to a smooth finish. If you’re using pre-mixed, ready-to-use compound, just stir gently until it’s lump-free — don’t over-whip, or you’ll trap air.
For setting-type powders, mix with clean water using a drill and paddle, following the bag’s instructions.
- Consistency matters: Thick like peanut butter or cake frosting for filling gaps, slightly thinner for skim coats.
- Slake if needed: Some powders benefit from resting a few minutes before use.
- Temperature range: Aim for 10–30°C (50–86°F) to keep drying and setting predictable.
With the right mix and conditions, your mud will spread easily and dry reliably.
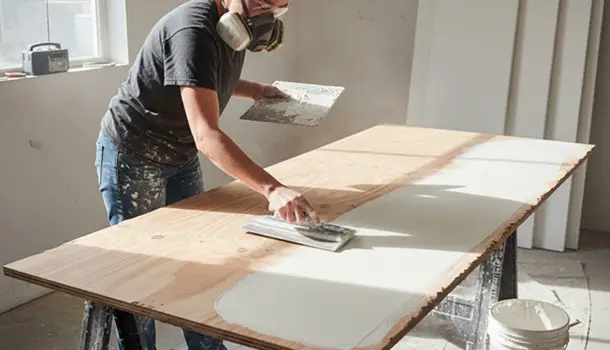
3- Application — multiple thin coats
When it comes to skim coating, multiple thin layers beat one thick coat every time.
The goal is to get smooth, even surfaces without ridges, so take your time and work in stages.
First coat – leveling/filling:
- Use a 6″–10″ knife to apply a thin layer (0.5–1 mm), pressing the compound into screw holes and seams.
- This fills imperfections and gives you a flat base.
- Let it dry completely — all-purpose mud may take 12–24+ hours, setting compounds are faster (20–90 minutes).
Light sanding (if needed): Knock down any high spots with 80–100 grit sandpaper and remove dust.
Second coat – the skim:
- Grab a 12″ knife and apply a very thin layer (0.3–0.6 mm) across the panel.
- Hold the knife at a low angle, pull long smooth passes, overlap slightly, and feather edges.
- For big panels, work in sections (3–6 ft wide).
- Setting compound allows a quicker second coat since it won’t re-wet the first layer as much.
Optional third coat:
- After light sanding, a final ultra-thin pass can smooth out any remaining trowel marks.
Thin, patient layers give the smoothest, most professional-looking finish — rushing with thick coats will just make more work sanding later.
4- Drying and environmental tips
Proper drying is key to a smooth finish. Keep the room ventilated, but avoid strong, direct airflow — it can dry the surface unevenly and cause tiny cracks.
Aim for humidity under 60%; high humidity slows drying and makes sanding harder.
- Patience pays off: Let the skim coat fully dry before sanding or priming. On plywood, thin coats can take 12–24 hours to cure, while setting compounds are usually faster.
Controlling airflow, humidity, and timing will save you extra sanding and ensure a flawless finish.
5- Sanding, priming, and finishing
Once your skim coat is fully dry, start sanding lightly.
Begin with 120-grit for leveling, then move to 150–180 grit for a smooth finish. Don’t sand aggressively — you don’t want to go through the skim coat.
Use a sanding block or sponge to keep the surface flat and avoid dips. Vacuum and wipe with a tack cloth to remove all dust, since leftover particles can ruin primer adhesion.
Prime: Apply a PVA or bonding primer to seal the surface and even out absorption, ensuring your paint goes on smoothly.
Inspect and touch up: After priming, any remaining imperfections will show. Spot-fill lightly, sand, and touch up primer as needed.
Topcoat: Finish with your chosen paint. For high-traffic areas, eggshell or satin is practical, while flat paint is great for hiding minor flaws.
Why You Need to Skim Coat Plywood with Joint Compound?
Skim coating plywood with joint compound transforms its surface so it can look like a wall rather than raw wood.
Without it, plywood often shows grain, knots, and seams, which makes painting or finishing tricky.
Applying a thin layer of compound mimics drywall texture, giving a smooth, uniform finish that looks like drywall and can even be textured like it.
Is Plywood Cheaper Than Drywall?
Raw plywood panels can sometimes cost more upfront than drywall, and you still need joint compound and extra labor to achieve that perfect wall finish.
So while plywood is versatile, achieving a seamless, drywall-like look requires additional work and materials — making it not always the cheaper option if your goal is a flawless wall appearance.
So, Why Not Use Plywood Instead of Drywall?
Plywood is strong and durable, but its natural grain and seams make it difficult to achieve the smooth, seamless surface most interiors demand.
Skim coating solves this by creating a surface that is textured like drywall, ready for paint, wallpaper, or other finishes.
Common Problems When Skim Coating Wood and How to Avoid Them
Even with care, skim coating can have hiccups. Here’s what to watch for and how to fix it.
Remember that a little patience and attention to detail go a long way in preventing these common issues.
| Problem | Cause | Solution |
|---|---|---|
| Peeling or poor adhesion | Glossy surfaces, dust, skipping primer | Scuff the surface, clean thoroughly, and prime before applying mud |
| Cracking | Mud applied too thick, substrate movement | Use multiple thin coats, setting compound for deep fills, ensure plywood is securely fastened |
| Visible seams or tool marks | Rushed application, improper feathering | Take long, smooth knife passes and finish with a very thin final coat |
| Sanding through skim coat | Heavy or aggressive sanding | Sand lightly with finer grit, do multiple thin passes instead of one heavy pass |
The conclusion
In short, skim coating plywood with joint compound is the key to making it look like a wall rather than raw wood.
It smooths out imperfections, mimics drywall texture, and gives your space a polished, professional finish.
Whether you’re aiming for walls that look like drywall or want a surface ready for paint and decor, taking the extra step to skim coat ensures your plywood doesn’t just function well — it also looks great.
Share the post "How to Skim Coat Plywood with Drywall Mud?"
When working on a paint project, it is the materials you choose/use which determine its success and validity. This sentence Read more
Storage heaters and radiators aren’t popular anymore as they used to be. I have one old piece installed in my Read more
The purpose of a primer is to provide a surface sticky enough for the paint to adhere properly. The paint Read more
There are many similarities between latex and enamel-based paints. Being used on interior and exterior surfaces, they come in a Read more

Douglas Becker (aka Painter Doug) has over twenty years of experience as a painter in Adkins, Texas. At present, he resides in Florida with his family.
From painting multi-storeyed houses, condos, and apartments to large commercial buildings and small offices, he had served various customers in areas not only in Adkins but also in Southwest Florida, Sarasota, Naples, and many more. To know more about him check here.