
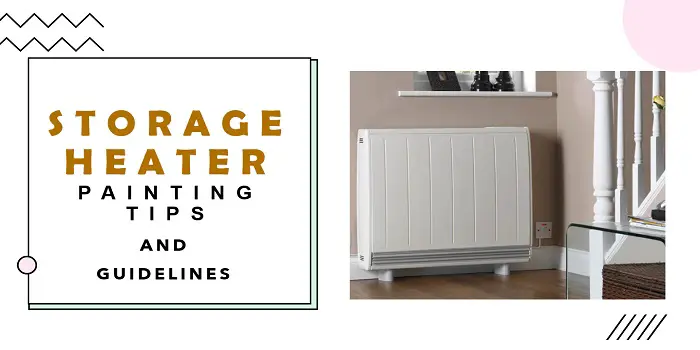
Storage heaters and radiators aren’t popular anymore as they used to be.
I have one old piece installed in my home.
And I am pretty sure that if you have one in your home, you would be interested in maintaining them from time to time.
Cleaning them, priming and painting are some of the most significant ways by which you can refinish them to look new.
But remember, even though you can paint your old storage heater from time to time, you should choose the paint that perfectly suits your purpose.
This means you would need to select the type of heat-resistant paint that is designed to apply on hot metal surfaces without getting damaged soon.
What's Here in the Article:
Best Storage Heater Paint?
When it comes to choosing the right paints for refinishing your old radiator and storage heater, you need premium quality heat-resistant paint.
IMO, Rust-Oleum is one of the best brands to consider as it offers a wide variety of heat-resistant paints and primers you can choose from.
The products listed range from Rust-Oleum, Coo-Var, Teamac, and Blackfriar. These are heat resistant, long-lasting, hard-wearing, and great for long-term usage.
The good thing about these heat-resistant radiator and storage heater paints is it does not peel away, split or blister even under extreme heat conditions.
Available in classic white as well as black or aluminum colored coatings, these paint coatings are great for metal surfaces that are exposed to high temperatures.
No doubt, you can use them not only for domestic purposes but also for commercial and industrial applications.
What about the Colors?
When painting my old-fashioned storage heater, a traditional metallic color is what I prefer most.
This helps to add more of a statement and visual appeal to my old piece of appliance.
If you don’t like metallic, you can choose the color that blends in with your surroundings.
Also, consider the intended effect you desire to get.
For example, you will need to consider the color of the wall behind your appliance and choose the one that matches closely with it.
To make your heater pop, you should choose the shade that contrasts with the wall.
Remember, the choice in hue or color will also depend on the availability of that specific type of paint.
Benefits of Painting Storage Heater?
A storage heater is a type of electric convection heating system or an electrical heat bank that works by storing thermal energy during the evening (or at night) when electricity is available at a lower cost.
The system then releases the heat during the day when the electricity tariff is high.
This means with this type of system; you can use the stored thermal energy as and when required without paying extra-high electricity bills.
Maintaining the storage heating elements, grids, and storage bricks is important so that you can enjoy the lower cost of electricity even when you have increased on-peak rates.
As I mentioned before, you can do this by properly caring for your system and by refinishing it on regular basis by using high-quality paint products.
A good paint when applied to the storage heater system will also ensure that the stored heat does not leak through fast.
This way, you can store and use more heat that is required for the next day.
How to DIY Paint Your Old Storage Heater?
Painting your old storage heater or a radiator heater isn’t tough if you follow the steps right.
In fact, if you are good at DIY projects, you can complete painting step-by-step without the need for a professional painter.
Here is an exact procedure you will need to follow…
Step 1: Ready the heater
When painting your storage heater, make sure it is turned off and cool.
Start by removing the dust from the appliance using soft cotton.
Then using masking tape, tape off the control valve and other areas you do not intend to paint.
Step 2: Prep the work area
Prep the working area by applying the masking tape to the wall behind and lay down the drop cloth on the floor below the heating unit.
This will prevent the areas from getting overspray.
Since spray paints for storage heaters can be toxic, you will also need to wear gloves, a respirator, and protective clothing to avoid any kind of health hazard.
Plus, you should open the windows in your room to improve ventilation.
Step 3: Sand the storage heater
After preparing your heater and work area, you are ready to sand the surface.
If the old paint on the surface seems to be flaking, take a screwdriver or a blade to scrape a small area.
If you find the old paint or varnish peeling away, you will need to sand it hard using coarse-grit sandpaper (like 40- to 60-grit).
On the other hand, if the paint is not flaking, you can use fine-grit sandpaper (like 80- to 120-grit) to sand the surface gently and remove light rust accumulation.
After sanding, wipe away all the sanding dust using a water-dampened cloth.
Once done, you will now have a smooth, paintable surface ready to prime and paint.
Note:
If you have a very old storage heater that is already painted, you will need to first test the existing paint for the lead with a lead paint test kit.
Paint on heaters and radiators in homes built before 1978 may contain lead and should be dealt with only by a professional.
Step 4: Spray a coat of primer
For priming, we will be using a high-quality spray primer like the Rust-Oleum High-Performance System Enamel Aerosol primer.
When spraying, make sure you hold the can upright at a distance of about 10 to 15 inches from your appliance.
Start by spraying an even coat of primer using a back-and-forth motion. You should work in a way to cover all the visible surfaces properly.
After you are done priming all the surfaces, let them dry for about 24 hours before painting.
Step 5: Paint the metal storage heater
As we have done with priming, similarly apply the paint.
Just make sure that you use high-temperature metal spray paint and spray evenly on all the visible surfaces.
After allowing the drying time of about 7 to 10 minutes, you can apply more coats to achieve the desired results.
Between each coat allow at least 5 to 7 minutes to dry the paint. This will prevent the spray paint from getting sticky.
Step 6: Clean up the space
After you have completed the spraying, it’s time to remove the painter’s tape you initially used to mask the surfaces.
If you have used the paintbrush, clean it properly and store it safely for your next usage.
Discard the drop cloth and properly dispose of the spray cans according to your local guidelines.
Also, make sure that you allow 24 hours of drying time to dry the final coat of spray paint before using the storage heater again.
Final Thoughts
Storage heaters are easy to install and are highly beneficial.
They do not require any extensive plumbing or pipework and require very little maintenance.
However, to make your traditional appliance look new and perform better with higher efficiency, painting is the way to go.
Make sure you choose the right paint and follow the steps when refinishing them.
Share the post "What Kind of Paint to Use for Your Old Storage Heater?"
When working on a paint project, it is the materials you choose/use which determine its success and validity. This sentence Read more
The purpose of a primer is to provide a surface sticky enough for the paint to adhere properly. The paint Read more
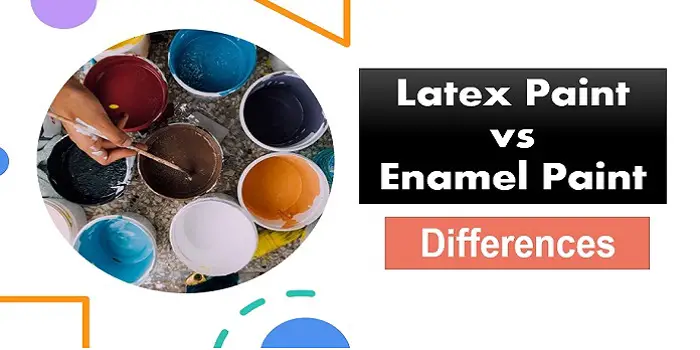
There are many similarities between latex and enamel-based paints. Being used on interior and exterior surfaces, they come in a Read more
Among the many chemicals found in paints, formaldehyde is one that raises significant concern. The problem is that formaldehyde is Read more

Douglas Becker (aka Painter Doug) has over twenty years of experience as a painter in Adkins, Texas. At present, he resides in Florida with his family.
From painting multi-storeyed houses, condos, and apartments to large commercial buildings and small offices, he had served various customers in areas not only in Adkins but also in Southwest Florida, Sarasota, Naples, and many more. To know more about him check here.