
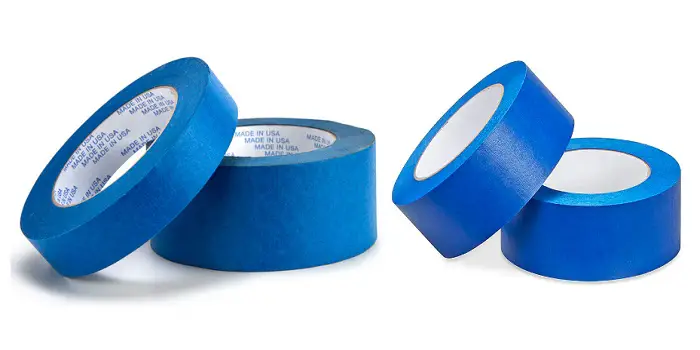
Painter’s tapes can be classified into different categories based on colors like blue tape, yellow tape, etc.
When it comes to which one is better among the blue painter’s tape and other tape varieties, the answer will more likely depend on the type of project.
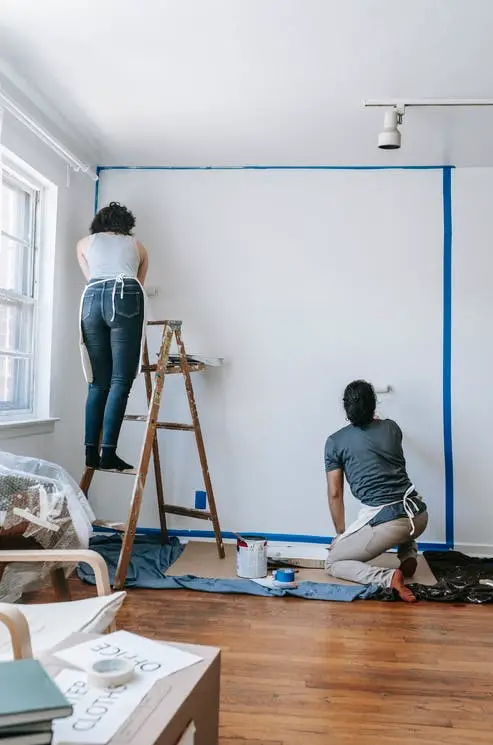
Generally, blue painter’s tape is considered to be the standard when protecting the walls, trims, baseboards, or other surfaces during the painting project.
Knowing how to use it correctly is therefore important when you want to get the right finish without creating a mess.
If you are using blue painter’s tape, you can use the following steps and tips…
What's Here in the Article:
5 Easy Steps to Using Blue Painter’s Tape
What follows are the five basic steps to using blue painter’s tape properly.
Let’s get started with step one…
Step 1- Clean
The surface will need to be cleaned before you can apply the tape.
Remove all dust, dirt, and debris from the surface.
The greasy residue will require additional cleaning.
After the job is done, wait until the surface is completely dry.
Step 2- Apply the Tape
Once the surface is clean, you can apply the tape.
Using a painter’s tape applicator can speed up the process and is generally recommended if you have a large project.
For interiors, start by applying the tape to the baseboards and ceiling line.
Use stretches of tape no longer than three feet long.
If you are taping a corner, then tear the tape at an angle so it will properly fit.
Also, to avoid getting the paint between the sections of tape, it’s good to overlap the tape sections.
Step 3- Smooth the Tape Down
When you apply the tape, use your hand fingers to smooth it down.
This will ensure there are no wrinkles or bubbles that might prevent a straight, clean line from being formed.
This is where applying relatively short strips of tape pays off, as it is easier to smooth down three feet or less of painter’s tape compared to several feet.
Step 4- Paint the Surface
Once all the tape has been properly applied, you can start to paint the area.
Start by painting around the borders created by the tape first. This is known as cutting in.
Once that is complete, then you can paint the rest of the surface faster.
Keep in mind that the purpose of the tape is to prevent areas you do not want to be painted from being touched.
Because the tape is solid, it will prevent any paint that winds up on the surface from penetrating. But keep such splashes of paint to a minimum.
Step 5- Remove the Taping
Most painter’s tapes come with a 21-day clean removal period. After which, you may face difficulty peeling them off.
IMO, you should remove the tape once the paint is dry to the touch.
Try removing the tape at 45-degree angles to prevent tearing.
Pull each section of tape away, starting with one end. Continue until you have removed all the tape from the area.
Now, you can let the paint fully dry and then use the tape again to paint the areas that did not get painted the first time.
Repeat the process as you did before, but this time section off the freshly painted area so you can address the surfaces that did not get painted.
What if the tape is stuck and hard to remove?
Although blue painter’s tape is designed to pull up quickly when the paint is dry, there may be situations where it can get stuck and become unsafe to pull off.
If you try too hard, you can pull the paint up or even the plaster layer underneath.
This usually happens with cheaper non-branded painter’s tape or if you have applied too thick of a layer of tape.
The simple way to deal with this situation is by running a razor blade along the edges of the tape.
This will make it easier for you to pull the tape off from the surface without peeling the paint.
PRO Tips for Applying the Tape when Painting
While using scotch blue painter’s tape is pretty easy, getting professional results after you are done with your paint job is another thing.
Here are a few additional tips and tricks that can assist you in applying the painter’s tape like a pro.
So, apply them based on the specific requirements of your project…
a) Cover All Areas
Please take all the necessary precautions by applying a layer of blue tape to every area where it is needed.
Door frames, window trims, baseboards, tile floors, moldings attached to interior walls, etc., are a few surfaces where you may need to use them.
Light switches and electrical outlets in your room can also be covered if they are near the surface you are painting.
Of course, if you are an experienced painter, you could probably get away with taping fewer areas because you already know how to be careful.
But if you are not confident in your painting skills, then it is better to be safe than sorry.
So, use tape generously until you have more confidence.
b) Use a Laser Level Tool
It isn’t easy to know for sure whether your painter’s tape is perfectly straight after it is applied.
You could save yourself from this uncertainty by using a laser-level tool to help guide the tape in a straight line on the wall.
The device can also help you apply the painter’s tape in a straight line when you want to paint vertical or horizontal lines on your walls.
Don’t tape too high or low on the baseboards, though.
You have to apply the tape just well enough to cover the baseboards without covering the walls.
If you get some of the tapes on the walls, it could interfere with your paint job.
c) Check the Baseboards Carefully
Baseboards and crown moldings are where the painter’s tape is generally applied.
You don’t need to tape the ceilings or window sills.
So, scrutinize the baseboards before you start painting.
If you have to readjust the tape, then it is better to spend time doing that.
Also, make sure that you paint slowly around these areas to avoid making mistakes.
It is the best thing to do whenever you paint free-handedly.
d) Match the Tape with the Proper Surface
Please spend some time researching the surface and see which type of tape will work best for it.
Never tape a hardwood floor when you want to paint your walls.
Tape could pull up the polymer finish from your floors if it is left on them for too long.
Then you’ll have to spend time refinishing your flooring in addition to the painting project itself.
Therefore, it is better to tape the baseboards instead.
You could also tape a plastic or canvas floor covering over the base of the wall too.
If you’re planning to paint your ceiling, you’ll need to apply a cover to your walls.
It will require a long-lasting tape to hold the cover in place.
Since yellow and white tape has a weak adhesive, you’ll need to use masking tape or blue tape.
e) Use Tape to Create Wall Patterns and Designs
Did you know you can actually divide walls and create wall patterns and designs with painter’s tape?
For instance, you could add stripes to your walls with the help of blue tape.
Its strong adhesive quality ensures the tape will stick from the beginning of your project until the end of it.
Remember that patience is important throughout this process.
If you need to remove or retouch paint, it could cost you more time in the long run.
You need to plan to avoid making mistakes and wasting time fixing them.
Here are some key pieces of advice to help you out when designing wall patterns with tape:
- Sketch a complete diagram of the design you had in mind.
- Do not paint anything until the tape is applied correctly.
- It is better to spend time taping your walls correctly.
- Failure to do this will cost you even more time because you’ll have to fix the mistakes.
- Try to wait one day in between tape and paint applications.
f) Apply the Tape Patiently and Do Not Rush
Patience cannot be emphasized enough.
Don’t rush your spray paint job because you’ll likely make mistakes if you do.
If you rush your paint jobs too quickly, it will cost you more time in the long run because you’ll need to refinish and retouch all the messy areas you made.
This is especially true when finishing the flat surfaces in an old house.
These surfaces, although they seem to be flat, can be uneven and can be harder to work on.
You will need to press and smooth the tape multiple times (while painting) on some of these surfaces.
As a tape smoothening assistant, you can try a tool like a putty knife; or an old credit card can also work great to make the tape smooth and bubble-free.
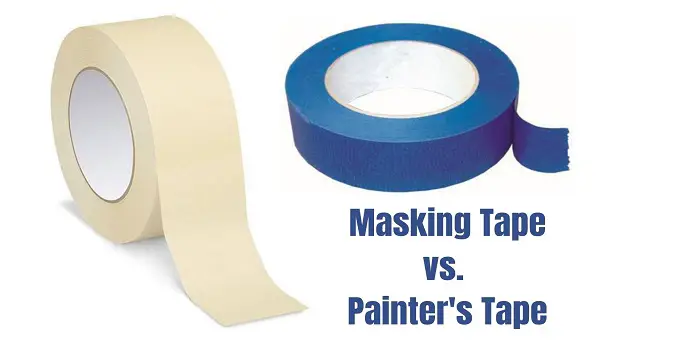
Is Masking Tape the Same as Painter’s Tape?
People commonly confuse masking tape with tape that is meant for painters and vice versa.
It is understandable because both tapes look and feel so much alike.
In fact, masking tape is a type of painter’s tape. But you cannot substitute one for the other on certain projects.
The difference between the masking tape and blue painter’s tape is pretty simple.
While masking tape is used for all DIY projects that do not involve painting, painter’s tape is exclusively used for paint projects.
Another significant difference between both tapes lies in the problem with masking tape, which is – it usually leaves residue behind after you peel it away.
This means you’ll have to spend time scraping away the residue to achieve a clean surface again when you use masking tapes.
This is not the case with painter’s tape because no sticky residue will be left behind from the blue painter’s tape after it is peeled away.
That means you won’t have to spend any extra time cleaning the surface to remove tape residue.
With that said, keep in mind that blue painter’s tape can adhere to the surface more strongly.
So, if you leave them on the surface for too long, you may need to require more effort for getting them removed.
It can also leave some residue in that case.
| Masking Tape | Painter’s Tape |
|---|---|
| Cheap | More expensive |
| Medium to Low-Level Adhesion | High-Level Adhesion |
| Difficult to remove and can leave residue | Easy and clean to remove |
| Not very efficient in preventing paint bleeding | Prevents the paint from bleeding |
Is Washi Tape the Same as Masking Tape?
Originally marketed as Japanese masking tape (with the brand name “mt”), washi tape is a high-quality masking tape made of rice paper.
Some of them are also made of natural fibers like hemp and bamboo.
The durable material is not only useful but also beautiful it is mostly used for decorative craft purposes.
It comes with low tack adhesive which makes it easy to stick, reposition and tear by hand.
You can even write on them to get the surface labeled during your project.
When it comes to differentiating washi tape vs. masking tape vs. painter tape, I would say they all mean the same thing.
The minor difference is, however, in the tackiness they offer depending on which you can use them on surfaces like wood, plastic, glass, and metal.
What About Gaffer’s Tape, Duct Tape, and Electrical Tape?
Unlike painter’s tape, duct tape and gaffer’s (also called gaff tape or spike tape) come with a stronger adhesive that can pull paint off surfaces.
The difference between gaffer and duct tape is in the backing material used to make them.
While gaffer tape comes with a cloth backing material, the material used in duct tape can be vinyl, fiber, or plastic.
Electrical tape, on the other hand, is made to be elastic.
These will often return to their original shape and do not stick well on the surfaces like wood and wall.
Painters tape is the overall solution when you need to mask surfaces while painting.
Stick to them unless your project demands something else.
Related Questions
Is blue painter’s tape waterproof?
Blue painter’s tape is not waterproof tape, but it is designed to withstand water-based paints such as acrylics or latex paints.
This means you can use the tape indoors without worrying about the water-based paints (as well as oil-based) seeping through.
However, if you need waterproof tape for exterior use, it’s good to find one that comes with an “exterior-grade waterproof” labeling.
These tapes are meant for exterior use, have extra strong adhesion, and can be put even in wet conditions even when the surface is not completely dry.
Can I put painters’ tape on a freshly painted wall?
In my opinion, you should wait for at least 24 hours before applying the tape to freshly painted walls, ceilings, or other surfaces like wood, stone, concrete, brick, etc.
For instance, if you want to paint the ceiling and walls:
- apply the paint on the ceiling first
- wait for 24 hours to dry the paint
- apply the painter’s tape to the edges of the ceiling
- then apply the paint to your walls
Based on the surface you are working on, choose the one specifically designed for the specific application.
3M, for example, recommends using ScotchBlue™ WALLS + WOOD FLOORS Painter’s Tape when you want to mask wood floors for staining or painting.
What’s the difference between blue and green painter’s tape?
The basic difference between blue and green painter’s tape lies in the strength of the adhesive.
While blue painter’s tape comes with standard strength, green painter’s tape adhesive is of extra strength.
For most projects, blue tape is all you need, and it comes at a relatively low price.
Green painter’s tape you may require when you are working on uneven rough surfaces and need stronger adhesive.
But be aware, as green painter’s tape comes with stronger adhesion, it can pull up the surface while peeling of – if used wrongly.
Final Thoughts
Each type of tape (including blue, green, yellow, vanilla, etc.) has its unique characteristics and properties.
So, you must avoid applying the wrong tape to the wrong surface, or else it could cause problems for your project.
For example, if you’re performing a paint job, you should not use masking tape rather than blue painter’s tape.
The latter is designed for paint jobs and reduces the risk of damage to surfaces.
So, when starting with your paint project, choose the tape best for your surface with these attributes in mind.
Also, follow the right steps when using the tape so that you can complete your job fast without any problem.
Share the post "How to Use Blue Painter’s Tape Correctly (Without Any Mess)"
Paint brushes are valuable for any house painter. If you want to keep them for future use and preserve their Read more
Dating back to its origin in China in the 13th century, sandpaper has come a long way. Somewhat similar to Read more
Washing the paintbrushes thoroughly is an important task you should never miss - after you are done with your paint Read more

Sandpaper is the traditional tool to give wooden or metal surfaces a smooth finish. Modern versions are the same with Read more

Douglas Becker (aka Painter Doug) has over twenty years of experience as a painter in Adkins, Texas. At present, he resides in Florida with his family.
From painting multi-storeyed houses, condos, and apartments to large commercial buildings and small offices, he had served various customers in areas not only in Adkins but also in Southwest Florida, Sarasota, Naples, and many more. To know more about him check here.