
This may come as a surprise to many, but the paint designed to cover the walls is not the same as the paint designed to cover your ceiling.
The differences may seem subtle, but they are important if you want the best paint to cover your walls and ceiling.
This is especially true if you try to paint the ceiling with wall paint and find yourself covered in paint drips as a result.
What follows are the basic differences between ceiling and wall paint.
In addition, you will learn how you can prepare wall paint properly so that it can be used on the ceiling as well.
So, without any delay, let’s get started…
Ceiling Paint vs. Wall Paint
| Ceiling Paint | Wall Paint | |
|---|---|---|
| Viscosity: | Thick and highly viscous | Less viscous and thin |
| Colors: | Available in limited colors | Available in more colors |
| Cost: | Can be expensive | Is less expensive |
| Application: | Takes time to apply | It can be applied faster |
| Use of sprayer: | Tough to spray | It can be easily sprayed |
What's Here in the Article:
Ceiling Paint
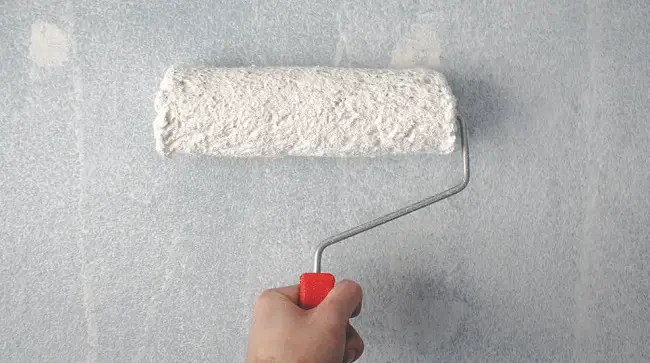
You’ll probably notice the difference between ceiling and wall paint when you open each can and start stirring the paint.
The differences are as follows.
Thicker Viscosity
Ceiling paint is designed to be applied in one coat, will cover any rough spots, and not drip at least with the frequency of wall paint.
This is because ceiling paint has a higher viscosity level which means that it tends to hold together better.
You can imagine the difference between water and honey.
Both are liquids, but honey is thicker and has a higher viscosity level.
That means it is less likely to drip or come apart when it is still wet.
The same is true for ceiling paint, as it is thicker and more likely to stick to the ceiling rather than drip on you and the floor.
It also dries quicker as well, so the likelihood of paint drips is considerably reduced.
Fuller Coverage
The thickness of the ceiling paint means that you can cover areas smoothly and uniformly to a greater degree than wall paint.
This means that any discolorations or stains are generally covered and disappear with a single coat.
You can paint over such areas once and not go back with the higher quality ceiling paints.
Greater Durability
As implied by the thicker viscosity, the paint itself tends to be quite durable.
This is welcome news to those who do not want to repaint their ceiling all that often.
Plus, it is less likely to peel or crack compared to wall paint.
However, ceilings are more prone to heat exposure which may lead to greater stress on the paint, especially when in the kitchen or just below the open roof.
Keep in mind that it is possible to use wall paint on the ceiling if you prepare it correctly.
But that will take some work, and it may be far easier to simply purchase ceiling paint separately.
The Downside of Ceiling Paint
Given its advantages, it may sound like you should paint the walls with ceiling paint.
However, there are some downsides as well.
- Limited Colors
- More Expensive
You can get around the limited colors by having the store create a custom colorizing of the ceiling paint, but that will only make it cost more money.
One other downside is that if you plan on using a paint sprayer, then you need to be sure that it can handle the thicker viscosity.
Otherwise, you’ll wind up with a clogged sprayer. Check the parameters of your sprayer before adding the ceiling paint.
Wall Paint
Compared to ceiling paint, wall paint comes in more colors and is less expensive.
This means you can choose the colors that you want while paying far less.
Because it is not as thick, you can apply wall paint faster compared to ceiling paint.
Its lower viscosity makes it easier to use in paint sprayers, and you can complete the paint job faster even if you must apply multiple coats.
Perhaps the most noticeable advantages are that wall paint comes in more varieties and sheens.
Here are a few suggestions for each of the rooms.
- Kitchen, Bathroom, and Kid’s Room: Semi-Gloss
- Living Room and Bedroom: Velvety Matt Finish w/Semi-Gloss Trim
Although you can choose to pick between water-based or oil-based paints, the water-based versions are easier to paint with and clean up afterward.
Water-based vs. Oil-based paints
Before you choose which wall paint is right for your needs, you should examine the differences between water and oil-based paints.
Water-based paints will require you to thoroughly clean the walls first, then rough up the surface with sandpaper, so the paint has a better chance to stick.
The advantages of using water-based paint include the following.
- Dries Quickly
- Easy Clean-Up
- Less Toxic
- UV Protection
- Prevents Mildew from Forming
- It can be used on most surfaces as well.
Oil-based wall paint should be considered as well for its properties.
However, when using oil-based paint, you will need protective gloves, goggles, and gear.
Plus, you will need a strong solvent such as turpentine for cleaning.
Turpentine carries a strong, unpleasant odor that will need to be ventilated from your home.
The downside of oil-based paint is that it takes longer to dry, which may not be desirable under certain circumstances.
However, it does have some advantages as well.
- Easy to Clean
- Resists Moisture
- Smooth Coverage
With oil-based paints for walls, you will rarely see brushstrokes when applying it with a brush.
Ceiling Paint vs. Wall Paint: Which is Better?
No doubt, ceiling paint is better when applied with a natural brush and roller.
It dries quickly and only requires one coat.
However, it is way too expensive to purchase covering the walls as wall paint.
Be sure to choose an opaque ceiling paint so it covers any stains.
For wall paint, it is not practical to use on the ceiling unless you make modifications which may be even more expensive.
So, keep wall paints for the walls and ceiling paints for painting the ceilings.
Should I Paint the Ceiling or Walls of the Room First?
Always begin by painting the ceiling. This enables you to cover the surface properly with at least two coats while avoiding overspray (the impact of extra paint is sprayed onto the walls) by the roller.
Always use a roller with a double arm frame while painting the ceiling.
With that being said, you need to keep in mind the steps you need to follow to get the job done right…
Step 1. Getting Ready to Paint
Preparation work consists of many phases:
- Relocating or repositioning objects in the room (if applicable).
- Tarping and taping various parts that need to be covered, such as floor edges, trim, windows, woodwork, and so on.
- Spackling cracks and holes or, in certain circumstances, complete interior drywall restoration.
- Removing any flaking paint from trim, doors, and other wood furnishings by sanding and scraping.
- Removing all outlet covers, switches as well as all light fittings.
- Removing damaged or old caulk and re-caulking doors, windows, and trim.
- Removing filth, mold, or dust from the walls.
Step 2. Buy the Right Materials and Tools
The correct equipment and supplies for painting an interior space are appropriate for the task at hand.
You’ll need a decent roller and trim brush with the appropriate nap thickness. A superior quality paint may keep your room great for years.
Step 3. Ceiling Painting
Always start with the ceiling.
Ceiling paint may fade and leave a yellow hue in your space over time.
Ceiling painting can be the most effective way to beautify a space, particularly if it has been neglected for tens of years.
Step 4. Painting the Walls
Walls are the next phase in painting the area. Precisely “cut in” a brush around doors, ceilings, windows, light fixtures, outlets, and baseboards before painting the walls with a roller.
It is critical to roll the cuts to blend so the two separate application methods (roller nap, brushstroke) mix well.
Step 5. Finally, paint the doors and trims
Painting the windows, trim, and doors is the last stage in room painting.
This is the most time-consuming aspect of room painting since it requires a slow hand and excellent skill to achieve perfection.
Always use the proper gears for this sort of precise work. This will speed up the process and help prevent stains and drips.
FAQs
Can You Use Wall Paint on Ceilings?
Turning wall paint into ceiling paint is relatively simple in concept, but it is expensive.
Typically, you will need to have the viscosity of the wall paint increased to match what ceiling paint provides.
There are products that can help with increasing the viscosity, but again they will cost you good money.
Conversely, you can have the paint store create a more viscus wall paint, but they might suggest customizing ceiling paint to the color you want instead.
Can You Use Ceiling Paint on Walls, Doors, or Trim?
While they can be clearly labeled as “ceiling paint,” you can choose to put them on walls, doors, or trim if you plan to topcoat them with a higher gloss finish.
That’s the reason many people use their leftover ceiling paints as a primer to undercoat the walls.
With that said, if you plan to use ceiling paint instead of a primer, it can be expensive.
Since most ceiling paints will be available in a flat or eggshell finish to hide the imperfections, you will not be able to get the desired sheen with them on surfaces other than the ceiling if you choose them as a topcoat.
If you plan to put them on your kitchen or bathroom walls, these ceiling paints with eggshell finish are again less durable than satin or semi-gloss, which is ideally the best paint finish for kitchens and bathrooms.
Final Thoughts
Both ceiling and wall paints are superior when used for the job that they were designed.
So, you will need to choose which type to find the right one for your needs.
If you keep it that way, that will save you from additional work and expense.
Share the post "What is the Difference between Ceiling Paint and Wall Paint?"

When working on a paint project, it is the materials you choose/use which determine its success and validity. This sentence Read more
Storage heaters and radiators aren’t popular anymore as they used to be. I have one old piece installed in my Read more
The purpose of a primer is to provide a surface sticky enough for the paint to adhere properly. The paint Read more
There are many similarities between latex and enamel-based paints. Being used on interior and exterior surfaces, they come in a Read more

Douglas Becker (aka Painter Doug) has over twenty years of experience as a painter in Adkins, Texas. At present, he resides in Florida with his family.
From painting multi-storeyed houses, condos, and apartments to large commercial buildings and small offices, he had served various customers in areas not only in Adkins but also in Southwest Florida, Sarasota, Naples, and many more. To know more about him check here.