
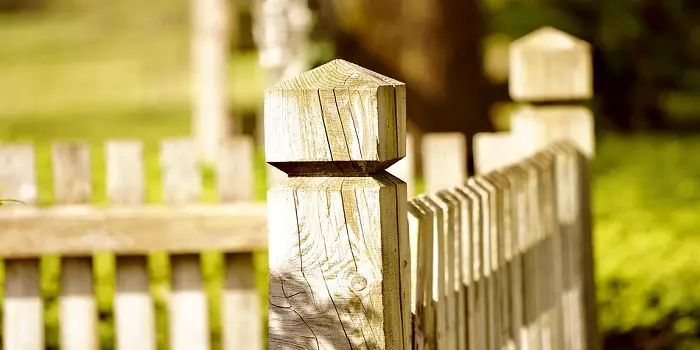
Pressure-treated wood fence offers a wide range of benefits which includes protection from insects, fungi, external elements, etc.
Plus, it’s an important option to consider for homeowners looking for privacy.
For most fences, standard wood post sizes of 4x4s or 6x6s (or even 2x4s) and pickets of 1x4s or 1x6s can work.
But you can have them based on the size of your property and personal requirements.
Why staining a wood fence is important?
No matter what size of the fence you have, staining your pressure-treated wood is important for extended durability and a longer lifespan.
Although the chemicals present in pressure-treated lumber will prevent rot and keep away the insects, they will not prevent the moisture from seeping into the wood.
Over time moisture and rainwater can seep into the wood causing it to swell and shrink which can then lead to cracked, splintered, and warped wood.
Sealing and maintaining your pressure-treated fencing not only helps in covering those ugly green-tinted posts but also by protecting the wood against moisture, UV damage, and/or mold and mildew.
Below in this detailed step-by-step guide, I will cover all the steps to staining pressure-treated wood fences.
Based on my years of experience, I will also discuss how long to wait before you start staining treated wood and a few other essential tips that will help you work like a pro.
So, let’s dive right in…
What's Here in the Article:
5 Steps to Staining Your Pressure-Treated Wood Fence
When you see that the treated wood is ready, you should start by choosing the right tools and stain that is designed for staining treated wood.
Here are the exact steps and techniques that I used many times for staining treated lumber.
So, let’s jump into the steps right here…
Step 1: Gather Your Tools
To stain wood in general, you will only need a few tools. You will need a few scrub brushes and a few paintbrushes.
You will need some safety equipment such as gloves when you work with the stain.
And, of course, you will need a paint mixer (or paint stirrer sticks) and some paint can openers.
Finally, you will also need to have a pressure washer as it is important in this process.
For materials, it is pretty self-explanatory.
You will simply need wood stain and wood cleaner. The amount, of course, will be based on the size of the project.
You will have to look at the specific sealer and stain you are using to determine how much surface area you can cover.
Step 2: Choose the Wood Stain
There are tons of different types of stains and water-repellent sealers that you can choose from.
However, we can give you some recommendations when it comes to choosing the best stain for pressure-treated fences.
Two options you have to choose from are a transparent or a semi-transparent stain.
A clear or transparent stain (like Thompson Waterseal Transparent Waterproofing Stain) does not contain a lot of pigmentation.
It’s, therefore, a good option if you prefer to choose a less strong stain.
A semi-transparent (like DEFY Extreme) is probably the more common stain type that has a lot of stronger colors and pigments that are ideal for pressure-treated wood.
When trying to figure out among the best available options, you should know how your lumbar was treated and what kind of end results you desire.
Step 3: Prepare the Wood
Before we stain, we have to make sure the wood is nice and clean.
Although this step may not be important if you have brand new wood, this is absolutely required if you are using wood that is old or dirty.
You may be able to get away with a quick wash with your hose, but we recommend doing a deep clean of the weathered wood.
To deep clean your wood, you will need a fence cleaner. Any old deck cleaner should do just fine, and you should be able to just follow the instructions on the can.
After a short waiting period, we will want to wash it off with a pressure washer to remove the cleaner and any stains that would be on the wood.
Before we stain, we will want the wood to be dry, so move it to a nice dry place where it can dry and wait about 24 hours.
Step 4: Prepare to Stain
Stain can be extremely tricky to work with, so make sure you read this section all the way through.
Before we even begin, we will need a place for it to dry. However, it should not be in direct sunlight as the stain will dry too fast, and it shouldn’t be inside a house due to the strong smells associated.
If this can’t be done, like on a wooden fence, you will be fine as long as you do it properly.
We will want to use tarps or painters’ tape to protect the environment near the wood that is about to be stained.
It may be even better to move as much as you can away. This is a really important step as the wood stain will stain anything.
Cleaning any spilled or accidental stained things is extremely difficult, so if you can avoid it, that will be best.
We are almost ready to stain pressure-treated wood on the fence, but there are a couple of minor steps.
You should brush the wood one more time with a brush to remove any dust or leaves that may have fallen on it overnight.
Quickly read through the wood stain’s instructions to make sure you know how to use it.
Step 5: Start Staining
Finally, we can stain the wood!
You may be able to get away with a roller, but we recommend using a paintbrush for most of it so you can get in cracks and crannies.
If you haven’t stained your fence before, it’s good that you should practice applying the stain using your preferred stain applicator on a piece of scrap wood to make sure you know how it looks.
One coat is probably fine, but it depends on the project, the stain, and the wood itself.
Make sure you stain every part, even the ends.
And on vertical pieces of wood, make sure you start at the top and make your way down, working with gravity.
Before doing anything else with the stained wood, wait 24 hours for the stain to dry or whatever the stain recommends.
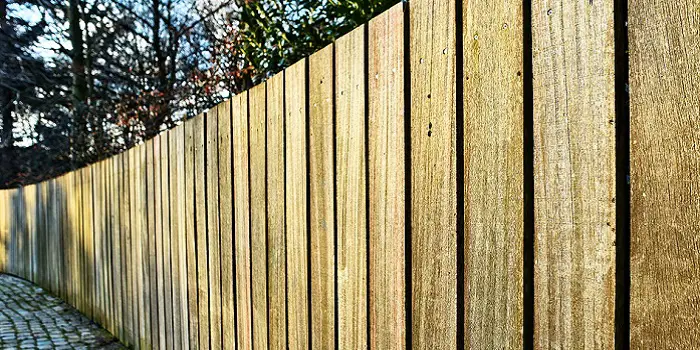
What Color to Stain Pressure-Treated Wood?
The next big step when staining and sealing fences is choosing the color of the stain.
There are dozens of various types, but we will split them into two options, lighter colors and darker colors.
And these colors are exactly what you think. Lighter colors are more yellow and bright, while darker colors are browner and darker.
IMO, for treated lumber that we use mostly for privacy fencing, colors like dark brown, dark mahogany, mountain cedar, rich redwood, and desert sand are the best options.
If you want a more neutral fence color and solid look, you can even try a gray color stain that matches your property and home style.
I always recommend dark colors for staining fence and decking areas because darker shades will most likely stand much longer than lighter ones.
Most homeowners and DIYers hence prefer dark colors for staining the wood outside.
But as I said, this is mostly your preference.
So, if you plan on staining the wood with a lighter color, that will also be fine.
In fact, if you stain the wood fences with lighter shades, in the future, you will be able to stain them again with a darker color without any problem.
Plus, if you know a little about light, you will know lighter colors will absorb less heat than darker colors, which is better for the long-term lifespan of the wood.
How Long to Wait Before You Stain Treated Wood?
Normally, you should wait for two to three days before staining treated wood.
However, this time may increase from 4 weeks to even a couple of months depending on factors like the type of treated lumber used, the size of logs, and also humidity level, and the temperature in your area.
For treated lumber that is still wet, waiting time may exceed up to 6 to 8 months.
- Tropical areas may have a high level of humidity that can prevent the lumber from drying soon.
- Kiln-dried treated lumber is already exposed to the heat of the kiln, and it may take less time to dry.
- Bigger pieces of wood will always take more time to dry than smaller pieces because there the moisture can be sitting deep inside the pores.
What if you do not wait?
Remember, when you buy lumber for a DIY fencing project, the wood is not ready to stain immediately after the purchase.
It’s because the pressure-treating process uses water to force chemical preservatives deep into the wood.
And for this reason, the treated lumber comes with certain humidity levels that need to be dry off completely before you can stain them.
Just in case you do not wait and stain immediately the stain will not stand long, and the wood may lose its quality/finish.
Although you can start working on building your project with it, staining and sealing the lumber should always be the last step so that your hard work does not get wasted.
How to tell if the wood is ready to stain?
The water test is one best way out there to check whether your treated lumber is ready to stain/paint or not.
Simply sprinkle some water directly on the wood surface.
If the droplets of water soak inside, it means the pores are closed, and the wood can accommodate more moisture.
This also means that the wood is now ready to stain.
But on the flip side, if you see the beads of water forming on the surface, you should wait for a few days more to let it dry completely.
Can You Use Creosote On Pressure Treated Wood Fence?
Coal tar creosote (a complex mixture of coal tar derivatives) is a kind of wood preservative that has been traditionally used for deterring wood-destroying insects and fungi.
But due to medical issues (like breathing problems because of heavy fumes), it is no longer allowed to use for interior purposes by DIYers.
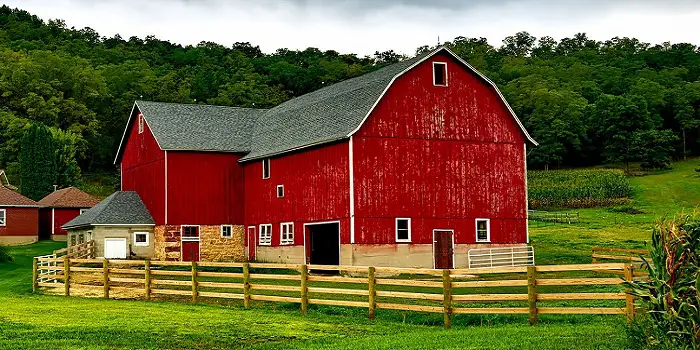
Certified professionals in the US can still buy creosote wood preservatives and similar products for treating outdoor rough wood structures like fences, sheds, barns, telegraph poles, and railway sleepers.
Products like WOCO Creocote, when applied professionally can help in achieving a water-repellent surface that is resistant to weather damages.
To get the best protection, you will need to apply at least three coats of creosote on a wood fence, leaving about 24 hours of time between each coat.
Using a sprayer (rather than a brush) makes it a lot easier for you to apply the stuff beautifully, as it can reach every nook and cranny of the panels.
The only downside of using creosote on the wood fence is the choking smell that can linger for long.
But since the product is used outdoors, you may not need to worry about the odor.
Also, remember that Creosote-treated timber can’t be painted very easily.
If you want, you can stain it.
But the staining over the creosote should be done only after the wood surface has weathered and it no longer has an oily surface.
Related Questions
What is wood stain made out of?
Although wood stains are designed to provide a similar protective coating as paints, they are a bit different.
Unlike paints, stains for pressure-treated wood get absorbed into the wood and make the natural grain visible.
However, the extent of wood grain that can be seen depends on the ingredients and opacity of the stain.
In general, wood stains are made up of three main components. These include:
- Pigment: for providing the color to the stain
- Binder: for holding the pigment strongly onto the wood
- Solvent or Vehicle: for transporting the pigment over the wood surface, which makes applying the stain easier
All these ingredients together make the wood stain permanent.
This means once the stain is applied to the wood and has been given enough time to cure, it’s nearly impossible to remove it from the surface completely.
Is wood stain toxic – can you use them inside?
Depending on the type of wood stains, they can be very toxic during their application and drying process.
But after the applied stain has dried and cured for at least 30 days, these turn out to be non-toxic and harmless.
Wood stains and their fumes can also be highly flammable. Also, their fumes can be poisonous and hence dangerous if inhaled.
Since they are not labeled food safe, they can also prove hazardous if swallowed by mistake.
It’s therefore important that you stain the treated wood outside or, if not possible, choose a well-ventilated room for staining.
What’s the difference between a wood stain and a varnish?
Unlike wood stain, wood varnish is a clear transparent compound that hardens along with the outer layer of wood without penetrating deep into it.
This means, when applied over wood, the varnish will remain on the outside of the wood surface forming an excellent protective barrier to protect the surface from various external elements like dirt, debris, scratch, sunlight, moisture, etc.
Some varnishes also come with color to enhance the texture of wood. And they usually come with matt, satin, and gloss finishes.
Based on whether you are applying it on indoor or outdoor surfaces, you should choose the finish and color that is best suited for your project.
Final Thoughts
An average life span of pressure-treated wood like pine and cedar ranges from 10 to 40 years.
Although you do not necessarily need to stain these treated wood, if you do, you can extend the life expectancy and also the beauty by staining them properly from time to time.
Choosing the right stain type and the color for your treated wood is simply a matter of personal preference and your choices.
Just be sure that you use a premium quality wood stain preservative and follow the right staining process.
This way, you can enjoy the best security from fencing your house for a long.
Share the post "How to Stain a Pressure-Treated Wood Fence (5 Easy Steps)"

You can bring new life to the interior of your home just by adding a new coat of paint to Read more

Wood blinds are highly energy-efficient and can add a lot to the warmth of your room interiors. These can also Read more
Concrete houses appear more durable and stronger, but timber-made or timber & concrete fusion house designs are making a stance Read more

Although dealing with epoxy is not at all difficult, you are prone to make mistakes that can arise due for Read more

Douglas Becker (aka Painter Doug) has over twenty years of experience as a painter in Adkins, Texas. At present, he resides in Florida with his family.
From painting multi-storeyed houses, condos, and apartments to large commercial buildings and small offices, he had served various customers in areas not only in Adkins but also in Southwest Florida, Sarasota, Naples, and many more. To know more about him check here.