Painting a microwave can be a daunting task if you don’t know what you’re doing.
A slight mistake and you may end up in a lot of trouble.
Such as:
- Depending on the type of paint you’ve purchased, it can contain toxins that can contaminate the food inside, making it unsafe for you and your loved ones.
- If you don’t wear decent protecting gear, you and your microwave could end up suffering losses.
- Or worse, you may end up accidentally leaving the microwave open when it’s still wet – causing it to completely short circuit.
Hence the reason for this article.
Where you will learn how to paint the microwave’s interior correctly and safely without damaging yourself or the microwave itself.
But before we get into the detailed steps, I know many of you may be wondering why you need to paint the inside of a microwave in the first place.
So, to answer in short…
What's Here in the Article:
Why Paint Inside the Microwave?
First of all, it is not safe to eat from a rusted microwave.
The rust completely ruins your food’s quality and quickly becomes fire-prone.
Rust accumulates on the inside of a microwave oven owing to age and environmental conditions such as humidity.
It can also occur if a liquid spills inside the oven and is not adequately wiped with a dry towel.
Over time the rust that accumulates within a microwave becomes hazardous to one’s health and safety.
How to Paint the Interiors of Your Microwave?
You can paint your microwave’s interior by following a simple 5 step process listed below.
Hopefully, it will result in a seamless and effortless accomplishment of the goal.
Step 1: Prepare the Microwave
Before you do anything else, unplug the microwave and prepare the internal surface for repainting.
It’s critical to cut all the electricity connection to the microwave so it doesn’t come on by accident and there’s no power running into it.
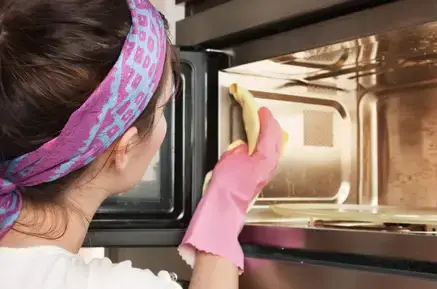
Soak the sponge in soapy water, squeeze out any excess, and wipe the inside of the microwave to remove flake-like paint, grease, and dirt.
Clean the outside of the microwave as well to sterilize it all at the same time.
To speed up the drying process, finish with a paper towel or dry cloth.
Step 2: Smooth the Microwave’s Interior
Gently sand with medium-grit sandpaper to remove the current color as much as possible.
Now, rub smooth sandpaper to make the surface smoother.
If there are rusty places, this technique will be enough to remove the rust.
If not, consider using steel wool for the same.
Wipe down the sanded portions to keep the damaged region from rusting.
Step 3: Get the Paint Ready
You can use both brush paint and spray paint to coat the inside of the microwave.
Spray paint is preferred because it saves a lot of time and effort, but brush paint can also help repair small spots.
Many appliance merchants sell microwave-safe paint.
However, you must confirm that the company sells the proper sort of microwave-safe paint since some paints include components or particles that react to microwaves and may generate toxins that may contaminate the food in the oven.
Ensure to request microwave applicant paint.
Then once you have the paint and your microwave is ready.
Step 4: Test the Paint on a Small Area
The next thing you have to do is test the paint color on a little area first.
Please consider doing these jobs in a well-ventilated area if you’re using spray paint, as the paint fumes may intoxicate your body and lead to sickness.
Then leave the paint to get dried before applying it.
After that, put a small water cup in your microwave on a high setting for one minute to test how it’s working.
Step 5: Paint the Microwave’s Interior
If everything works perfectly, then begin spraying the microwave until the entire surface is covered in paint.
Avoid splattering too much paint in one spot; try to maintain the evenness of your paint coat.
Apply the paint multiple times to prevent dripping, but make sure the surface is dry, polished, and wiped clean between each application before moving on to the next application.
Then all you have to do is get the paint dried. It should take a night with the open door.
Remember not to close the door as it will obstruct the air circulation in the microwave, slowing down the drying time.
The next day, check that the paint is ready to use.

What Type of Paint to Use Inside a Microwave?
You can’t paint the microwave with just any other paint.
No. That is not safe.
But, yes.
If you are using the right paint, which doesn’t melt with the excessive heat produced by the microwave and is heat resistant, then painting a microwave is safe.
The best choice would be Enamel paint as it’s heat resistant and doesn’t melt.
A wonderful enamel paint to utilize is Rust-Oleum High Heat Performance Paint.
Purchase enamel paint that can resist temperatures of up to 1,200°F, such as Rust-Oleum.
You need paint that can withstand oven temperatures.
Tips and precautions
Remember, moderation is the key when you need to paint your microwave from the inside.
Do not paint too much at once; that can ruin the microwave’s surface.
If you think you can use an electric sander that fits perfectly inside of the microwave to sand, think again.
By this, you run the risk of damaging the interior.
So, it’s good to sand by hand with medium-grit paper and then finish it with soft-grit paper and then either a dry cloth or a paper towel to wipe away the resulting rust particles.
Also, do make sure to use gloves and eyeglasses for your protection.
Final Thoughts
A microwave is one of the most important home appliances since that’s where you cook a lot of your food.
And if it’s not properly managed and maintained, it can quickly become a biohazard.
So, make sure you always use a good, microwave-safe paint inside and also apply a coating of sand to make sure the paint never peels away.
That’s it for this article; I hope you found it helpful, and don’t forget to share it with your friends and family to make them aware of the safety concerns while painting the inside of their microwave.

Douglas Becker (aka Painter Doug) has over twenty years of experience as a painter in Adkins, Texas. At present, he resides in Florida with his family.
From painting multi-storeyed houses, condos, and apartments to large commercial buildings and small offices, he had served various customers in areas not only in Adkins but also in Southwest Florida, Sarasota, Naples, and many more. To know more about him check here.


