
When it comes to prepping a brick wall for its big paint debut, choosing the right mortar is like picking the perfect dance partner—get it wrong, and things can fall apart (literally).
For most standard brick walls, especially those strutting their stuff above ground—be it indoors or out—Type N mortar is the go-to choice. It strikes a solid balance between strength, flexibility, and ease of use, making it the all-around crowd-pleaser of the mortar world.
But if your wall’s job description includes holding back soil (think retaining walls) or braving the elements below ground, you’ll want to upgrade to Type S mortar. It’s stronger, tougher, and built for the heavy lifting—like the gym rat of mortars.
In this article, I will explain the different types of mortar along with the standard mortar ingredients ratios for a yield of 1 cubic yard, usually given in a volume of cubic feet (cu ft).
Hopefully, the information here will help you select the best one for your project while prepping the brick walls or other masonry surfaces before painting.
What's Here in the Article:
Types of Mortar Mix
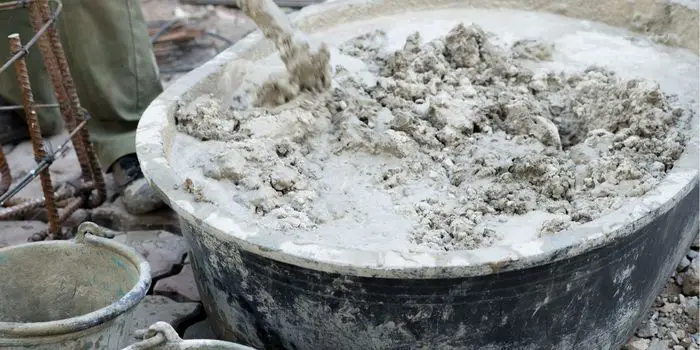
Mortar is a mixture of Portland cement, hydrated lime, and sand combined in precise amounts to fulfill specified requirements.
It acts as a binding agent that helps to hold bricks or other masonry units together while providing additional strength and stability to the overall wall or structure.
Typically, the four main types of mortar are categorized as follows: N, O, S, and M. All of these use a combination of cement, lime, and sand.
However, the ratio in which these ingredients are mixed together produces different results and variations in properties like flexibility or compressive strength.
The best type of mortar mix to use depends on the project requirements set forth by the mason.
N Type
Type N mortar mix is the most common type of mortar and is made with 1 part Portland cement, 1 part hydrated lime, and 6 parts sand. This comes with medium compressive strength and is among the best choices when it comes to general applications like preparing brick walls before painting.
Primarily, the Type N mortar is a general-purpose mix recommended and used for:
- Soft stone masonry (such as limestone)
- Above-grade, exterior, and interior load-bearing installations
- Stone veneers are exposed to severe weather conditions like high heat and moisture
Type N mortar typically reaches 28-day strength at around 750 psi compressive strength.
To protect your work, it is best to apply a waterproofing membrane once you have finished the project.
Type N Mortar Mixing Ratio
- Sand 20.25: cu ft
- Hydrated lime: 3.375 cu ft
- Portland cement: 3.375 cu ft
O Type
Type O mortar mix is not as strong as other types, with a compressive strength of only 350 psi (pounds per square inch).
Because of its weak structural capacity and strength, the Type O mortar mix is not an ideal candidate for exterior use, especially the locations where high winds exist.
Therefore, it is most often used for walls indoors and above-ground that won’t be carrying heavy weight (non-load–bearing).
While Type N can also be used indoors in some circumstances, Type O is better suited for repair work, such as repointing older structures, because it’s easier to apply evenly.
Type O Mixing Ratio
- Sand: 20.25 cu ft
- Hydrated lime: 4.5 cu ft
- Portland cement: 2.25 cu ft
S Type
Type S mortar is incredibly strong, with a compressive strength of over 1,800 psi and high-tensile bond strength.
Although this mortar mix must have a minimum compressive strength of 1,800 psi, it’s often mixed to achieve strengths between 2,300 and 3,000 psi.
Type S mortar is an ideal choice for many projects at or below grade that need to withstand soil pressure, wind, and seismic loads.
Primarily it’s found useful for below-grade applications like masonry foundations, manholes, retaining walls, and sewers. But it can also be used for at-grade projects like brick patios, driveways, and walkways.
Remember that if you are working with a glass block, you will need a special mortar that is white glass block mortar.
Even though it would be classified as a type S mortar, it has been formulated to exceed the requirements for strength set by type S mortars.
Type S Mixing Ratio
- Sand: 20.25 cu ft
- Hydrated lime: 2.25 cu ft
- Portland cement: 4.5 cu ft
M Type
Type M mortar, which contains the highest amount of Portland cement, is best for hefty loads and applications beneath the ground, such as foundations, retaining walls, and driveways.
While type M mortar helps achieve at least 2,500 psi of compressive strength, it has poor adhesion and sealing qualities compared to others. This makes it unsuitable for certain outdoor applications where external elements can be a problem.
Since type M has a similar strength to natural stone, it is ideal for use with natural stone.
That said, you will need to use a special high-heat mortar, also known as refractory mortar, which is formulated to handle temperatures exceeding 500 degrees Fahrenheit – in case you are working on projects like fireplaces, chimneys, or fire pits in your backyard.
Type M Mixing Ratio
- Sand: 20.25 cu ft
- Hydrated lime: 1.6875 cu ft
- Portland cement: 5.0625 cu ft
K Type
Type K mortar has a very low compressive strength of around 75 psi and is not commonly used for new construction.
But it can be specified for certain applications, like restoration or special projects that require a bit of extra strength.
Because it is soft, type K is mainly used to restore the masonry on ancient historical buildings that require a mix that isn’t much stronger than the existing masonry.
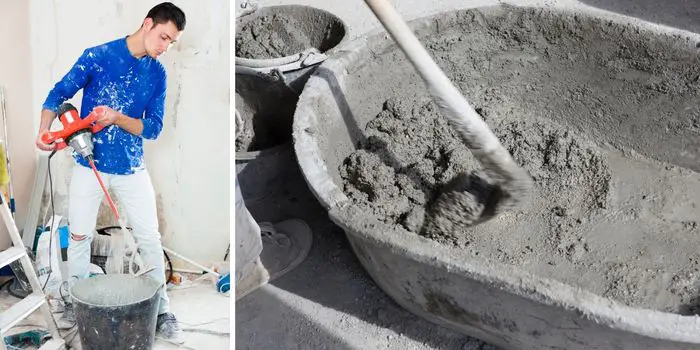
How to Mix the Mortar Correctly?
When mixing, firstly remember that the amount of water added will depend on the type of mortar being mixed and the temperature outside.
You should not add too much water at once, as this will result in a weak mixture. If the mixture becomes too dry, add small amounts of water until the desired consistency is reached. But do not add more water once the mortar begins to set.
Secondly, each variety of mortar mix will need a different amount of materials, so make sure you’re using the correct type for the job.
When using cement, it’s best to get fresh, unopened bags, as the cement that is not sealed will have absorbed moisture from the air and will require an altered water percentage to get the correct viscosity.
Lastly, you should note that mixed mortar lasts for around 90 minutes, after which it’s unusable and should be thrown away since it begins to lose some of its characteristics. So, only mix as much mortar as you can use within that time frame. Overestimating how much you need can lead to unnecessary waste and inconsistent quality in your work.
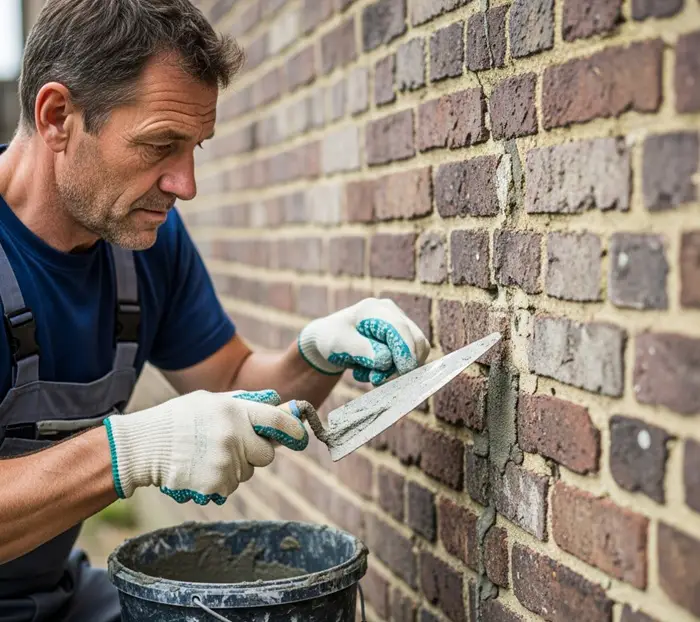
How to Repair Mortar Cracks in a Brick Wall?
Mortar is the unsung hero holding your beautiful brick wall together. It’s not just there to fill the gaps and look pretty, but it keeps your wall stable, standing strong against wind, rain, and whatever else Mother Nature throws at it.
Ignoring mortar cracks is like ignoring a slow leak in your roof—it doesn’t end well. Those little cracks let water sneak in, which can lead to all sorts of drama: mold, rotting wood, crumbling bricks, and that mysterious white powder called efflorescence (fancy name, not-so-fancy problem).
And let’s not forget the aesthetic nightmare. Cracks make your wall look tired, worn, and frankly, a bit neglected. Want to keep your home’s curb appeal and structural integrity in check? Then patching up those cracks isn’t just a chore—it’s a must-do, especially before you plan to repaint your wall.
Ready to fix it like a pro? Here’s how:
Step 1: Clean
First things first—give that crack a proper clean-up. Grab a stiff brush and some water, and scrub away any loose debris. A clean surface means better bonding, and better bonding means a longer-lasting repair.
Step 2: Mix It Right
Mix one part cement with two parts sand. Gradually add water until it reaches a peanut butter-like consistency—not too dry, not too sloppy.
Step 3: Dampen the Area
Before you apply the mix, dampen the crack slightly with water. This keeps the bricks from sucking all the moisture out of the mortar—because nobody likes a clingy brick.
Step 4: Fill it Up
With a trowel in hand, pack the mortar into the crack. Push it in good and tight so it sticks where it should. Work in small sections and smooth it out with a jointing tool (or your finger, if you’re feeling brave and gloved).
Step 5: Let It Cure
Give your repair 24 hours to cure. Mist it with water every few hours to prevent it from drying out too fast. Slow curing = stronger mortar.
The Conclusion
Choosing the right mortar for a brick wall isn’t just about grabbing whatever bag is closest at the hardware store—it’s about ensuring strength, longevity, and a clean, professional finish.
Whether you’re building a new wall or repairing the cracks before repainting an old one, the type of mortar you use should match the job. Type N is a solid all-rounder for most brickwork, while Type S brings extra strength for load-bearing or below-grade walls.
Just ensure that if your wall is looking like it’s seen one too many action movies—crumbling, bowing, or just generally falling apart—it’s best to call in a professional.
Share the post "What Type of Mortar is Best to Use for a Brick Wall?"
Is your house slowly starting to look like a serial hoarder lives in it? We all have stuff lying around Read more
The color pink is the favorite girl color which is most admirable to them. In fact, a color like baby Read more

Have the bright sunny days of summer motivated you to liven up your tired decor? Are you yearning to create Read more

Tough to wear out, long-lasting, simple to clean, and stylish, UPVC windows are undoubtedly one of the most popular choices Read more

Douglas Becker (aka Painter Doug) has over twenty years of experience as a painter in Adkins, Texas. At present, he resides in Florida with his family.
From painting multi-storeyed houses, condos, and apartments to large commercial buildings and small offices, he had served various customers in areas not only in Adkins but also in Southwest Florida, Sarasota, Naples, and many more. To know more about him check here.