
Textured walls are not just decorative; they also provide the practical effect of hiding signs of the drywall underneath being installed.
The taped seams where each section of drywall meets are easier to see underneath smooth paint, but textured paint hides their appearance to a greater degree.
Textured walls were quite popular in the 1970s, and today they are still widely used, mostly in commercial buildings and offices.
This is because the textured surface not only hides the signs of drywall installation but also because it is more durable and provides character to the surface of the walls.
The best part being if you are looking to capture that Old World appearance, you can add stucco plasterwork or texture over painted walls.
However, before you start applying the texture, you will need to prepare the surfaces and protect the areas of your home where you do not want to clean up any dripping plasterwork.
To ensure that the plasterwork or texture properly sticks, you will need to prep the surface so that it can adhere sufficiently.
What's Here in the Article:
Why Should You Texture Your Walls?
The most common reason people consider texturing their already painted walls is that it is certainly less boring to look at than smooth surfaces.
Few other benefits that come with textured walls include…
a) Conceal Flaws:
Texturing your walls will hide the many blemishes and imperfections that smooth paint will only reveal and highlight.
A textured surface makes such flaws much harder to see, if they can be seen at all.
b) Protection:
The textured coating has a longer lifespan compared to smooth coatings. This means you will need to paint less often.
That will save you money while your walls will still look good for years to come.
c) Soundproofing:
If you want to lower the amount of noise that travels through walls, a textured surface will help.
This is because the textured surface helps break up sound waves compared to smooth surfaces.
d) Stucco:
There is something classy about stucco walls that adds vibrancy to the interior of your home.
You can also create a unique appearance with stucco.
How to Texture Over Your Painted Walls?
Below is the step-by-step process you will need to follow when putting up the texture over your painted wall…
Step 1- Plaster Types
Some of the best types of plaster include Venetian and drywall compound finishes.
You should be able to find these at your local hardware store.
Once you have the type of plaster you want, start by testing it on separate sections of drywall.
Before using it on your painted walls, you’ll want to know how it sticks.
Keep in mind that the plaster you use should be no more than a quarter-inch thick.
Any thicker, it will not stick well to the surface.
You will see cracks develop in thicker plaster, so keep it to a quarter-inch or less.
Step 2- Prep the Surface
If there is any gloss or sheen on the surface, it will need to be sanded away.
This provides additional adhesion so that the texture can stick.
You can use medium-grit sandpaper and attach it to a sanding pole or a sanding machine if you apply a light enough touch.
To prevent the particles from escaping the room, turn off the air conditioner and make sure the doors are shut.
Put on a mask and goggles to prevent the dust from getting into your mouth, nose, and eyes.
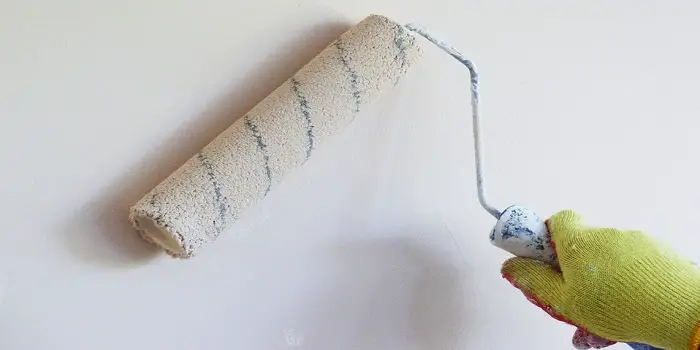
Step 3- Apply the Texture
Now that the walls have been prepared, you can apply the texture using a drywall trowel.
Start with a small amount of plaster and use the trowel to cover the surface.
You can apply the plaster to the trowel using a putty knife.
Keep the layers of plaster thin on the walls, and remember that you do not have to cover it all.
Some smooth areas are fine if they complement the texture you are adding.
Let the plaster dry, look over the results, and then add the paint.
You can be sure if the plaster has dried by lightly touching it. If it is cold, let it dry for a few more hours and test it again.
Once the plaster has dried completely, you can paint over the surface. You can use primer and then one or two coats of oil-based paint.
If the paint is flat sheen, it’s good to add a coat of satin or eggshell because flat paint may absorb too much moisture from the plaster and cause it to crack.
What are the Different Types of Wall Textures You Can Put?
You may be surprised to learn how many different types of wall textures are found in homes, offices, and facilities worldwide.
The right wall texture adds charm and unique touch to your residence or building.
For those who are thinking of remodeling, adding a new wall texture paint may be the perfect touch.
For those who may want to do the work themselves in texturing walls, it’s not as difficult as you might think.
What follows are just some of the different definitions of wall textures, so you can choose the one that best suits your needs.
1- Comb
As the name implies, this is a wall texture that consists of parallel lines as if put there by a comb.
When applying the drywall or mud, use a trowel that has small teeth which will create the lines.
You can choose the exact design, but many people will use a semi-circular approach, as if the wall has rainbows applied at different angles.
You may need a little help to add the lines before the mud or drywall dries. Best for living and dining rooms.
2- Crow’s Feet
You use the slap brush technique to apply this wall texture.
Just apply the wet mud to the wall using a brush with stiff bristles.
You can also use a roller as well.
The trick is to twist the pole holding the roller or brush so that it creates a unique pattern resembling the marks made by the feet of crows.
Be sure to cover the floor and remove all other objects from the room as it can be messy to apply.
While attractive, you will need to move fast before the mud has a chance to dry.
Pretty much any room in the house will look good with this pattern, especially the study.
3- Hawk & Trowel
You will need a trowel and hawk to create this wall texture.
The hawk you use will not be a bird, but rather a flat plate that has a handle attached which is called a hawk.
By using both tools, you can create a wall texture that seems to flow like a river.
Start by putting some plaster on the hawk, then use the trowel to apply it to the wall.
The application needs to be fast before the plaster can dry, so you may want to practice the technique on scrap drywall first.
When done right, the result will be a flowing surface that is quite attractive. This is best used for studies and living rooms.
4- Orange Peel
Another common type of wall texture, the name comes from how the texture appears on the wall.
Its popularity comes from being one of the simplest and easier to apply.
Start by sanding, cleaning, and priming the wall so that the mud will stick.
Next, make sure that the drywall mud is the right consistency to stick without being runny.
You can use a spray gun with the compressor to apply the substance to the wall.
Let the first coat dry, then apply a second for maximum effect.
Best used for dining and living rooms along with the study.
5- Knockdown
One of the simplest wall textures to apply, it’s quite popular thanks to the stucco appearance that it provides when applied properly.
Similar to the Orange Peel texture, the Knockdown uses a spray gun with a compressor.
Before letting the first coat dry, use a trowel or drywall knife to smooth out the bumps, then apply a second coat if needed.
This type of wall texture is perfect for kitchens, dining, and living rooms.
You can even apply this new texture right over the top of the existing textured walls and ceilings as long as the existing one is not heavily applied.
6- Popcorn
This is one of the most popular wall texture types and is sometimes called cottage cheese.
Consisting of mud and Styrofoam, the popcorn wall texture is also one of the most difficult to properly apply.
To create the proper appearance, you will need to mix the texture with Styrofoam and polystyrene.
To apply the mixture, you will need a spray gun with a compressor.
Once applied, the popcorn texture can be difficult to remove, so be sure this is what you want. Best used for dining and living rooms.
7- Rosebud
This wall texture gets its name from the flower design stamp that creates a bud in the center with petals that resemble a rosebud.
To apply, you use the stomp or stamp technique evenly across the wall so that one pattern does not intersect with another.
It’s best to practice first on a scrap piece of drywall before starting on your walls.
It’s perfect for any homeroom with imperfections that can be hidden by the rosebuds stamped into place.
8- Sand Swirl
A combination of sand spray and comb techniques is the application of swirls resembling the patterns of the desert or beach.
In addition, you add sand to the mixture to complete the effect.
You can keep the pattern simple, such as the use of rows.
However, you can augment the pattern by applying spirals; it’s your choice.
You can dig the brush into the drywall or mud and apply it like latex paint to the walls or press the pattern into the bed of mud.
It takes some patience as the mud needs to be wet so it can be properly applied.
The results are quite playful, which is why this pattern is perfect for your child’s bedroom.
9- Skip Trowel
Named for the instrument in which the plaster or mud is applied, this type of texturing uses a curved knife to apply thin layers of the substance.
This type of design uses overlapping circles in its application, so you will need to be careful. In addition, to apply the plaster or mud, it must be of the proper consistency.
The Skip Trowel type of wall texture is best suited for the dining room, living room, or kitchen.
10- Slap Brush
This is a wall texture that has a floral pattern. You use a paintbrush to apply or slap the mud into place.
Start by applying a covering to the wall using a roller.
Then, use a brush with stiff bristles and slap the mud into place.
You may want to practice the technique on scrap material first, but this technique is quite fast once you get it down.
The Slap Brush technique can be used for any room when you want that artistic flair.
11- Spanish Lace
There are many similarities between Spanish Lace and the Stomp Knockdown texture.
However, it does take a little more work to create the Spanish Lace effect.
Start by making sure the mud or plaster you use has the proper consistency.
Then, use your knife to apply the product by splattering it on the wall.
The goal is to create the appearance of fine lines which resemble a lace veil.
Once it looks right, coat the wall with a single-color paint, then add a different pattern on top.
The raised appearance is perfect for walls that have bad cracks or dents.
This means that it can be used for any room in the home.
12- Spray Sand
This will look like Orange Peel, but it is applied differently.
You mix some sand with primer and let it dry for several hours.
Stir up the compound you have created, so the sand is on the bottom.
Then, apply the mixture with a brush or trowel, or you can use a spray gun.
Because the application process takes time, you will need to be patient.
But the good news is that when applied properly, you will not have any cracks in your textured wall.
Any room in the house can benefit from this technique.
13- Stomp Knockdown
This is quite similar to the Knockdown wall texture, with the difference being using a roller and stomp brush.
Once you apply the drywall mud, press or stomp the stomp brush into the surface. You are stamping the mud with the brush.
Any peaks or bumps can be smoothed out with a knife or trowel.
For this type of texture, compound mud tends to work best because it can adhere to the wall more effectively.
You can use this texture in most rooms, including the dining, living room, and kitchen.
14- Venetian Plaster Finish
This is one of the oldest types of wall textures. You mix the finish with marble dust and apply in thin layers.
Once dry, sand and buff the surface for a shiny appearance.
Because of the unique materials, there is no wall texture quite like Venetian Plaster Finish.
And, you can purchase the product all-in-one for easier application.
A steel trowel can be used to apply the mud using an X pattern, so there is no consistency.
Let it dry and apply again until you have a smooth surface. Best for dining rooms, living rooms, and the kitchen.
Final Thoughts
Texturing adds that layer of depth, which creates a more interesting surface.
In addition to the many attributes provided by textured walls, it is the remarkable depth that may be the most impressive.
Or it could be that you do not have to paint the walls often.
Whatever the case, textured walls make for a great addition to your home in terms of style and substance.
Be sure to look at the different patterns before choosing the one that is right for your needs.
The more you know in advance, the better the results will be.
Share the post "Can You Put Texture Over a Painted Wall?"
Is your house slowly starting to look like a serial hoarder lives in it? We all have stuff lying around Read more
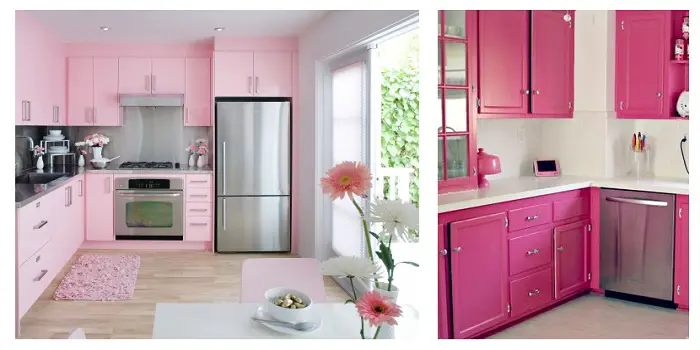
The color pink is the favorite girl color which is most admirable to them. In fact, a color like baby Read more

Have the bright sunny days of summer motivated you to liven up your tired decor? Are you yearning to create Read more
Tough to wear out, long-lasting, simple to clean, and stylish, UPVC windows are undoubtedly one of the most popular choices Read more

Douglas Becker (aka Painter Doug) has over twenty years of experience as a painter in Adkins, Texas. At present, he resides in Florida with his family.
From painting multi-storeyed houses, condos, and apartments to large commercial buildings and small offices, he had served various customers in areas not only in Adkins but also in Southwest Florida, Sarasota, Naples, and many more. To know more about him check here.