
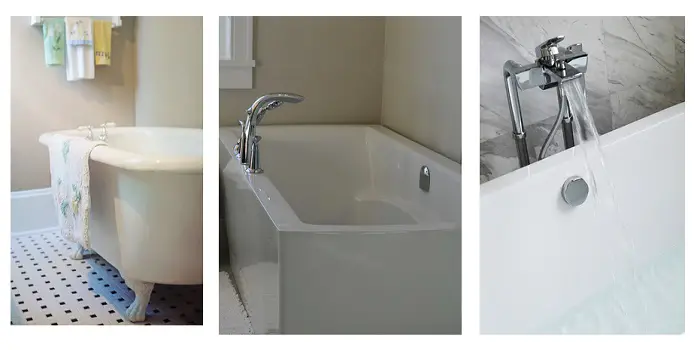
Fiberglass reinforced plastic (or FRP as it is more commonly known) is one of the cheapest materials used to create a bathtub.
Tubs made from FRP are tough, light, easy to install, and repair. However, they are not very durable (compared to other materials like porcelain-enameled steel or cast iron), which means that over time they can fade, scratch, and crack.
If you have an existing fiberglass bathtub that has dulled over a few years, painting it properly will restore its appearance at a fraction of the cost compared to replacement.
When it comes to painting fiberglass surfaces, epoxy paint stands out as one of the most effective options. Renowned for its durability, water resistance, and scratch resistance—especially on fiberglass tubs—epoxy provides a long-lasting finish.
However, for the proper application, you need to carefully follow the manufacturer’s instructions. As epoxy requires precise preparation and swift use once mixed, the components begin curing immediately and must be applied promptly to avoid waste.
What's Here in the Article:
How to Paint a Fiberglass Bathtub?
If you are purchasing a fiberglass tub, you may have noticed that the color choices are not really that great. However, there is something you can do about that by painting the tub the color of your choice. All you need is the right paint and technique to do the job.
Below are the exact steps you will need to follow…
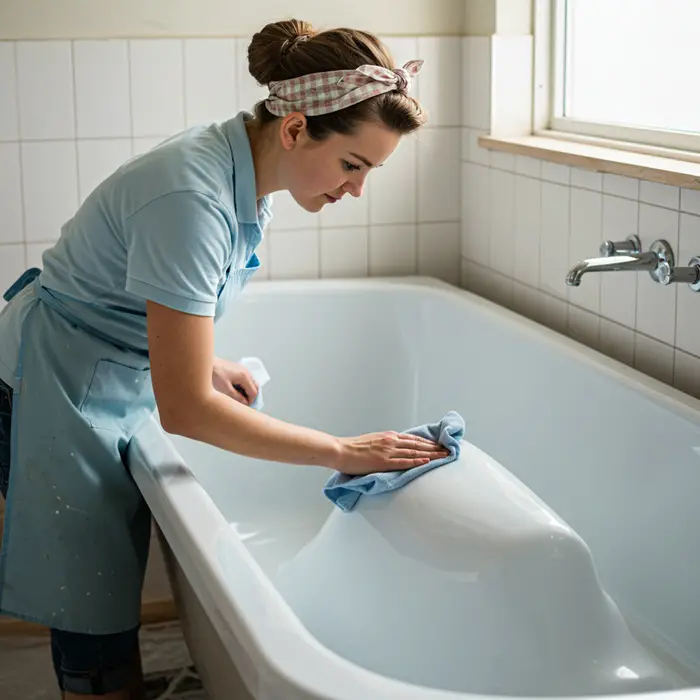
Step 1- Prep the Tub
Refinishing a new or old bathtub does take some work, but it will be worth it if you want to improve the appearance of your bathroom.
So be patient and take your time while preparing the surface so that you can achieve long-lasting results.
Clean:
Before you can apply the paint, you will need to thoroughly clean the tub. This means removing the grime using a soap-scum remover, getting rid of the oil using acetone, and applying bleach in diluted form to kill any mold or mildew that might be present.
Once you have achieved that goal, you should rinse the tub and prep it properly.
Repair Cracks:
Epoxy putty can be used to fill in any cracks, dents, or imperfections. Do not worry about the color of the putty since you will paint over it.
Remove Metal Fixtures and Old Caulk:
Anything in the tub that will not be painted should be removed or covered by painter’s tape.
Use a putty or utility knife to remove the caulk, just be careful not to scratch the surface. Any remaining caulk can be removed using a grout brush.
Be sure to wipe down the entire tub afterward using isopropyl alcohol. This will clean the tub again and evaporate relatively quickly.
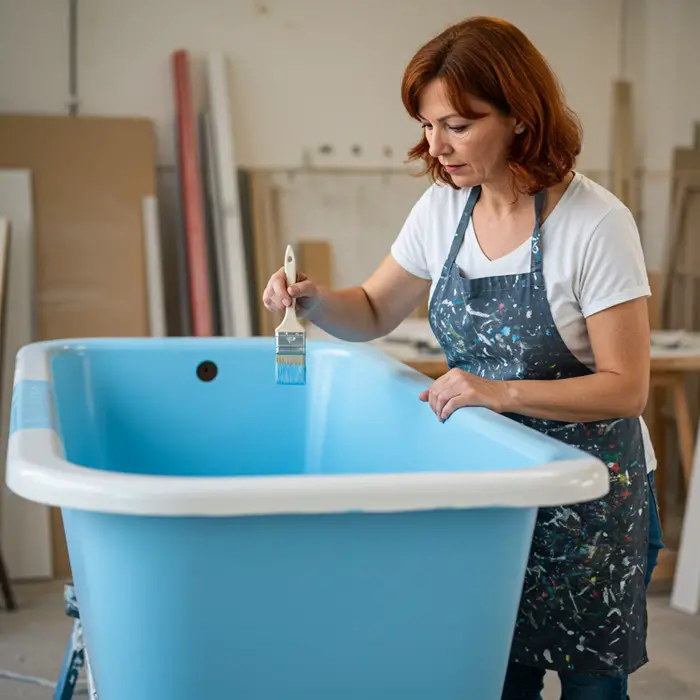
Step 2- Paint the Bathtub
Now you are ready to paint. Start by covering all surfaces outside the tub using drop cloths to ensure that no paint reaches the surface.
Next, if trim is on the tub, you can use painter’s tape to cover the areas you want free of the paint.
Sand:
Use 80-grit sandpaper, and lastly, sand the entire tub. Once finished, remove the grit using a tack cloth.
Mix the Paint:
Read the instructions and mix the paint properly. If you are using epoxy paint, you may have to mix both the base and catalyst together, or they may already be combined.
Stir the paint in that case, and you are ready to begin.
Apply the Paint:
You can use a varnish brush, foam brush, or foam roller to apply the paint on a fiberglass tub, your choice. The goal is to create a light layer followed by a second coat for maximum effect.
If you apply a smooth second coat, you may not need a third unless you want to maximize the protective qualities.
Now you can replace the fixtures on the tub and recaulk the areas that run between the tub and the wall or floor. A neater line of caulk can be created when you use painter’s tape along the seam. You can use your fingers to smooth out the caulk if you keep them wet.
Step 3- Gel Coat Application
If you are repainting an old tub and using a gel coat, then you can repeat the steps listed above.
You may need to scrub out the tub surround more depending on how much soap scum, dirt, grime, and oil have been building up over the years.
You also may need to sand the tub surround more to remove any imperfections that might have developed as well. While 80-grit sandpaper works well, you can alternate with finer grains to ensure a smoother surface.
Remember to remove the grains from the tub before you start painting. Now you can mix the gel coat as directed. Pour it into a small bucket and stir until it is ready.
Now, use a spray gun to add the gel coat to the surface. Cover the tub in a fine mist and let it harden, then repeat to create a solid surface. You will probably need to add a third gel coat for maximum effect.
Once the surface is cool to the touch, the gel coat is ready for use. You will probably want to let it dry or cure overnight and then use the tub when ready, as indicated in the directions. That will prevent the water from penetrating the surface, assuming the gel coat is not quite dry.
What Color to Paint a Fiberglass Tub With?
Selecting the appropriate color for a fiberglass tub is a key decision that can significantly influence the overall aesthetic of your bathroom.
While functionality and durability matter, the color you choose also sets the tone for the space—you’re not just slapping on paint; you’re setting the tone for every soak, scrub, and accidental shampoo-in-the-eye moment to come.
Classic white is the undisputed champion of tub colors. It’s timeless, crisp, and makes your bathroom look cleaner than it probably is. Plus, it plays nicely with every other color in the room.
But if your design taste leans less “rental apartment” and more “home magazine cover,” let’s venture beyond the vanilla.
- Light blues and greens bring a calm, coastal feel. Think sea glass or mint—gentle colors that practically hum lullabies while you bathe. These hues work especially well if your bathroom is your sanctuary from life’s nonsense.
- Soft grays are a sleek upgrade, too. They whisper sophistication without screaming for attention. Want a modern, spa-like feel without investing in Himalayan salt lamps? Gray’s your go-to.
- Beige or almond tones are perfect if your bathroom gives off cozy, earthy vibes. These warm neutrals pair beautifully with wood accents and say, “I exfoliate with oats and good intentions.”
Now, if you’re a bit of a daredevil (in the most domestic sense), you might consider deep navy, charcoal, or even black.
Bold, dramatic, and undeniably chic—but beware: darker tubs show soap scum like it’s their full-time job. They’re high-maintenance, like a cat that only drinks filtered water.
Can You Use Acrylic Latex Paint for Fiberglass Tub?
FRP material is slippery and is not very easy to paint.
Ideally, you will want to use toxic-free paint that has few odors and can be applied easily. So, acrylic paint can also be another good choice for fiberglass tubs, shower stalls, shower surrounds, etc., if you do not find epoxy paint or Rustoleum fiber paints available near you.
Acrylic latex paint is water-resistant and provides a hard-wearing, durable finish, provided you have prepared the surface well and have applied it on top of latex primer.
Moreover, since this water-based paint contains fewer chemicals, it’s convenient to apply and environmentally friendly. Also, it holds up well to cleaning and is less likely to crack or peel off.
Overall, acrylic is easier to use and apply compared to epoxy, but it will require a latex primer to be the most effective.
A fiberglass-compatible epoxy primer is also many times recommended before applying epoxy paint to fiberglass surfaces, but its necessity depends on the condition of the surface and the type of epoxy paint being used.
In situations where the fiberglass is particularly smooth or previously coated, a primer enhances adhesion, ensures a more uniform finish, and improves long-term durability.
However, some high-quality epoxy paints are formulated for direct-to-surface application and may not require a primer. Some two-part epoxy systems also include a built-in primer or bonding agent. So, it’s advisable to always check the product specifications to see if a separate primer is necessary.
Pro tip: If you are picking the paint for outdoor objects like fiberglass boats, urethane and epoxy will be the best products to choose. Unlike acrylic paints, urethane provides higher performance where the projects need to take a lot of beating.
Easy Maintenance Tips for Painted Fiberglass Bathtubs
So, your fiberglass tub is gleaming like a car fresh off the showroom floor. Nice. But let’s not pretend that shine is going to stick around on charm alone. A little regular TLC goes a long way.
Rule #1: Easy Does It
Put down the bleach and back away slowly from the scouring pad. This isn’t a CSI episode — your tub doesn’t need an interrogation, just a kind touch. Stick with pH-balanced, non-abrasive cleaners. Think “spa day,” not “deep clean dungeon.”
Your Weekly Tub Date
Once a week, take a soft cloth or sponge for a spin around the tub. Consider it exfoliation for your bathroom — removing soap scum without peeling off that lovely painted finish.
Avoid the Toolbox Temptation
If it belongs in a garage or sounds like it could cut metal, keep it far from your tub. Steel wool, sharp edges, and aggressive scrubbers are out. Gentle sponges and soft brushes? In. Your tub deserves better than a hardware-store brawl.
Bath Mats: The Unsung Heroes
Bath mats aren’t just for grip — they’re the secret service of the tub world, quietly preventing slips and surface scratches. Who knew?
Tiny Troubles? Fix ‘Em Fast
A chip or scratch might seem harmless… until it isn’t. Check the tub after each use (takes five seconds, promise). Spot an issue? Grab a fiberglass repair kit and patch it before it turns into a full-blown soap opera.
Keep Things Fresh: Air it Out & Dry it Down
Humidity is not your tub’s BFF. Run that exhaust fan like it’s part of your morning routine, and always dry the tub after use. Yes, every time. It sounds fussy, but future-you will thank present-you for the glossy, mildew-free finish.
Related FAQs
How Much to Paint a Fiberglass Tub?
Refinishing a fiberglass tub can run you $250 to $1000—yep, not exactly pocket change, but fiberglass is a finicky diva of a surface. Still, if your tub’s in decent shape, a facelift beats a full replacement.
Buying a brand-new fiberglass tub might only cost $200 to $850, but once you factor in installation, you’re staring at $2000 or more. So, refinishing? Kind of a bargain in comparison.
DIY route? Materials alone—paint, tape, putty, sandpaper—can cost $150+. Professional labor adds $100 to $450, possibly more if your tub needs TLC. You can go DIY to save a buck, but don’t be surprised if the finish looks a bit… abstract. Pros have the tools and know-how to make your tub shine like new.
Can you Paint Fiberglass with Rustoleum?
Absolutely—Rustoleum has paints that play nice with fiberglass. In fact, many DIYers swear by them. Just make sure you grab the right one—especially acrylic epoxy marine paints, which stick better and hold up longer than oil-based options.
Read the label like it’s a love letter: prep and application instructions are key. A couple of coats usually do the trick, but only if the surface is properly prepped.
Yes, it’s a bit on the pricey side—but users say the smooth, durable finish is totally worth it. So, if you’re aiming for pro-level results without calling in a pro, Rustoleum’s got your back (and your tub).
How to Tell if a Bathtub is Fiberglass or Acrylic?
To tell if a bathtub is fiberglass or acrylic, start by checking the edges—fiberglass tubs usually have thicker rims, while acrylic ones are thinner and more refined. Fiberglass tends to feel rougher and cooler to the touch, and it flexes slightly under pressure. It’s also lighter in weight and typically comes in plain white.
In contrast, acrylic tubs have a smooth, glossy finish, offer more color options, and are generally more durable and expensive. If you’re still unsure, asking a store associate or plumber can help you confirm the material quickly.
Final Thoughts
Changing the color of the FRP bathtub not only adds a layer of protection but can also create a brand-new look that will sparkle. Achieving such results may seem to require a professional, but the truth is that if you use the right paint, you can do the work yourself.
While epoxy is ideal and does provide the most durable coat on fiberglass bathtubs, applying a good gel coat is also recommended to make the paint last longer. You can even purchase a kit to make the process easier if you desire. These can be found easily at your local hardware store.
Share the post "What Type of Paint to Use on a Fiberglass Tub?"
When working on a paint project, it is the materials you choose/use which determine its success and validity. This sentence Read more
Storage heaters and radiators aren’t popular anymore as they used to be. I have one old piece installed in my Read more
The purpose of a primer is to provide a surface sticky enough for the paint to adhere properly. The paint Read more
There are many similarities between latex and enamel-based paints. Being used on interior and exterior surfaces, they come in a Read more

Douglas Becker (aka Painter Doug) has over twenty years of experience as a painter in Adkins, Texas. At present, he resides in Florida with his family.
From painting multi-storeyed houses, condos, and apartments to large commercial buildings and small offices, he had served various customers in areas not only in Adkins but also in Southwest Florida, Sarasota, Naples, and many more. To know more about him check here.