
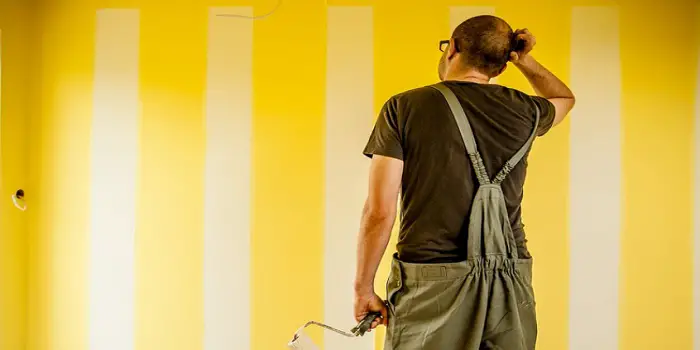
When you plan to paint the interior or exterior of a house, there is a lot to be excited about.
Walls shelter us from the elements, give us privacy, and are pretty much the one aspect of our house we see the most often.
After all, they are everywhere we look.
So, when we look at our walls, imagining them in a different color is very intriguing.
Then the big day comes, the walls are painted…and you leave them to dry, but that stubborn tacky paint just refuses to cooperate.
I understand the frustration, as I have been through it many times.
That’s why I want to offer you the answers you are looking for about how to get tacky paint to dry, so you can come back to the excitement you experienced when you first began painting.
What's Here in the Article:
Why is My Paint Sticky?
Paint does take a while to dry, but tacky paint, even after 48 hours, can be a real annoyance to wait out.
There are actually a few factors that contribute to the poor drying of tacky paint, but they all generally stem from poor planning and preparation.
These missteps typically include the use of a low-quality primer (or no primer at all), the use of acrylic paints, the application of a second coat too quickly, as well as painting in high humidity in a poorly ventilated space or during cold weather.
Those are essentially the most common tacky paint drying problem factors.
How Long Does it Take for Paint to Dry?
Tacky paint can leave long-term effects noticeable for days, weeks, months, or years.
The paint may feel like it never dried at all.
You can cover a lot of important aspects if you thoroughly prepare and take the correct steps during your painting.
Depending on the type of paint used for the job, the first coat can dry in as little as one but as many as eight hours (depending on the conditions).
Not to mention, temperature and humidity will greatly influence the drying time.
The hotter and more humid it is, the longer it will take paint to dry.
One of the biggest factors is to assume that the paint drying will take significant time and to wait multiple hours between applying subsequent coats.
The 5 Best Ways to Dry Tacky Paint Faster
Now that we covered the negative moves that lead to poorly drying tacky paint and how much time the paint actually takes to dry let’s talk about how you can mitigate and avoid drying problems.
While some of the following tips will seem completely obvious, it’s important to consider that they all make a difference.
So, let’s get to it. Here are the ways to get your paint to dry faster:
- Give it time
- Use primer
- Use oil-based paint
- Apply auto wax
- Utilize talcum powder
Now, let’s dig into each one of those points in detail…
1- Give Sticky Paint Time
There is no suggestion easier than this one: just wait.
Don’t be surprised if it takes a while. In some instances, you can still make fingernail prints in your paint two weeks after painting.
The container for your paint should have the information you need to let you know how long the paint will take to dry.
If the paint is still wet, you likely have not waited long enough.
2- Use Oil-Based Paint
In truth, acrylic and latex paints dry faster than oil-based ones, but the oil-based paints will result in sturdy, solid paint results without resorting to feeling spongy to the touch.
Of course, if oil-based paint is your choice, ensure you get quality stuff. Not all oil-based paints are comparable in their efficacy.
Think about what you need from the paint job and thoroughly research the paint that has a great drying turnaround, as well as looks the best when it finally dries completely.
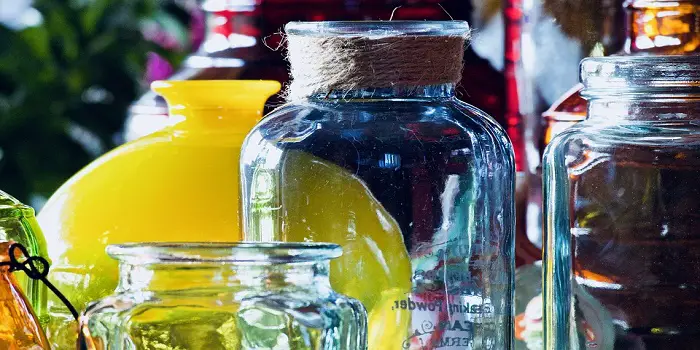
3- Utilize Talcum Powder
If you are painting a white surface or one where two painted surface has a frictional effect on one another (like doors), consider using talcum powder.
The powder helps to stave the moisture off, helping the paint dry faster.
Just be aware that smothering your wall in talcum powder can get messy, plus you will quickly run out.
So apply it to small surfaces that you feel need it the most to avoid causing a bigger problem while trying to deal with sticky paint.
4- Use the Right Primer
When certain spots need extra color to hide what’s underneath, it causes multiple layers to have to be painted.
This lays the paint on thick and makes it harder for that tacky feel to dissipate.
However, when the primer is used, it neutralizes the wall color, leading to less layered (or blocking) paint.
That helps the overall paint job dry faster.
But there is a catch.
Some primers are not compatible with certain paints, and if the wrong combination is used, the changes in sticky, slow-drying paint increase.
So before going this route, do your research to assure that the combination you are using is appropriate.
5- Apply a Bit of Auto Wax
Much like people buffer their cars, walls can also be buffed with wax, which, much like talcum powder, secures the paint on things like furniture, or areas with friction in places with painted surfaces.
Because tacky paint can easily incur damage due to friction, applying wax gives it another layer of defense against damage.
How Can You Prevent a Tacky Paint in the First Place?
Paint that remains tacky and sticky for days or weeks puts a real damper on your dreams to pleasantly color the room, and rather than help fix the tackiness; many painters try to learn how to prevent it in the first place.
So here is how this problem can be avoided.
1- Consider the Weather
Temperature and humidity are huge factors in paint drying.
Therefore, it is crucial to paint either the interior or exterior of your home in mild temperatures when it’s not overly hot or cold.
Also, it is ideal for painting when humidity levels are low. If the air is humid, it just rained, or it’s egregious hot, push out your painting project, or your paint’s drying will feel eternal.
In fact, if ambient temperatures are under 50 degrees Fahrenheit, hold off on the painting project till things warm up a bit.
2- Prepare Your Painting Surfaces
Foundation is the key to optimal results. This is no different in terms of painting.
When adequately preparing surfaces, you vastly improve the chances of an awesome painting result.
Before you start painting the walls of a house, wipe them down to eliminate any dirt, dust, and grime.
You should remove dust from floors and ceilings too as it travels and will settle on your paint, reducing the quality of its appearance.
If there are any cracks or divots in the wall, before painting, patch them with filler (like wall putty) or sealant.
Paint that is applied to smooth, clean walls lays on better and looks smoother at the end.
3- Use High-Quality Primer
Next, make sure to apply high-quality primer before painting.
This will help paint stick to the surface faster, negating the need to paint multiple layers to thoroughly cover the surfaces, and reducing the chances of sticky paint.
Just make sure that the primer you use is compatible with your choice of paint.
4- Using Oil-Based Paints
Many painters choose to use semi-gloss latex paint for their painting projects due to its sheen, simplicity of cleaning, and durability.
However, latex paint is more prone to being tacky.
While oil-based paints take longer to dry, they are far less likely to become tacky, never mind for extensive periods.
Oil-based paints are also more scratch and stain resistant, ensuring quality and longevity to the looks of your walls.
5- Wait for Each Coat to Dry
Let’s say you took all of the correct actions as we described. Can you still mess this up?
Yes! And the most common way this happens is simply due to rushing and impatience.
Simply put, people tend to just not give paint sufficient time to dry.
Even if you use the appropriate primer, the highest quality paint, and find that you are working with the smoothest surface, the paint will still need time to dry.
You will end up putting on extra layers, only to find that the paint left behind is persistently sticky and tacky.
Before applying a new coat, make certain that the last coat has full drive.
This way, you avoid blocking paint layers on top of other layers and end up with a tacky surface as a result.
Final Thoughts
The best way to avoid tacky paint is preparation.
First, ensure that the painting surface is dry and clean before the painting begins.
If the surface has bumps or imperfections, paint won’t hide them; it will show them more, so patch them up and run over any rough spots with some sandpaper.
Make sure you are painting in an environment conducive to good paint drying.
That means if the ambient temperatures are too cold, warm up the area first.
If the air is too humid, run a dehumidifier to help.
Finally, always get high-quality paint. An adage that overwhelmingly applies to painting is “buy nice or buy twice.”
When you paint with top-of-the-line paint versus the cheaper stuff, the difference is very notable.
Share the post "Why is My Paint Still Tacky After 2 Days – How to Fix It?"
When working on a paint project, it is the materials you choose/use which determine its success and validity. This sentence Read more
Storage heaters and radiators aren’t popular anymore as they used to be. I have one old piece installed in my Read more
The purpose of a primer is to provide a surface sticky enough for the paint to adhere properly. The paint Read more
There are many similarities between latex and enamel-based paints. Being used on interior and exterior surfaces, they come in a Read more

Douglas Becker (aka Painter Doug) has over twenty years of experience as a painter in Adkins, Texas. At present, he resides in Florida with his family.
From painting multi-storeyed houses, condos, and apartments to large commercial buildings and small offices, he had served various customers in areas not only in Adkins but also in Southwest Florida, Sarasota, Naples, and many more. To know more about him check here.