
When trying to improve upon the appearance of your bathroom, getting rid of unsightly stains is likely high on your to-do list, including painting the toilet.
As unusual as it may seem, you can indeed paint your toilet bowl from the inside in almost any color you desire. Although the process is somewhat specific and intensive, it is entirely manageable for an average DIY enthusiast.
This means everything should be done strategically, from cleaning it to sanding to choosing the right type of paint and then applying the paint to the inside section of a toilet bowl.
Worry not; if you haven’t done it ever before, I’ll outline the easy steps you need to follow to complete the job.
What's Here in the Article:
Painting a Toilet Bowl Inside
The steps for painting the scratched and stained toilet bowl are the same as painting the rest of the toilet. But like any other paint job, you’ll want to make sure you have all the materials for the job on hand before you start.
The supplies you’ll need for painting your toilet inside include:
- Face mask
- Eye protection
- Paint
- 120-160 grit sandpaper
- Painters tape
- Clear topcoat or sealant if you’re using spray paint
- Dropcloth or newspaper
Step 1. Prepare
Before you begin the process, it is recommended that you put on a face mask to prevent inhaling any tiny bits of porcelain that will be kicked up.
Also, open a window, keep the door open, and turn on a fan, if possible to ensure the area has good ventilation.
You also need to cover up anything that you don’t want to be painted using a drop cloth, plastic or newspaper, and some painter’s tape. This includes the floor, walls, and any cabinets that are near the toilet.
Be sure to also cover the bolts that secure the toilet to the floor, the handles, and the plumbing pipes connected to the tank.
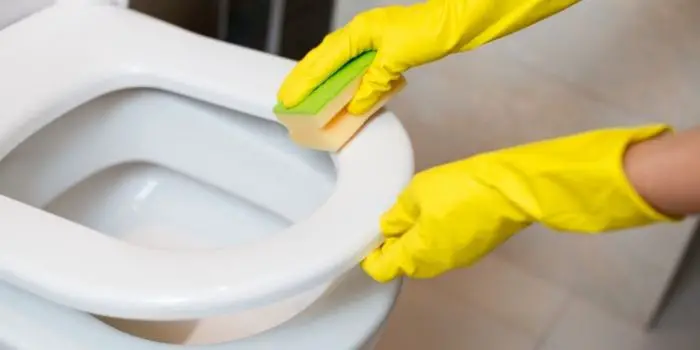
Step 2. Clean the toilet
A common concern when it comes to painting a toilet is dealing with a stained bowl due to irregular cleaning. So, the first step is to thoroughly clean the inside of the bowl or else the paint won’t adhere to the surface if there is dirt and grime in place.
- Start by removing the toilet seat. This can be done by unscrewing the bolts that secure it in place, either with your fingers or with a wrench or pair of pliers if necessary.
- Once the seat is removed, clean in and around the bolt holes, ensuring that any mineral deposits or rust are thoroughly removed.
- Next, clean both the inside and outside of the toilet using your usual cleaning products. Finally, flush the toilet to ensure it is thoroughly rinsed.
Remember that while there are numerous cleaning products available that claim to remove stains, their effectiveness can vary, especially with severe staining.
Step 3. Drain the water
To ensure the paint will stick properly, you’ll need to be sure the toilet is dry. To do this, you’ll need to drain the water from the bowl which can be done as follows.
- Locate the water supply valve behind the toilet near the floor. Turn it clockwise to shut off the water supply to the toilet.
- Flush the toilet to drain as much water from the tank and bowl as possible. It’s good to hold the handle down to allow as much water to escape as possible.
- If there is still water in the bowl, you can use a plunger to force some of the water down the drain. This step is optional but can help remove more water.
- Next use a sponge, towel, or wet/dry vacuum to remove any water left in the toilet bowl. Soak up the water and wring it out into a bucket.
Step 4. Sand the toilet inside
Lightly sand the slick porcelain surface of the bowl with 210-160 grit sandpaper to create a rough surface that allows the primer and paint to stick effectively.
Be careful not to sand for too long; just roughen the surface sufficiently.
After sanding, the toilet bowl will be covered in porcelain dust. So, clean the bowl and seat thoroughly again to remove all the dust, and wait until the bowl is dried completely.
Step 5. Apply a primer to the toilet bowl
Once the toilet is dry, it’s time to apply the primer inside the bowl and on the seat. Use a high-quality latex-acrylic spray primer, applying an even layer to the bowl as per the product instructions.
Make sure to coat the entire surface thoroughly and then allow the primer to dry completely before proceeding to the next step.
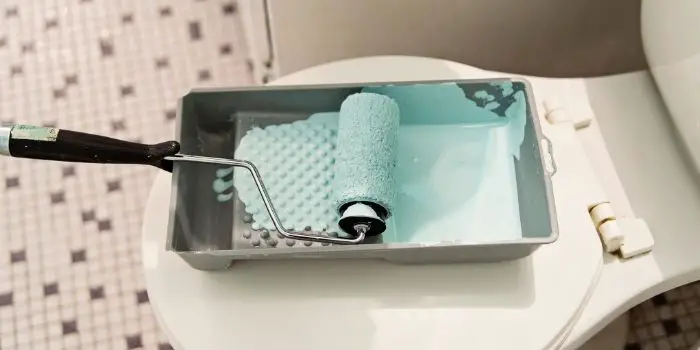
Step 6. Evenly paint the toilet from the inside
Once the primer on the toilet has dried, it is time to apply the coat of paint.
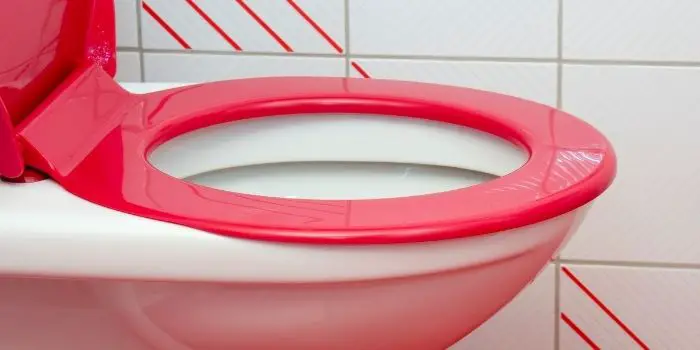
To successfully paint your toilet bowl from the inside, you’ll need high-quality appliance epoxy spray paint which is typically available in shades like black, gray, and white, primarily aimed at offering a fresh, touched-up appearance.
Choose your preferred color and apply it following the manufacturer’s guidelines. If you’re not satisfied with the color options available in epoxy paint, you can opt for a conventional spray paint, such as those produced by Rust-Oleum.
Spray paint allows you to paint the toilet in any color you desire, and it’s easy to apply and dries quickly. However, if you choose to spray paint, you’ll also need to apply a clear epoxy topcoat to ensure the color remains intact and the toilet is waterproof.
As with any painting project, multiple coats of paint may be necessary, while ensuring the toilet is completely dry between coats.
Step 7. Allow proper drying time and refill with water
After, the paint job, allow the coating to dry for at least a few hours.
Ideally, you could let the toilet dry overnight by using another toilet. If you have an extra bathroom in the house, this is easier to accomplish. Otherwise, you can use a friend’s or neighbor’s bathroom, or visit a nearby coffee shop to use their facilities.
Once you’re satisfied with the painting project, you can refill the toilet. Give the toilet a flush, and you should be good to go.
Can I Use Regular Latex Paint On The Toilet Bowl?
Tempting as it may be to grab a brush and give your throne a makeover, regular latex paint is not up to the task. It simply can’t handle the royal flush of water, waste, and scrub-happy chemicals—it’ll peel, chip, and flake faster than your patience on cleaning day. Wall paint and spray paint are equally ill-equipped; porcelain surfaces demand something more committed.
If you’re determined to jazz up your john, opt for a paint made specifically for ceramic or porcelain—because not all paint is throne-worthy.
Still, feeling iffy about turning your bowl into an art project? No worries. High-powered toilet cleaners and a little bleach can do wonders for stains and dullness. And if it’s just the seat that’s seen better days, repainting or replacing it is a much easier (and less questionable) way to freshen things up.
How to Protect My Freshly Painted Toilet Bowl (Maintenance and Care Tips)
A freshly painted toilet bowl and seat can enhance the aesthetics of your bathroom, but without proper protection, it’s susceptible to chipping, fading, and premature wear.
To protect your freshly painted toilet bowl and prevent chipping and fading, follow these steps:
Choose the Right Paint: Epoxy-based paints or urethane-based paints are ideal for toilet bowls (made of porcelain and ceramics) as they adhere well and are water-resistant.
Seal the Paint: Once the paint is completely dry, apply a clear waterproof sealant to protect the coating from water, stains, and chipping.
Cure the Paint: Allow the painted and sealed toilet bowl to cure for the recommended time before using it. This can range from a few days to a week, depending on the products used. Avoid using the toilet during this curing period to ensure the paint sets properly.
Regular Maintenance: Also, clean the painted toilet bowl with non-abrasive cleaners to avoid scratching the paint. Avoid using pumice stone, harsh chemicals, or bleach that could damage the paint, and inspect your toilet bowl regularly for any signs of wear and touch up as needed to maintain the finish.
Final thoughts
Embarking on a home improvement project often brings a sense of accomplishment and satisfaction, especially when it involves reviving tired spaces like a bathroom. However, when it comes to painting fixtures such as the toilet bowl, ensuring a lasting finish requires more than just a brush and paint.
Hopefully, the above steps will help you paint and safeguard your newly painted toilet bowl, preserving its beauty and durability for the long haul. From surface preparation to selecting the right materials, follow the above expert tips to paint and maintain a pristine finish and enjoy your revitalized toilet for years to come.
Share the post "Can You Paint a Toilet Bowl From the Inside?"
Is your house slowly starting to look like a serial hoarder lives in it? We all have stuff lying around Read more
The color pink is the favorite girl color which is most admirable to them. In fact, a color like baby Read more

Have the bright sunny days of summer motivated you to liven up your tired decor? Are you yearning to create Read more
Tough to wear out, long-lasting, simple to clean, and stylish, UPVC windows are undoubtedly one of the most popular choices Read more

Douglas Becker (aka Painter Doug) has over twenty years of experience as a painter in Adkins, Texas. At present, he resides in Florida with his family.
From painting multi-storeyed houses, condos, and apartments to large commercial buildings and small offices, he had served various customers in areas not only in Adkins but also in Southwest Florida, Sarasota, Naples, and many more. To know more about him check here.