
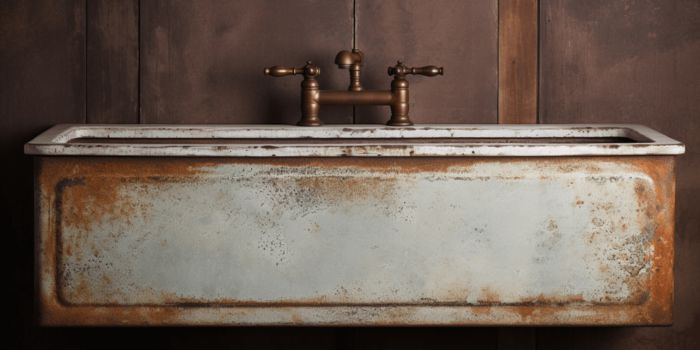
You just moved into a new house, and you love everything about it except for the old, rusty cast iron sink in the kitchen. You’re not sure how to go about cleaning and painting it, but you know you want to give it a try.
After all, a fresh coat of paint could make a big difference in how your kitchen looks overall. Plus, it’s a fun DIY project to take on, and you can really make the sink your own by choosing the perfect color.
What's Here in the Article:
Cleaning and Painting a Rusted Cast Iron Sink
No doubt – a cast iron sink is a great addition to any kitchen because it’s durable and easy to maintain. But it can be difficult to clean and repaint. If you’re not careful, you could end up with a mess on your hands.
But don’t worry! By following the steps in this guide, you’ll be able to avoid those challenges and easily paint your cast iron sink. You’ll also learn how to remove rust, choose the right type of paint and sealant, and allow the paint to dry properly. So, let’s get started.
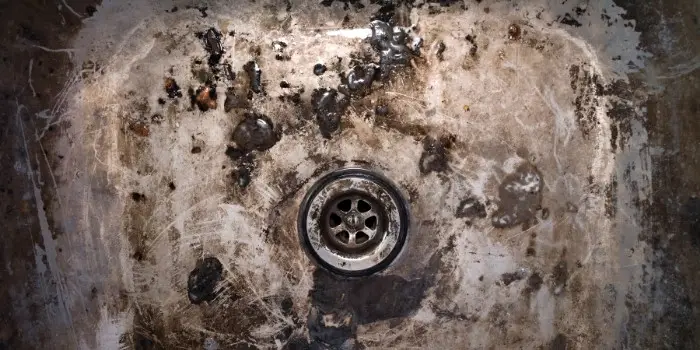
Step 1- Remove the rust from the sink
When confronted with rust-covered sinks, it’s essential to eliminate the rust prior to painting. The most effective method involves using a wire brush. Begin by vigorously scrubbing the rust from the sink’s surface. For particularly stubborn areas, employing a rust remover or sandpaper can help eradicate them completely.
Once the rust is removed, rinse and clean your iron sink thoroughly with soap and water to eliminate any residual debris from the rust removal process. After the clean-up, use the towel to dry the sink completely, ensuring there is no moisture left on the surface. This step is crucial to prevent any remaining rust from re-forming and to prepare the surface for further treatment or sealing.
Step 2- Apply a coat of primer to the sink
After successfully removing the rust, the next step is to apply a coat of primer to the sink. This step is crucial as it enhances paint adhesion and creates a protective barrier between the metal and the paint.
While any type of primer can be used, opting for a rust-inhibiting primer is advisable for optimal results. Proceed to apply the primer using a brush or a mini roller. Allow it to dry completely according to the instructions provided on the product label. Once dry, you’re ready to proceed to the next phase of the project.
Step 3- Apply a coat of enamel paint to the iron sink
Once the primer has dried, it’s time to proceed with applying the paint. For optimal results, opt for high-quality oil-based enamel paint or epoxy-based paint. These paints are easy to clean and are capable of enduring continual exposure to water and wear and as a result, they offer a resilient, waterproof finish.
Additionally, these coatings ensure proper adhesion and longevity of the paint job on your cast iron sink.
- Thoroughly stir the paint to evenly distribute the color.
- Once stirred, apply the paint to the sink using a brush or a thick-napped roller.
- Work in small sections to prevent the paint from drying too quickly before achieving an even application.
Once the entire sink is covered with paint, allow it to dry according to the instructions provided on the product label. Typically, enamel paint takes around 24 hours to dry completely. However, it’s advisable to wait at least 12 hours before using the sink to ensure the paint has been properly set.
What color to pick for painting the cast iron sink in the kitchen?
When selecting a paint color, there’s a myriad of options to contemplate. It’s crucial to choose a color that harmonizes with the overall aesthetic of the bathroom or kitchen where the sink resides. Popular options include neutral shades like white, gray, or black, which offer a timeless and adaptable appearance. Alternatively, brighter colors can inject personality and vibrancy into the space, adding a unique touch to your decor.
Do I Need to Use Sealant to Protect the Painted Sink?
Applying a sealant that harmonizes with the paint applied on the cast iron sink is pivotal for achieving a durable and enduring outcome. With a plethora of options available in the market, it’s essential to opt for one tailored for metal surfaces and capable of withstanding water exposure.
Silicone-based and epoxy-based sealants stand out for their exceptional adhesion properties and moisture resistance, making them a popular choice for cast iron sinks.
When you are ready to apply the sealant, following the application techniques outlined by the manufacturer is crucial.
- Properly preparing the surface by thoroughly cleaning and sanding enhances adhesion, allowing the sealant to effectively bond with both the paint and cast iron surface.
- Applying thin and even coats of sealant is essential to achieve a smooth and professional finish.
- Research suggests that using multiple thin layers, rather than a single thick layer, improves the durability and effectiveness of the protective coating.
Maintenance Tips for Keeping Your Cast Iron Sink Looking Great
Cast iron sinks are known for their durability and timeless aesthetic appeal. Proper maintenance is key to preserving their beauty and functionality for years to come. Here are some maintenance tips to keep your cast iron sink looking great for years:
a) Regular Cleaning:
Regularly clean your sink using a mild detergent and warm water. Steer clear of abrasive cleaners or scrubbing pads that may cause scratches and after each use, thoroughly rinse the sink to eliminate any residue or food particles, ensuring a sanitary and spotless surface.
b) Preventing the Rust:
Keep a vigilant eye out for any signs of rust or corrosion, as catching these early can prevent further damage. If you spot any rust spots, it’s crucial to address them promptly. For small rust spots, a gentle scrub with a mixture of baking soda and water or a mild rust remover can work wonders. After scrubbing, be sure to rinse the area thoroughly and dry it completely to inhibit any lingering moisture from exacerbating the issue.
c) Avoiding Stains, Scratches and Chips:
Swiftly attending to spills is key, particularly when dealing with acidic or abrasive substances such as vinegar or potent cleaning agents. These can leave lasting stains if left unaddressed. For those stubborn marks that refuse to budge, concoct a mixture of baking soda and water to form a paste. Apply this paste to the affected area, allowing it to work its magic for a few minutes before delicately scrubbing with a soft cloth.
Furthermore, exercise caution when handling heavy items near the sink, as inadvertent drops may result in chips or cracks in the enamel. To provide an added layer of protection, consider employing sink mats or soft cloths when washing dishes or utensils to safeguard the sink’s surface from unnecessary wear and tear.
In conclusion
Restoring a rusted cast iron sink to its former glory is a rewarding and transformative process. By diligently following the steps outlined above, you can effectively remove rust, apply a fresh coat of paint, and prolong the life of your sink. Remember to prioritize safety by wearing protective gear and working in a well-ventilated area.
With patience and attention to detail, you can achieve a beautifully refurbished sink that enhances the aesthetics of your space while also preserving a piece of history. So roll up your sleeves, embrace the challenge, and enjoy the satisfaction of revitalizing your cast iron sink to its pristine condition.
Share the post "How to Clean and Paint a Rusted Cast Iron Sink?"

You can bring new life to the interior of your home just by adding a new coat of paint to Read more

Wood blinds are highly energy-efficient and can add a lot to the warmth of your room interiors. These can also Read more

Concrete houses appear more durable and stronger, but timber-made or timber & concrete fusion house designs are making a stance Read more

Although dealing with epoxy is not at all difficult, you are prone to make mistakes that can arise due for Read more

Douglas Becker (aka Painter Doug) has over twenty years of experience as a painter in Adkins, Texas. At present, he resides in Florida with his family.
From painting multi-storeyed houses, condos, and apartments to large commercial buildings and small offices, he had served various customers in areas not only in Adkins but also in Southwest Florida, Sarasota, Naples, and many more. To know more about him check here.