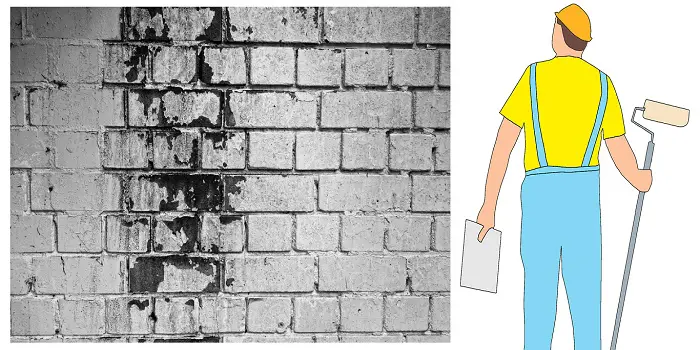
The primary reason your bathroom walls and ceilings become so moldy is the moisture present inside.
This creates a warm, humid environment that is ideal for the growth of mold spores on your bathroom walls.
Every time you take a hot shower or simply wash your hands and face in your bathroom sink, this type of ideal habitat is created for these microscopic organisms to grow and thrive.
And the bad part is, once they grow, they keep on spreading rapidly.
Although you can paint over moldy walls in your bathroom, you should avoid painting them.
Because if you paint over this unhygienic mold, all you will be doing is risking your family’s health.
What's Here in the Article:
Signs of Mold Problem in Bathroom
Keep in mind that the formation of dark spots on the walls, cabinets, or around the windows in your bathroom is not always a sign of mold.
You will need to identify them by their color and smell.
Although the most common is black mold, they may range in color from white to green, brown, and gray.
Plus, if it smells musty and damp (in your bathroom, laundry room, or basement), it is very obvious that mold is present.
You can even tell the difference between mold and mildew by checking the color and texture.
| Mold | Mildew |
|---|---|
| Color: Green or black | Color: White, gray, or yellow |
| Texture: Fuzzy or slimy | Texture: Fluffy or powdery |
| It can grow underneath anything that is wet | Usually grows in moist and warm areas |
Bubbling, peeling, cracking, or flaking paint in your bathroom due to moisture is also an indication that there can be a mold or mildew growth present.
You can simply check the visible spots and areas by pressing the surface with your fingers.
If the area feels soft, cooler, or damp, you need to be cautious and act fast.
How to Clean Molds in Your Bathroom?
To get rid of black mold and mildews in your bathroom, you have two options…
You can either kill the mold yourself or opt for mold remediation services.
Mold remediation services will make use of the right tools that will solve the problem from its root in a more professional way.
However, if you think the problem is not very severe and you can deal with it yourself, you can go with a DIY route and follow the easy steps mentioned below…
1- Use Bleach and Water
One of the best ways to clean the mold on your bathroom walls (before painting) is to use bleach diluted in water.
Do not use undiluted bleach if you are concerned about getting the old paint damaged on the walls.
- Prepare a mixture by pouring 1 cup of bleach into 1 gallon of water in a spray bottle.
- Directly spray this mixture onto molds and allow it to set in for 15 to 25 minutes.
- If the wall surface is rough, you can use a stiff brush to scrub the molds off the walls.
- Rinse the surface with clean water
- Open all the windows and doors, so everything can completely dry
Keep in mind that bleach is a powerful mold cleaner solution to use on hard surfaces like tubs, showers, basins, and tiles in the bathroom.
But it is not very effective for cleaning molds on porous surfaces like wood.
This is simply because mold spreads its roots deep into the porous surfaces.
And just wiping the surface will not kill the molds that are thriving beneath the surface.
2- Treat the Wood with Boric Acid
Once you have scrubbed the mold, you need to treat the wooden areas (like doors and framing) and other porous surfaces.
Let them dry completely before you start with the mold-removing process.
You can speed up the drying process by using heat (if the bathroom is cold) or by providing ventilation through a fan.
Boric acid is best for treating wood frames, windows, and doors as it aims to kill the spores and prevent mold from growing in the future.
- Mix water and boric acid, and apply it over the dried area with a brush
- Let it be there for half an hour so that it can dry
- After that, you can begin with the priming and painting process over the surface
3- Apply the Anti-Mold Primer and Paint
After you have treated the molds on your bathroom walls, start with primer application using a bristle brush or a roller.
When picking the primer, it is best to choose a semi-gloss or satin primer that contains mildewcide.
It will be more water-resistant than other primers and is, therefore, the best option for rooms with high humidity and moisture.
- Once you have primed the area, allow it to dry for a couple of hours
- Then sand the walls lightly with medium-grit sandpaper
- Then it’s time to apply at least two coats of mold-resistant paint
It’s good to choose lighter colors with flat and matte paint finishes.
These will benefit the smaller areas like the bathroom and kitchen by making them look larger.
Some of the best mold-sealing primers and paints you can use are:
- Zinsser Mold Killing Primer
- Zinsser Perma-White Paint
- Benjamin Moore Regular Aura Interior Semi-gloss
- Benjamin Moore Aura Bath and Spa Paint
- Sherwin Williams Duration Home Interior Satin, or Semi-gloss
All these products are incredibly effective in preventing molds.
Remember, anti-mold paint is not designed to kill the molds.
Instead, these mold inhibitors will help in stopping the mold from future attacks.
Removing Mold From Painted Walls
If your goal is to only remove the mold, and you do not plan to repaint the walls, it’s good to use a natural solution that is safe for painted walls.
White vinegar solution acts as the best natural mold remover if you want to clean painted or wallpapered walls in your bathroom.
- Take two cups of hot water in a bowl.
- Add two tablespoons of borax and 1/4 cup of white vinegar
- Mix and pour the prepared mixture into a spray bottle
- Spray it on painted walls and scrub gently to wipe it clean using a soft sponge
- If you still see traces of mold, spray the vinegar solution again and let it sit for 10-15 minutes before wiping
Tips for Preventing the Mold after Remediation
Mold can get worse with time, and you don’t want them to spread in your home. Right!
Even after you are done fixing the mold, you still need to take a few steps to prevent the fungus from growing again.
You have to maintain a mold-free environment on your property, and here are some ways to do that…
a) Keep Your Home Dry and Ventilated
Since mold thrives in a moist environment, keeping your place properly ventilated (and dry) is the most important thing you can do to prevent their growth.
For this, you should:
- Have an exhaust fan installed to remove excess moisture
- Run the squeegee on your tub and shower walls right after the shower
- Remove sponges, loofahs, bottles, and other items from the shower when not in use
- Clean the bathroom drains regularly and make sure they are draining well
Keeping such a check will ensure that you take care of the problem on time and keep the molds from growing.
b) Fix The Leakages As Soon As Possible
You should also keep a check from time to time in your home’s spaces where a leak might occur.
If there is any plumbing leakage or flooding, make sure it is fixed, cleaned up, and dried.
c) Wash Your Rugs and Towels Regularly
If you leave your bathroom rugs, towels, or mats damp (or unwashed) for long, it can become a breeding ground for molds very fast.
So, it’s good to wash them at least once a week.
This will help in maintaining a cleaner and healthier bathroom.
Final Words
That was your complete guide on removing mold from bathroom walls.
Keep in mind that a bathroom or your kitchen will always be moist, and you need to ensure you are keeping an eye on mold growth.
Even if you get it remediated by a professional, you will still need to take preventative steps to prevent mold growth in the future.
So, follow the steps above; hopefully, you will never have to worry about molds and mildews again.
Share the post "How to Kill Molds in Your Bathroom Before Painting?"

Douglas Becker (aka Painter Doug) has over twenty years of experience as a painter in Adkins, Texas. At present, he resides in Florida with his family.
From painting multi-storeyed houses, condos, and apartments to large commercial buildings and small offices, he had served various customers in areas not only in Adkins but also in Southwest Florida, Sarasota, Naples, and many more. To know more about him check here.
