
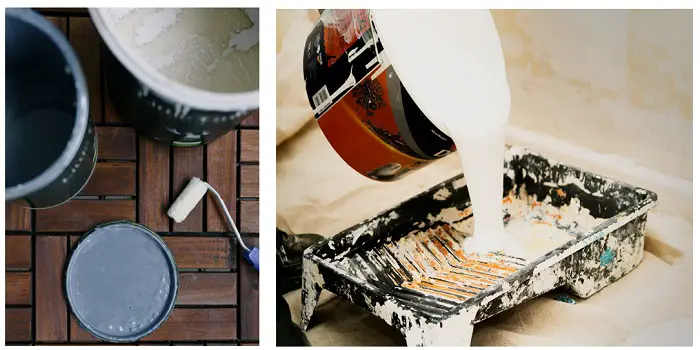
Prepping a surface for painting isn’t just about grabbing a brush and hoping for the best—it’s about giving your paint the perfect stage to shine.
And when it comes to stripping away grease, fingerprints, wax, and stubborn grime, rubbing alcohol quietly becomes the unsung hero of the whole process.
Used correctly, rubbing alcohol can save you from streaks, peeling, and all the frustrating “why-does-this-look-like-that?” moments.
So before you dip that brush, let’s talk about how a simple bottle of rubbing alcohol can turn a good finish into a flawless one. Here, I will discuss how to make it work for you like a pro.
What's Here in the Article:
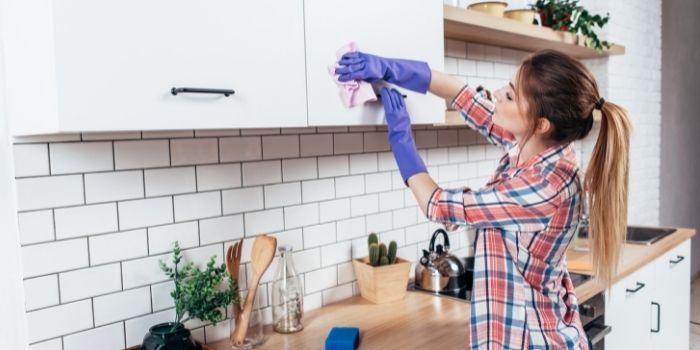
Paint Prep with Rubbing Alcohol
Rubbing alcohol is isopropyl alcohol that has been slightly diluted with water and is often used as a disinfectant.
The amount of water supplied actually influences the strength of the solution. So, when cleaning the surfaces for paint prep with rubbing alcohol, concentration is critical.
The two most common concentrations on store shelves are 70% rubbing alcohol (7:3 ratio of alcohol and water, respectively) and 99% rubbing alcohol (99:1 ratio of alcohol and water, respectively).
Contrary to popular belief, a lower concentration may be a more efficient disinfectant because the increased water content slows evaporation and allows the alcohol to kill germs for longer.
Here is a step-by-step process for cleaning the surfaces from rubbing alcohol:
Step 1: Grab the right bottle — head to the store and pick up 70–99% isopropyl rubbing alcohol (70% is safest for general use; 90–99% evaporates faster).
Also buy nitrile gloves, lint-free cloths, and a small spray bottle if you don’t have one.
Step 2: Clear and sand (if needed) — remove loose paint, heavy dirt, or flaky bits with a scraper or light sanding. Alcohol is not a substitute for mechanical prep; it’s for cleaning what’s left.
Step 3: Ventilate and protect — open windows, turn on a fan, wear gloves and eye protection, and keep flames and sparks away. Rubbing alcohol is highly flammable.
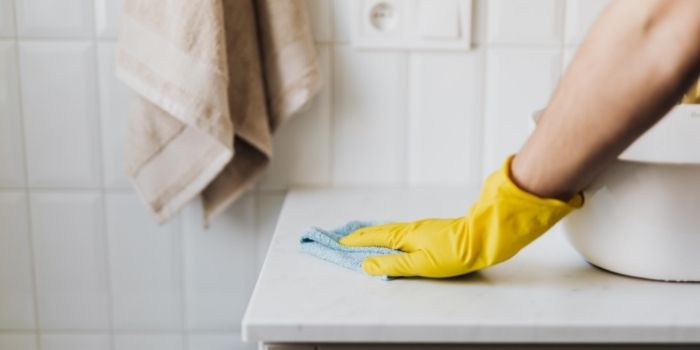
Step 4: Apply the alcohol — pour into a spray bottle or dampen a lint-free cloth.
Lightly spray or wipe the surface in small sections so the alcohol stays wet long enough to dissolve oils and residues. For greasy spots, let it sit 10–20 seconds.
Step 5: Wipe clean — use a fresh lint-free cloth and wipe in one direction to lift contaminants (don’t rub in circles or re-deposit grime).
Flip to a clean side or swap cloths often. Repeat until the cloth shows no residue.
Step #6 Let it fully evaporate and inspect — alcohol dries quickly; wait 1–5 minutes, then run your hand over the surface to check for any tackiness or dust.
If it feels clean and dry, you’re ready to prime or paint.
Bonus safety & finish tips: work in small sections to avoid streaks, avoid using on delicate plastics without testing, and store alcohol out of direct sunlight.
A clean surface isn’t glamorous — but it’s the secret behind a paint job that actually lasts.
Can Denatured Alcohol Be Used for Paint Prep?
Yes, you can use denatured alcohol for paint preparation, but with a bit of caution.
It’s a stronger solvent than regular rubbing alcohol and works very well for removing oils, grease, wax, old polish, and light contaminants from wood, metal, and some plastics.
It also evaporates quickly, which helps surfaces dry fast before priming or painting.
However, because it’s harsher, always test on a small area first, especially on plastics or pre-finished surfaces.
Use gloves, ensure good ventilation, and avoid open flames—denatured alcohol is highly flammable. When used correctly, it delivers an excellent paint-ready surface.
More Ways Rubbing Alcohol Helps With Paint Preparation
What makes rubbing alcohol so useful for paint preparation is the same reason it shines in other cleaning tasks—it cuts through oils, residues, and buildup effortlessly.
The same bottle you use to prep a wall or cabinet can also make quick work of doorknobs, counters, and other hard surfaces, leaving them residue-free.
When diluted with water, it even becomes a gentle cleaner for glass—perfect for clearing mirrors or glass panels you plan to tape off before painting.
And if old stickers, labels, or stubborn glue are stuck on a surface you want to refresh, rubbing alcohol does the heavy lifting there, too.
Simply soak the spot or place a saturated cotton ball over the adhesive, wait about 10 minutes, and then buff it away or lift it with a rubber scraper—giving you a perfectly clean, paint-ready area.
Even outside the house, its cleaning power is put to work: many gardeners mix equal parts alcohol and water (with a touch of dish soap or sugar soap) to create a simple pest-control spray.
While not directly part of painting, the same principle applies—alcohol’s ability to break down surfaces and cling effectively makes it a reliable tool in both prep and maintenance.
Always test first, whether it’s a plant leaf or a delicate surface, and you’ll get the best results with minimal risk.
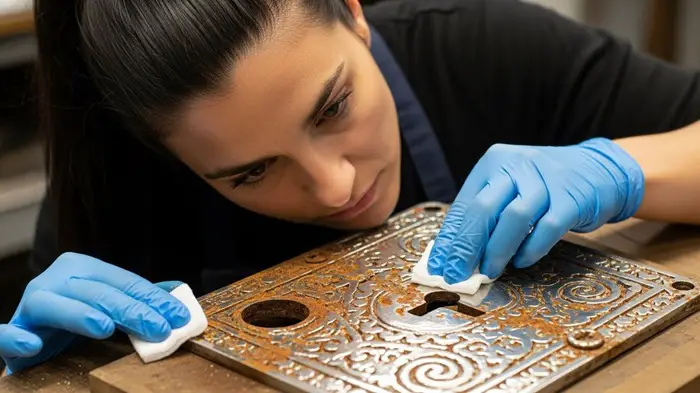
Can I Use Rubbing Alcohol to Remove Rust From Metal Surfaces?
Short answer: yes — but not as your primary rust remover.
Rubbing alcohol (isopropyl or ethyl) is excellent as a degreaser and final wipe before painting metal, but it won’t chemically convert or grind away rust.
Think of it as the polish and last-minute stagehand that prepares the stage — it gets oils, salts, and fingerprints off so primers and paints can bond — but you’ll still need mechanical or stronger chemical methods to actually remove corrosion.
Is alcohol safe on metal?
Generally, yes. Alcohols don’t corrode steel, aluminum, copper, or most plated finishes, and they evaporate quickly without leaving residues.
They’re usually safe on most bare and painted metals, but they can soften some plastics, rubber seals, or certain thin coatings, so test a hidden area first.
Also, remember: alcohol is flammable — ventilate and keep sparks away.
Here’s how to clean metal before painting…
1- Mechanical removal: remove loose scale and flaking paint with a wire brush, sanding (coarse to fine), or a rotary tool. For heavy rust, use a wire wheel, flap disc, or sandblaster.
2- Chemical treatment (optional): Apply a rust converter (phosphoric-acid-based) or a dedicated rust remover (oxalic/phosphoric acid formulations) for areas you can’t fully abrade. Follow product instructions and neutralize/rinse if required.
3- Solvent wipe: remove sanding dust and remaining oils with a solvent. Stronger solvents (acetone, lacquer thinner, or mineral spirits) remove heavy grease and old polish better than alcohol. Use them first if the surface is grimy.
4- Final wipe with rubbing alcohol: after heavier solvents and full drying, do a final wipe with 70–99% isopropyl alcohol on a lint-free cloth to remove any remaining film and accelerate drying just before priming/painting.
5- Prime promptly: paint adheres best to a clean, dry, and slightly roughened surface. Apply a metal-appropriate primer quickly to avoid flash rust.
Comparing effectiveness with other solvents
Rubbing alcohol is excellent for light cleaning, quick drying, and removing fingerprints or surface salts before painting—but it’s not the strongest option for heavy grease, oils, or baked-on grime.
Stronger solvents like acetone or lacquer thinner cut through contamination much faster, while mineral spirits offer slow, deep cleaning for oil-based residues.
For rust itself, only dedicated acid-based rust removers or converters are truly effective. The table below gives a quick, side-by-side look at how rubbing alcohol compares.
| Solvent Type | Strength for Degreasing | Rust Removal Ability | Surface Safety | Best Use Case |
|---|---|---|---|---|
| Rubbing Alcohol (IPA/Ethanol) | Light | Very low | Safe on most metals; may affect some plastics | Final wipe before painting; removing fingerprints, salts, light oils |
| Acetone | Very high | None | Harsh on plastics & coatings | Heavy grease, adhesives, resin, stubborn contaminants |
| Lacquer Thinner | Extremely high | None | Harsh; use with caution | Stripping old finishes; deep degreasing |
| Mineral Spirits | Moderate–high | None | Safer on coatings; gentle on metals | Cutting oil-based grime; longer working time |
| Phosphoric/Oxalic Acid Rust Removers | Low (not for grease) | High | Safe when used correctly | Converting/dissolving rust before priming |
| Rust Converters | None | High (chemical conversion) | Designed for metal | Treating rust that cannot be fully removed mechanically |
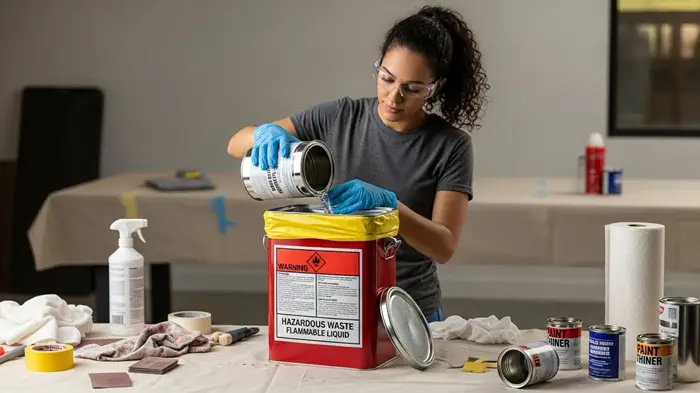
Safety Precautions and Safe Disposal of Rubbing Alcohol After Paint Prep
Working with rubbing alcohol during paint prep is incredibly effective—but like any strong solvent, it deserves a little respect once the job is done.
From disposing of leftover alcohol to clearing out that sharp chemical smell, a few smart precautions can keep your workspace safe, your home fresh, and your cleanup routine perfectly professional.
Here’s how to handle rubbing alcohol the right way—without turning your project into a chemistry experiment gone wrong.
1. Dispose of rubbing alcohol the right way
Contrary to what many people assume, the concentration of rubbing alcohol (70%, 91%, 99%) doesn’t change how you dispose of it—the method remains the same. For small household quantities, you can safely pour it down a residential drain.
Just run the tap first, slowly pour the alcohol while water is flowing, and let the water run for a few more seconds afterward. The dilution helps neutralize flammability and prevents fumes from lingering in pipes.
2. Septic systems: use common sense
If you’re on a septic system, no need to panic—a small amount of rubbing alcohol won’t harm the bacterial balance.
Problems only arise if someone decides to dump liters of IPA straight into the tank (please don’t be that person). A typical bottle used for paint prep cleanup is perfectly manageable for your system.
3. Know where not to dump it
Rubbing alcohol may evaporate quickly, but that doesn’t make it eco-friendly to toss outdoors.
Never dump it onto soil, driveways, or anywhere it can reach storm drains. Stormwater systems lead directly into natural waterways, where alcohol can harm aquatic life.
If you’re dealing with large volumes or unclear local regulations, call your municipal hazardous waste office—they’ll guide you toward proper disposal.
4. Handle the lingering smell (it happens!)
IPA has a sharp, unmistakable scent that loves to overstay its welcome. Residual fumes can cause headaches or dizziness, so it’s worth clearing them out quickly.
Start by physically removing any leftover alcohol. Surfaces like countertops or tiles can be wiped with a damp cloth. Upholstery is trickier—blot with a paper towel first, then wipe gently with a lightly dampened cloth. The goal is to remove, not smear.
5. Let fresh air do the heavy lifting
Even after the alcohol is gone, the odor often floats around like an uninvited guest. The simplest fix is ventilation.
Open doors between rooms to improve cross-flow, crack windows, and turn on a fan. Moving air breaks up concentrated vapors and helps them disperse faster. Think of it as “airing out” your home’s sinuses.
6. Mask the odor (but do it smartly)
If the smell hangs on longer than expected, go ahead and mask it—but choose wisely.
Use odor-neutralizing sprays, not perfumed air fresheners, which can mix with IPA fumes and create an even harsher scent.
True neutralizers work by breaking down odor molecules, allowing the alcohol smell to fade rather than compete with a floral cloud of confusion.
7. Flammability precautions you shouldn’t ignore
Rubbing alcohol evaporates fast, but while it’s present, it’s still highly flammable. Never toss alcohol-soaked clothing directly into a washing machine—the vapors inside a warm or electric environment can pose a fire risk.
Hand-wash them first until the smell dissipates. Also avoid wearing alcohol-damp clothes anywhere near open flames, fireplaces, candles, or even enthusiastic incense sticks. Respect the chemistry: IPA cleans beautifully, but it definitely has a fiery personality.
Related FAQs
Will rubbing alcohol take paint off of plywood?
Rubbing alcohol can soften or partially remove water-based paints on plywood, especially if the finish is thin or not fully cured. It’s far less effective on old or oil-based paints.
Because plywood is porous, alcohol can soak in and raise the grain, leaving the surface rough. If you’re trying to strip paint, you’ll still need sanding or a proper paint remover. If you’re cleaning before repainting, use alcohol gently and avoid soaking the wood.
What surfaces should you not use rubbing alcohol on?
Avoid rubbing alcohol on unfinished wood, shellac finishes, certain plastics (like ABS or polystyrene), rubber components, and some automotive clear coats.
It can dull soft finishes, crack or craze fragile plastics, and dry out rubber seals. It also shouldn’t be used on porous stone like granite or marble, as it may strip sealants.
Does isopropyl alcohol react with or damage old paint?
Isopropyl alcohol can soften, dull, or partially dissolve older or water-based paints, especially if they’re worn, uncured, or low-quality.
On oil-based or fully cured coatings, it generally causes minimal harm but may still remove surface contaminants or gloss.
Extended contact or vigorous scrubbing can degrade clear coats or aged finishes. If you’re unsure, always test with a small dab on a hidden area—old paint can be unpredictable, and alcohol works faster than expected on weaker films.
Final Thoughts
Rubbing alcohol may look like a simple household solvent, but it plays a surprisingly important role in achieving a flawless, long-lasting paint finish.
Its ability to cut through light oils, fingerprints, and surface contaminants makes it an ideal final prep step, especially on metal, wood, and other hard surfaces.
Still, it’s not a miracle worker—alcohol won’t remove rust, heavy grease, or old paint by itself, and it shouldn’t be used on certain delicate materials without testing first.
When paired with proper sanding, mechanical cleaning, and stronger solvents where needed, rubbing alcohol becomes the perfect “last wipe” that ensures primer and paint bond cleanly.
Used safely—with ventilation, careful disposal, and awareness of flammability—it’s a reliable, affordable, and effective tool for any DIYer or professional.
Treat it as one part of a complete preparation process, and your paint projects will reward you with smoother finishes and better durability.
Share the post "How to Use Rubbing Alcohol for Paint Prep?"

People use paint thinners for different purposes. Usually, these solvents help in reducing the viscosity of thick oil-based paints. But Read more
Paint thinner is one essential item you will use whenever you want to paint the walls or furniture in your Read more
Siding is a popular choice because it provides a strong layer of protection for the exterior of homes. But even Read more
In the increasingly complex world of varying industries, it is inevitable that several chemicals and compounds will be used across Read more

Douglas Becker (aka Painter Doug) has over twenty years of experience as a painter in Adkins, Texas. At present, he resides in Florida with his family.
From painting multi-storeyed houses, condos, and apartments to large commercial buildings and small offices, he had served various customers in areas not only in Adkins but also in Southwest Florida, Sarasota, Naples, and many more. To know more about him check here.