
Applying shellac polish is one of the easiest ways out there by which you can refinish your old furniture to bring that shine back.
Not only does it offer a very fine finishing to the wood furniture, but it also makes the natural grain of the wood more prominent and hence beautiful.
While you can apply shellac polish on a variety of woods like mahogany, walnut, teak, and even fine veneer woods, it’s important to thin it using the proper solvent and know how to apply it correctly.
This will help you get the maximum out of the polish.
What follows are a few things you will need to know about shellac polish, how to thin it correctly, what solvents to use, and how to apply it right.
So, let’s dive in…
What's Here in the Article:
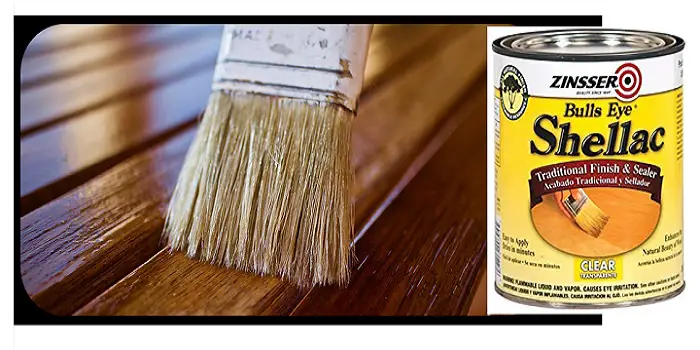
What is Shellac?
Shellac is basically a resinous product that is derived from the resinous pigment secretion of the female “lac bug” (Kerria lacca).
These insects usually colonize the branches of the host trees (mostly found in the forests of Thailand and India).
The resinous product “Shellac” that is obtained as flakes is dried, processed, and dissolved in ethanol to get liquid shellac which is generally used as a wood finishing polish, food glaze, and brush-on colorants.
Available in two colors (white and orange), shellac can be tinted and used to provide desirable looks on both light and dark woods.
The Pros:
For ages, shellac has been used to polish very fine furniture by homeowners, as well as professional painters and contractors.
Some of the benefits it offers include:
- Easy to apply
- It can be applied in several thin coats
- Can be brushed, sprayed, or French polished
- Offers a beautiful natural golden color to wood
- Mistakes while the application can be easily fixed
- Excellent sealer and can easily seal wax, silicone, oil, etc
- The polish dries fast and can be re-coated after 3-4 hours if needed
The Cons:
The biggest drawback to using shellac polish on furniture is – it’s not very durable.
Shellac polish on the furniture can be easily damaged as it can dissolve fairly well in both water and alcohol.
Ever noticed those “white rings” on old furniture? It’s due to fading away of polish!
Also, because shellac finishes absorb the moisture very fast, it can turn white or hazy with age due to humidity in the air.
It’s therefore important that you know how to thin the product and how to apply the polish in the right way.
A few other disadvantages of using shellac are:
- Sensitive to hot objects
- It can be harder to spray than lacquer because it’s thicker
- Must be mixed fresh, not a ready-made store-bought product that can be used directly

Why Do You Need to Thin Shellac?
The term “cut” is often used when thinning shellac.
It is basically the amount of alcohol you will need to add to dry shellac flakes.
Since store-bought dry shellac flakes are sold in several cuts (three- to four-pound cuts are most common), you will need to thin it accordingly by dissolving it in the right solvent.
Thinning the shellac is important to provide natural consistency to the product which makes it easier to apply.
This not only seals the wood well but will also help to get a very fine smooth finish on the wood surface.
What Can You Use to Thin Shellac?
Denatured alcohol at 95% (also called ethanol or ethyl alcohol) is the best solvent that should be used for thinning all the shellac flakes.
This shellac thinner will dissolve the flakes very well to obtain top-quality varnishes or base coats.
Plus, it can also be used for cleaning brushes that have been used for shellac or applying French Polish.
Alcohols like methanol and ethanol are good to dissolve and thin shellac when you want to apply it as a sealer coat.
But if you want the solvent just for cleanup, you can also use lacquer thinner, acetone, ammonia, or mineral spirits.
When buying the best alcohol for shellac, pick the one that contains less than 5% water.
Everclear and Diesel are the two most reliable brands that can be checked when buying nearly pure alcohol.
How to Thin Shellac and in What Ratio?
Shellac flakes should be dissolved and thinned only in a properly labeled glass jar.
This means you should NOT use any kind of plastic or metal container for thinning the shellac polish.
- Measure the amount of dry shellac
- Pour it into denatured alcohol and let it sit to dissolve
- Shake the container frequently to avoid getting lumps of shellac at bottom
Depending on the quality and freshness of the flakes, it may take a day or two to get dissolved completely.
Remember, shellac has a very short shelf life, and old shellac does not work very well.
So, it’s recommended that you mix only the small amount that you will use within a few days.
What about the Thinning Ratio?
Mostly shellac is dissolved in a ratio that ranges from two- to five-pound cut.
“Cut” is a term used to describe a particular ratio in which the amount of shellac (in pounds) is dissolved in a gallon of alcohol.
For example:
4lb. of shellac flakes, when dissolved in a gallon of alcohol, gives a well-thinned four-pound cut or 4-lb. cut of shellac
When thinning the white shellac, before application, you should decide your purpose and also refer to the manufacturer’s guidelines.
For sealers, you will most likely need to thin 1 part of 3- or 4-pound-cut shellac with 4 parts denatured alcohol.
However, for finish coats, thinning 1 part of 4-pound shellac with two parts of alcohol will do the job well.
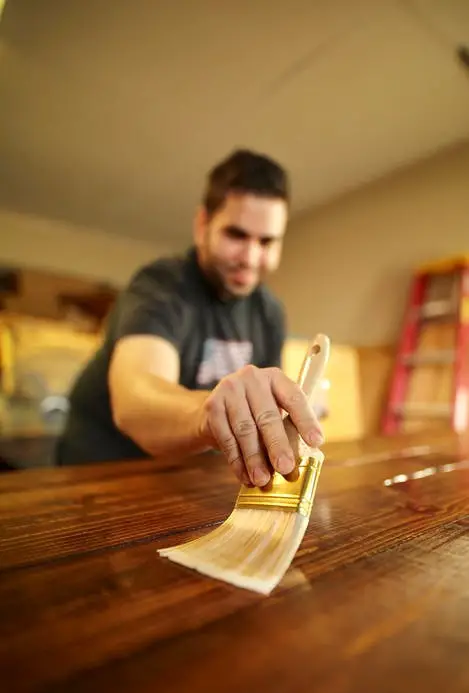
How to Apply and Get Smooth Finish with Shellac?
Shellac application can be laborious and very time-consuming if you do not know the right process.
Plus, it may end up delivering a completely messy product instead of getting the most desirable smooth finish.
So, here are the steps you will need to follow when applying the shellac polish.
Step 1.
Clean the surface well with a piece of soft cloth
Step 2.
Using a good-quality brush, apply freshly prepared shellac that is thinned to a 1-pound cut
Step 3.
Make sure you work on a single area at a time and apply the smooth strokes along the wood grain.
Step 4.
Keeping the wet surface, try to apply the shellac polish from dry to wet edges.
Step 5.
After you have coated the surface, finally tip off the shellac along the wood grains with another clean, dry brush.
Also, remove the brush marks and smooth the shellacked surface completely to get a shiny finish.
Recoating the Surface
Shellac will usually take about 30 minutes to dry.
However, if you need to recoat the surface, you can do it after 4 hours.
This will allow enough time to make sure that the shellac isn’t soft and has dried completely.
After the shellacked surface is dry, follow these steps:
- Using a padded sanding block with 320 grit sandpaper, lightly sand the surface
- Clean the sanded dust from the surface using a tack cloth
- Reapply the second coat of shellac as you have done before
After the shellac is dried for 3-4 hours, you can apply a third coat if needed. Additional coats are usually added to get a smoother and shinier finish.
If you prefer a less glossy or a somewhat satin finish, you can buff between coats (and also the final finish) with a fine 0000 steel wool.
Remember, gloss from the final finished furniture surface should be rubbed and removed carefully after the shellac has hardened for about 48 hours.
Plus, you should rub along the grains of wood and not across the grain.
After you have attained the right finish, allow the piece of furniture to stand for 48 hours.
Finally, you should apply a good-quality non-silicon-based paste wax to the finished wood surface of your furniture piece.
And using a soft cloth, buff the surface to get the shine.
Applying French Polish Finish Technique with Shellac Polish
French-Polish is a finishing technique that can produce a much more durable, highly polished surface than you will get with a standard shellac finish.
Surfaces, when French-polished with shellac, will have distinctive grain and much attractive color of the wood along with velvety sheen and feel.
Follow these steps to start applying a French polish finish:
Step 1.
In a glass cup, add 1 pint of 1-pound-cut shellac and about 2 tbsp of boiled linseed oil.
Step 2.
Wrap a cheesecloth in a clean, lint-free cotton cloth. Make the size of pad that easily fits into your palm.
Step 3.
Lightly dip this pad into the mixture of oil and shellac, do not soak it completely.
Step 4.
Quickly apply the coating evenly to the prepared wood surface along the grain.
Step 5.
Then rub the wood surface using a circular or figure-eight motion
Step 6.
While applying pressure and adding shellac mixture, continue rubbing in a circular motion for about 45 minutes.
Step 7.
After you have applied the shellac to the complete surface, let the surface dry for about 24 hours.
Step 8.
Reapply another coat to the surface for about 45 minutes to ensure you get an even gloss with no stroke marks or darkened spots
After the first coat, you can sand the surface lightly if you find any mistakes (like brush marks or spots) that you need to correct.
Step 9.
If needed, you can now apply a final third coat after the surface is dried for at least a week.
Step 10.
Finally, it’s time to clean the surface and apply some paste wax to the finished wood surface.
Buff it lightly to get a fine sheen that you desire.
Since shellac is a bit soft after it dries, waxing the surface becomes crucial to seal and protect the surface.
Remember, for polishing with this technique; you will need to use only water stains or spirit-based non-grain-raising (NGR) stains under French polish.
Final Thoughts
While shellac polish can be used over a variety of different stains and fillers, it’s not recommended for bare wood.
This means you should apply shellac only to a well-prepared, sanded, and sealed finished wood surface.
The shellac color or the type of cut you should pick will most likely depend on the type of furniture wood you are working on.
Regardless of shellac cut or color, make sure you thin it correctly using denatured alcohol and then patiently apply it over the surface to get the right finish.
Also, it’s good to sand lightly between the coats to smooth the surface and remove any finish imperfections.
Share the post "How to Thin and Apply Shellac Polish to Wood Furniture?"

Made from the formulated mix of paraffin, carnauba wax, and beeswax, wood wax includes a rich blend of wood enhancers Read more
Epoxy resin is a unique chemical compound that is popular for its strong adhesive quality. Scientifically speaking, epoxy resin is Read more
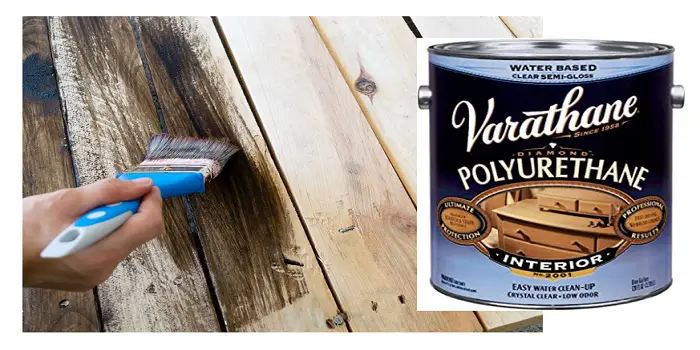
A brand of polyurethane that is made from Rust-Oleum, Varathane is designed to protect the wood by providing a clear Read more

You may have heard of wood preservers, but do you really know what they are, what are their importance, and Read more

Douglas Becker (aka Painter Doug) has over twenty years of experience as a painter in Adkins, Texas. At present, he resides in Florida with his family.
From painting multi-storeyed houses, condos, and apartments to large commercial buildings and small offices, he had served various customers in areas not only in Adkins but also in Southwest Florida, Sarasota, Naples, and many more. To know more about him check here.