
One of the benefits of wooden window frames is how long they survive. With proper maintenance, wooden frames can last for decades, often outlasting other materials such as vinyl or aluminum. This resilience is due to the natural strength of wood and its ability to be repaired and refinished over time.
Additionally, wooden window frames provide excellent insulation, which can help in maintaining indoor temperatures and reducing energy costs. Their timeless aesthetic also adds a classic, elegant touch to any home, enhancing its overall value and curb appeal.
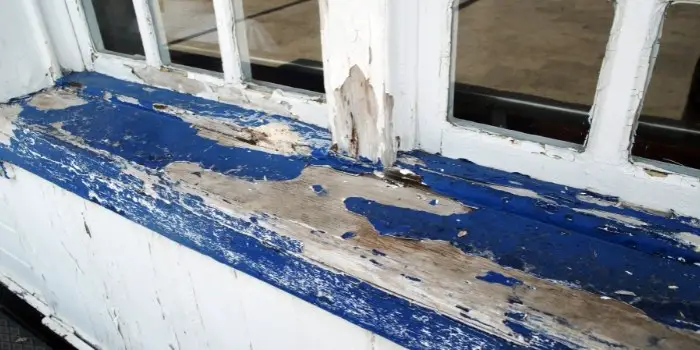
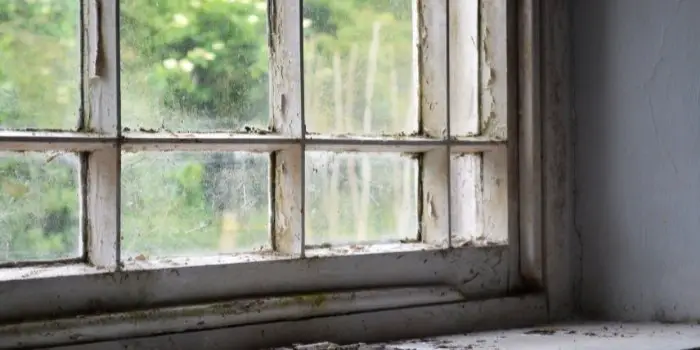
As a drawback, outdoor window frames must be ready to withstand extreme temperatures, rain, wind, and snow which means painting and refinishing them from time to time for better protection.
However, since all of these conditions may wear down the paint on your window frames, removing the old layer of paint is essential for a professional finish when it’s time to repaint. But depending on how old the paint is, its thickness, and the kind of paint layer, it may not always be simple to remove.
Worry not; I have listed down a few easy steps and techniques that can help you take the paint off your window frame and sill in no time. Just go through them before you start with your job.
What's Here in the Article:
Removing Paint From Window Frames and Sills
When it comes to stripping the paint from your window sills and frames, first and foremost, you must assess if it is in your best interests to remove the paint.
This is because, depending on the technique used, removing the paint may occasionally cause some harm to the window. So, you need to choose the products and processes that are less harmful and more effective.
To remove paint as easily and painlessly as possible, follow the step-by-step instructions I have mentioned here…
Step 1. Set up the Area
Commercial paint removers for wood contain a strong chemical. Accidental spills might cause harm, and the peeling paint could make a huge mess.
As a result, your first step of action should be to place a waterproof dust sheet or tarp under the window. Check that it is secure and that the surrounding area is thoroughly covered.
Step 2. Take precautions
Next, put on your best outfit that can help you stay protected during the entire process.
A pair of goggles will keep the fumes out of your eyes, and a respirator will keep them out of your lungs. Additionally, to protect your skin from chemical remover put on high-duty waterproof gloves made of latex or rubber.
Step 3. Use the Paint Stripper
When refurbishing your windows, employing a paint stripper is the most straightforward method to achieve a high-quality paint job. While it may require some time and effort, the process is not overly complex and proves to be highly beneficial in the long run.
Some common brands include Citristrip, Peel Away, and Klean-Strip. Before picking one, look for products that are specifically formulated for wood surfaces and follow the manufacturer’s instructions carefully.
- Use a generous amount of stripper on your window frame, applying it with a low-cost disposable paintbrush.
- Work in small sections with firm strokes.
- Ensure the stripper is thick enough to penetrate the paint’s surface, but be cautious not to let it drip or run down the frame.
Step 4. Wait
After applying the stripper, let it sit for approximately 20 minutes, although the duration may vary based on the type and condition of the wood as well as the specific paint remover you’re using.
Adhere to the manufacturer’s instructions and avoid leaving the paint stripping gel on the window for too long to prevent damage to the frame.
Step 5. Scrape Away the Peeling Paint
After the designated time, you should notice signs that the paint remover is working, such as bubbling, uneven appearance, or peeling of the paint.
Once you see the signs, scrape the paint off the frame using a scraper tool. You should be able to take the paint layer off in strips if you can move the scraper beneath the paint slowly. Make sure to work carefully; you don’t want to harm the structure even by mistake.
If there is still a lot of paint on the surface or you are having difficulty scraping it off, you may add a second coat of paint-stripping gel and wait for some time.
Step 6. Brush the Frames
When most of the paint has been removed, use wire wool or a wire brush to gently remove the paint from any crevices, wrinkles, or curves.
You may be a bit more aggressive with this, but be careful not to harm the wood. Then wipe clean the frames with a moist cloth to remove any residue.
Step 7. Surface sanding
Go over the window frame with fine sandpaper (about 220 grit) to smooth out any scrapes or scratches to ensure the surface is smooth.
It shouldn’t take long and will give your next application of paint a much nicer finish.
Washing the Paint Off Using Water
Water-based paints (like latex or acrylic paint) are washable and can be easily removed with water exposure. So, you can use this method, if you need to remove the old paint layers from the stone window sill.
- Begin by wiping the window sill with a clean rag to eliminate any debris and dust.
- Pour detergent (or dish soap) into a bowl filled with warm water, creating a soapy solution.
- Dip a scrubbing brush into the mixture and scrub the surface. As you scrub, you should observe the paint coming off.
- Rinse the affected area with water and allow the surface to dry. Once dry, inspect the surface to ensure all the paint has been removed.
- If any paint remnants remain, scrub the area again. Finally, wash the surface to complete the process.
Can You Use a Heat Gun for Paint Removal?
A heat gun for paint removal is a tool used to strip paint from various surfaces by applying heat. It typically resembles a handheld hairdryer but emits much hotter air, usually ranging from 200 to 1,000 degrees Fahrenheit (93 to 538 degrees Celsius).
When directed at painted surfaces (like wood and stone window sill), the intense heat softens the paint, causing it to bubble up or blister, making it easier to scrape off with a putty knife or similar tool.
Heat guns are a fire danger, and if used incorrectly they can cause havoc. Caution must be exercised to avoid damaging surfaces or causing fires, especially when working with flammable materials or near combustible objects.
With that said, if you know how to use these tools properly, you can go ahead and strip your window frames and sills as it makes the job easier.
The thing you need to remember is that lead-based paints should not be removed using heat guns because the lead vaporizes and may be breathed when the paint warms up. If you are concerned about lead paint, most home improvement businesses provide DIY lead testing kits. Use them for effective and safe paint removal.
As an alternative, you can also use a sandblaster to remove unwanted paint coatings from surfaces. They work by propelling abrasive materials, such as sand or other types of media, at high speed against the surface, effectively stripping away the paint.
Tips and Warnings When Using Paint Strippers for Window Frame
There are a variety of chemical solvents available for removing the paint from the window frames and sills.
Methylene chloride or DCM strippers dissolve latex, acrylic, and oil-based paint, but it takes multiple applications to remove all of the paint, and part of it is combustible. Environmentally friendly solvents, on the other hand, need more applications and take longer to work. Paint strippers based on solvents are combustible and volatile, yet they operate swiftly. These are easily available in gel, liquid, and paste forms so, you can choose the one based on your project.
No matter what product you pick, when dealing with chemical solvents, always wear protective clothes, goggles, gloves, and breathing masks.
- If you are pregnant, never use chemical solvents or heat guns.
- Children should be kept away from places where chemical solvents are being utilized.
- Turn off the power in any rooms where flammable chemical solvents are being used as they can cause a fire hazard.
- To assist in circulating air in tiny rooms with just one or two windows, install a fan in the entryway, angled away from the area you’re working on.
- While using the chemical solvent, take periodic pauses by going outdoors or into another room. Also, you should always follow the recommendations for chemical solvent safety, storage, and use.
Final Thoughts
Painting may alter the character and appearance of your home. Removing paint, on the other hand, is not as enjoyable as putting it. Thankfully, there are several methods for removing paint, ranging from scraping and sanding to heat guns and chemical solvents.
Surprisingly, chemical solvents are the safest method to remove paint from the woodwork such as window frames and sill. If you take the time to remove the old paint before painting, you will get many more years out of it while still enjoying the pleasure of a fresh new look. Hopefully, the above steps will help you with your project and allow you to complete it faster.
Share the post "How to Strip Old Paint From Exterior Window Frames and Sills?"

You can bring new life to the interior of your home just by adding a new coat of paint to Read more
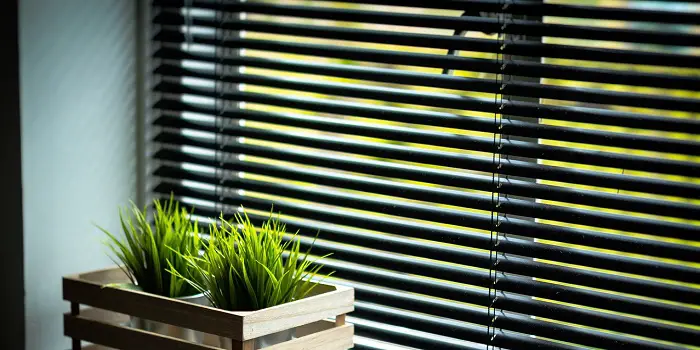
Wood blinds are highly energy-efficient and can add a lot to the warmth of your room interiors. These can also Read more

Concrete houses appear more durable and stronger, but timber-made or timber & concrete fusion house designs are making a stance Read more

Although dealing with epoxy is not at all difficult, you are prone to make mistakes that can arise due for Read more

Douglas Becker (aka Painter Doug) has over twenty years of experience as a painter in Adkins, Texas. At present, he resides in Florida with his family.
From painting multi-storeyed houses, condos, and apartments to large commercial buildings and small offices, he had served various customers in areas not only in Adkins but also in Southwest Florida, Sarasota, Naples, and many more. To know more about him check here.