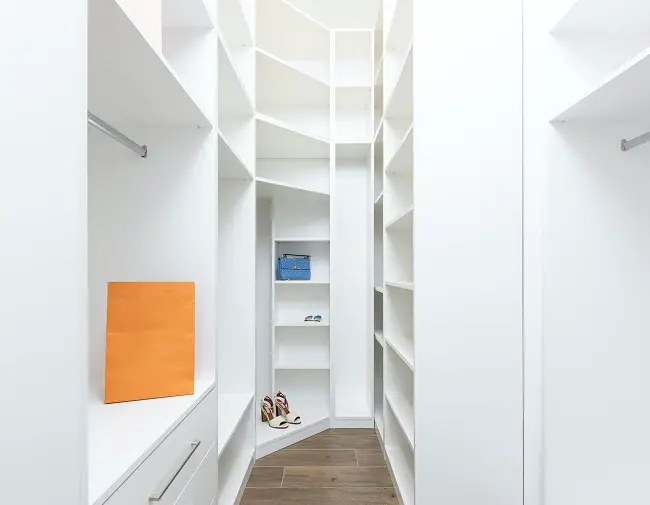
Surfaces made from melamine or laminate offer different challenges compared to standard wood materials used for cabinets, shelves, and countertops.
For those who want to refresh the appearance of wardrobes that use melamine materials, a good countertop resurfacing product such as Rust-Oleum’s Countertop Transformations works best.
A urethane-reinforced acrylic paint like INSL-X Cabinet Coat will also work great as it sticks better and helps hide scratches and imperfections.
But it’s not as simple as applying a new coat because you will need to prepare the surface well before painting.
In this article, I will try to cover in detail what melamine is, whether it should be painted, and how to paint it correctly for a long last finishing.
So, let’s dive in…
What's Here in the Article:
What is Melamine?
For those unfamiliar with the term melamine, you probably have heard of laminate which is similar material.
Both laminate and melamine are commonly used to create a wide range of items that include cabinets, shelves, and countertops.
The materials do not make up the entire product, but they do cover the surface to provide protection against otherwise porous materials such as wood.
Like laminate, melamine is a composite of different materials (usually a mixture of wood, paper, and resin) that provide a finished surface.
They are generally cheaper compared to standard wood or other construction materials.
Plus, they are already finished, so they do not need any additional treatment once in place.
However, because there are elements of plastic involved, melamine can wear down quickly if the surface is not treated.
Scratches, nicks, and dings are quite common. And when used as surfaces for countertops, they can be burned as well.
Under normal use conditions in the kitchen, it will not be long before the melamine surface looks old, battered, and in need of being resurfaced.

How to Paint Melamine?
As mentioned earlier, melamine surfaces cannot be sanded down like wood.
This is because no natural grain to melamine makes for the perfect surface to paint.
With wood, you need to expose the natural grain to provide a surface for the paint to stick.
Since melamine and laminate are designed to repel stains, they repel paint as well unless properly prepared.
While sanding will not improve the surface, it will roughen it up so that it can be painted.
If you do not prepare the surface properly, you will have a bigger mess on your hands due to paint that peels right off.
So, you will need to start the de-glossing and roughening process the right way before painting fitted wardrobes.
Step 1- Ventilate
Start the makeover by removing all items on or near the melamine surface.
Next, be sure you have plenty of ventilation.
This means opening a window and running a fan to ensure that the airflow runs from inside to outside your home.
This prevents the buildup of toxic materials in the air.
Step 2- Protect the Room
Next, place drop cloths on the floor and use painter’s tape to mark off the areas that you do not want to de-gloss and roughen.
Depending on the location of the material, this may take only a few minutes to do.
However, you should block off other areas of the home by placing plastic sheets over the entranceways.
This will prevent any dust from getting out of the room.
Step 3- Sand
Put on gloves and a dust mask or respirator. Use 150 to 180-grit sandpaper and begin the sanding process.
Be sure the area you are working in is well-lit, so you can see the gloss is removed.
If your glossy surface already has glossy paints and varnishes, they will not take the paint well.
So make sure you degloss the surface using liquid sandpaper or deglosser.
Keep in mind that the layer of melamine is relatively thin, so you’ll want to work lightly and frequently check the progress of the layer being roughened without doing too much damage.
Step 4- Wipe
Once you have removed the waxy layer, wipe the surface with a cloth with light pressure.
Once completed, use mineral spirits to clean the surface and apply lint-free cloths in the process.
When you have fully applied the product, let it dry.
Remember to wipe the hardware attached to the melamine furniture and wardrobes.
If you like, you can update the outdated handles or drawer pulls with a coat of spray paint to get the desired color.
Step 5- Primer
Now you are ready to apply the first coat of paint or primer to the surface.
If the paint you are using requires a primer, then apply that first.
Zinsser B-I-N for melamine worked great for me.
Alternatively, you can try Zinsser Bullseye 1-2-3 primer-sealer or a flash-bond primer like XIM by Rust-Oleum.
These will also work great to adhere to the paint better.
You can use a roller cover made from high-density foam to cover large surfaces.
And then, use a paintbrush to get the edges and tight areas.
Step 6- Paint
After putting up the primer it’s time to apply the paint to your laminate or melamine wardrobe.
You will need to pick a premium quality eggshell paint, satin or semi-gloss enamel paint.
While painting, be sure that you maintain a wet edge to apply the paint evenly across the surfaces that including wardrobe doors and shelves.
You can use the simple technique of overlapping slightly the edges of the paint as you put it on the surface.
This will result in an even coat if you apply all the paint before it has time to dry.
Step 7- Let it Dry
Let it dry for about six hours or depending on the instructions located on the paint can.
Keep in mind that you do not blow air on the surface as the paint dries.
You run the risk of small dust particles becoming embedded in the paint.
Instead, open a couple of windows or a window and door and place a fan outward in one opening.
This will allow the air to flow through while not collecting dust on the painted surface.
Look over the results to see that you have applied the coat evenly and there are no gaps.
Step 8- Add Additional Coats
Now that the paint or primer has dried, you can add another coat.
Use the same techniques as you did to apply the first coat.
A good rule of thumb is to apply one coat of primer and two coats of enamel paint, followed by two coats of Rust-Oleum’s Countertop Transformations.
Or, you can apply two coats of clear acrylic sealer.
This will help ensure that the paint is water and moisture-resistant, which is especially important in the kitchen or bathroom.
Step 9- Cure & Protect
Once the final coat is applied, it will take two to three weeks before it is cured enough to handle heavy objects or vigorous scrubbing.
For cabinets and shelves, this may not be much of an issue.
For countertops, you will want to place some protection on top to absorb spills.
Once the paint is fully cured, you can now place appliances and other heavy objects on top.
You may want to pad the feet of heavy objects, but the paint should be strong enough to withstand the weight.
Can You Resurface Melamine?
Since the material is made up of several different layers, it’s not possible to simply sand the surface as you would for stone or wood to reveal an underlying new surface.
Sanding melamine only makes the situation worse, so you cannot sand and expect the results to be good.
Instead, you will need to paint the surface. A good paint job will fill in the nicks, scratches, and dings.
Plus, it will add new coats to the surface, which can resist further impacts.
Painting melamine is like other surfaces, but you will need to prepare it properly to get the highest quality result.
Can Melamine Paint Be Tinted?
Yes, melamine paint can be tinted with the shade you have in mind.
You can use them to paint over melamine or laminate surfaces like bedroom cupboards and other furniture.
For example, to create a weathered look, you can tint the white paint with tones like honey yellow, blue or black.
Unless you are using an all-in-one paint/primer product, just prime the surface first with a primer specifically made for laminates and melamine.
Another great alternative to tinted melamine paints is to use an all-natural Frenchic paint that comes with eco-friendly ingredients.
The paint comes with zero toxins and has virtually no smell, so it’s great for use on materials like melamine, metal, wood, glass, concrete, and other indoor surfaces.
Other Options If You Do Not Want to Paint
If dealing with priming and painting pieces of melamine furniture seems to be a nightmare, there are a few alternatives you can try.
With these paint-free options, you need not worry about the mess and paint adhesion which can often be a problem when painting melamine wardrobes or other melamine-made furniture items.
The first trick is to dress up the wardrobes with old torn pages of children’s storybooks.
This can add a colorful, beautiful look to the bedroom furniture in your child’s room.
If you are a musician, you can use photocopied sheet music to decoupage and decorate the outdated furniture without painting.
As an enthusiastic traveler, you can also decorate the furniture in your travel-themed room with some outdated travel maps.
Final Thoughts
That is all about how to paint a melamine wardrobe, countertop, shelf, or kitchen cabinet.
The process is simple enough, but you will need to choose the right primer and paint and follow the steps to get it right.
Unless it’s an IKEA melamine cabinet (which can be hard to paint), you can paint all the sides and doors without any issues, even with a regular chalky paint finish.
Share the post "What Kind of Paint to Use on Melamine Wardrobes?"

Douglas Becker (aka Painter Doug) has over twenty years of experience as a painter in Adkins, Texas. At present, he resides in Florida with his family.
From painting multi-storeyed houses, condos, and apartments to large commercial buildings and small offices, he had served various customers in areas not only in Adkins but also in Southwest Florida, Sarasota, Naples, and many more. To know more about him check here.


