
Epoxy resin has been taking over the internet recently as a popular crafting hobby for many people looking for things to create during and after the pandemic.
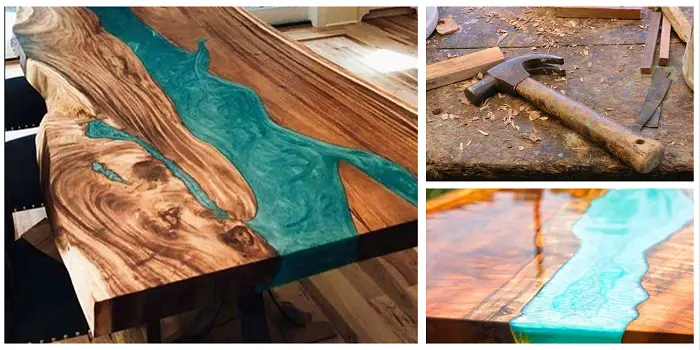
Whether you’re starting smaller projects like keychains, molds, or other smaller designs or looking to go big by crafting an epoxy resin river table, you’ve likely seen many different videos or tutorials full of suggestions for how to get the best possible epoxy pour on your project.
Mixing epoxy resin and pouring your first project can feel incredibly complicated and dangerous if you’re not taking the proper precautions.
Read through these twelve pro tips carefully to see my top suggestions for creating a safe and successful epoxy resin project on your first try.
What's Here in the Article:
How to Pour Epoxy Resin?
I have listed down all these epoxy pouring ideas and techniques from my own experiences and mistakes I have made in the past.
So, I hope you may find them pretty useful, especially if you are a beginner.
1- Check Your Tools
Knowing the tools you will need is the first step when starting with an epoxy mixing and pouring project.
Most of these items will include a sander, chisel, saw, painting bucket, stick, and the right paintbrush.
In my opinion, foam roller brushes will mostly work better than bristles for epoxy spreading. This is due to the fact that bristle brushes can leave uneven coating and will require more sanding between the applications.
Depending on the workspace and your project, you may start with the minimum. If you do not have some in your toolsbox, you can purchase a few inexpensive tools to get started.
2- Don’t Mix Epoxy Resin Brands
Some of the best epoxy resin brands are FGCI SUPERCLEAR Epoxy Resin, ProMarine Supplies Table Top Epoxy Resin, and Dr. Crafty Epoxy Resin. Still, you can do your research to decide which resin brand will work for you.
If you want to color resin, you’ll need to add your pigment or paint concentrates separately.
Before starting with the project, keep in mind that every pourable resin brand is formulated differently and uniquely. This means, that many resin formulas, when mixed, will struggle to set or seal correctly due to clashing chemical compounds within the two different formulations.
So, when you’re mixing resins, stick to similar brands in order to keep your mixing ratio and chemical compound balance the same and reduce the possibility of a cracking or bad seal.
3- Be Careful about Mixing Your Resin Ratio
Every epoxy resin can have different mixing ratios between the resin and the hardening liquid depending on the manufacturer and the specific chemical formulation of the resin.
It’s important to read the instructions on your resin carefully to make sure you know exactly what the manufacturer recommends for their specific resin formulation.
I recommend using a measuring cup to measure by volume, not by weight so that you can balance out your resin proportions perfectly.
4- Prepare Your Wood
If it’s a wood project you are working on (like a wood table, river tables, etc.), it’s important that you remove the bark using a drawknife or chisel. Then seal the surface to prevent the porous wood from making bubbles in the resin when you pour.
For sealing the wood you can simply apply a bit of epoxy on the wood surface (where you will be pouring the resin). Use a foam brush and make sure you apply more than one thin coat on the cut sides of the wood to avoid the rough edges.
5- Be Mindful of Where Your Resin is Curing
You should pay attention to where you’re leaving your resin to cure because that will affect the total length of time that it needs to cure.
Resin is extremely heat sensitive, so it’s extra important to keep the temperature of your curing location in mind when you cast it.
It takes much longer to cast the resin in cold temperatures, and you also run the risk of your resin developing a top, waxy layer that needs to be removed delicately in order to continue curing.
6- Never Ever Add Water
Never add water or allow any water to come into contact with your resin while it’s liquid or curing.
The introduction of any moisture to your resin will damage the overall quality of your resin and can cause it to separate, develop amine reddening, or even prevent it from completely curing.
Exposure to water includes extremely humid environments as well, so try to allow your resin to be mixed and cured in a dry, warm environment that’s sheltered from rain or dew.
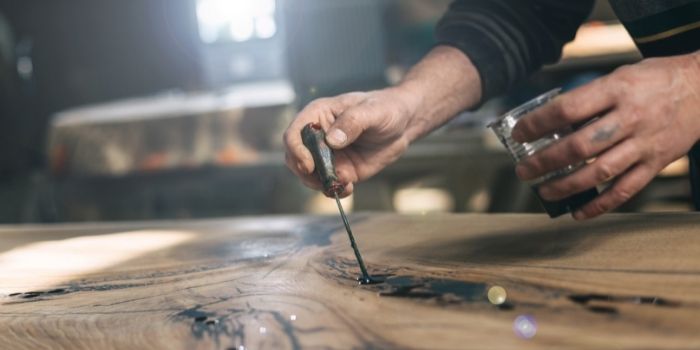
7- Pour Slowly
Start your pour by pouring just a very small amount of resin at a time.
Pouring from a smaller cup or distributor is generally easier to control the pour of your resin, which can sometimes come out very quickly if you’re not prepared.
Always leave a bit of resin in the bottom of your pour cup to help you test the curing process of your resin without disturbing or potentially damaging your project.
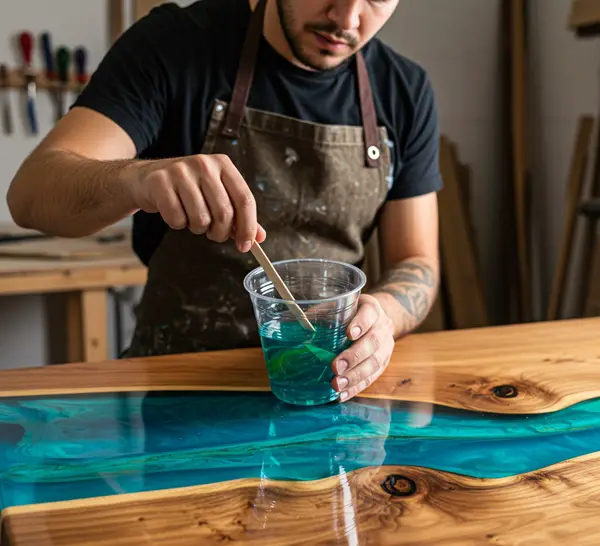
8- Add Coloring Slowly
If you’re coloring your resin, it’s best to start slowly and with only the proper colorants or pigments.
Some companies make resin-specific pigments to help you tint your resin exactly how you want them. But you can also use small amounts of powdered pigment or mica to help you tint your resin color.
You can even use a dye (about 3% – 5% of epoxy weight) to get the desired color. A little goes a long way, so I recommend pouring in less than a half teaspoon at a time.
9- Deal with Bubbles Quickly
Bubbles are one of the biggest dangers to a successful epoxy pour. Removing all the bubbles in your project as soon as possible will help increase the odds of a successful epoxy resin pour.
One of the first things you can do is grab a heat gun.
Allow your pour to sit for about ten minutes so the bubbles can rise to the surface and then using a heat gun slowly heat and pop the bubbles so they release back into the resin.
You can also put your resin into a vacuum before you pour it and remove all the bubbles right away through the suction.
10- Look for Non-Stick Molds
If you’re pouring resin into silicone molds or similar flexible resin pours, make sure that you’re buying a mold with a non-stick coating built into the design.
Your non-stick coat will look glossy and feel smooth, and it’s critical to make sure that your resin removes from the mold smoothly and doesn’t get stuck or stick to the side.
If your pour does get stuck, use a heat gun to gently heat up and loosen the resin and then peel it back from the mold.
11- Start Simple
If you are a beginner and never worked with epoxies, avoid pouring epoxy on live-edge tables, river tables, or wooden countertops.
Starting with a simple and fun epoxy resin project will let you get some good practice without taxing your resin pouring abilities too much and still allowing you to be creative.
Resin coasters, jewelry, or crafts are a popular and simple first option that allows you to practice mixing, coloring, and sealing, as well as embedding objects and polishing your final results.
The simpler a project you begin with, the better off your results will be and the better you’ll feel about the progress of your resin work long-term!
12- Learn from Your Mistakes
Mistakes may happen when you are trying something you have never done before. You should accept them and try to fix them early.
Unless it’s a huge blunder, you can easily fix common epoxy mistakes by investing some time and energy. If it’s difficult to fix, you should move on and learn from the mistakes.
Think about what has gone wrong and why it happened so that you do not repeat the same mistake again in the future.
Is Epoxy Safe to Use Indoors – 6 Precautions You Should Take
Well, in the past if you have asked this question, then the answer would have been a straight no!
The reason behind it was that previous epoxy products emitted a lot of fumes and the safety gear wasn’t so effective.
Today, it’s a different story, as it is safe to use most epoxy products inside.
In fact, when suitable precautions are taken, you literally don’t have to worry about anything at all because the safety gears available in the market are remarkable and efficient enough to deal with small hazards that epoxy presents.
Here are 6 major steps to stay safe. All of these are easy to manage and inexpensive to opt for.
1- Put on your gloves
Wearing gloves is a must and you should take one everywhere you go to work with wood and epoxy. The simple reason is that it is not just epoxy that can harm your skin – but it’s also the splinters of wood that can be very unpleasant.
In most cases, people who go for woodwork choose the material (metal mesh, canvas, and leather) that is hard-wearing so that it offers the security they need.
However, it may differ from one job to another. For instance, if you have a tricky wood project in the fall, then you should go for a latex-covered pair of gloves that offers you the highest versatility.
While if you are working in the mid of the summer you should go for something lighter and comfier which will lower the perspiration you produce when working with the gloves on.
IMO, when working with epoxy, nitrile gloves can be the best option to pick. You should avoid latex gloves as they may react strongly with epoxy and also not allow the epoxy to cure properly.
2- Wear safety apron
Woodworking aprons with pockets (to help you store tools and materials) are extremely useful and they aren’t quite expensive.
A disposable plastic apron that can be worn over your usual apron is also a good idea because epoxy has no reaction with plastic, so there is no chance of getting an adverse reaction.
A wax-coated canvas apron can also be a great option.
The only downside being is that the tools and work gear stored in your pockets are at risk of getting covered in epoxy. It means you need to react instantly in case of a spill to avoid everything stored in the pocket getting stuck to one another.
3- Wear a respirator
Before you go and purchase your first respirator or panic about getting one, you should know that most epoxy resins don’t need you to put on a respirator.
You can check out the documentation, you get with the epoxy resin, to know whether you really need to use a respirator or not.
A lot of people who think too much risk is involved in working with chemicals opt to wear a respirator. So, there is nothing harm in it, if you don’t want to take any chance.
In fact, it’s a good idea if you are working with toxic paints or chemicals other than epoxy. You don’t need to buy different respirators for different purposes. Just make sure it is able to deal with things you are working with.
Also, keep in mind that it is irritating to wear a respirator that falls off constantly when you are working.
Hence, you should opt for a non-slip design that keeps the respirator in its place.
The last thing you want is to struggle to take out your respirator while you are covered in epoxy. So, when purchasing one, you should get a respirator which is simple to put and remove.
3- Wear safety eyewear
Your eyes are the best gift from God and you should never put them at risk while working with epoxies, paints, varnishes, and wood.
Safety glasses are made to stop particles from getting in your eyes and thus avoid any kind of damage to your eyes during the project.
When buying, make sure the safety glasses you are picking come with proper ANSI Standards. They should usually pass high-impact tests which means the glass is usually thicker than the one used in prescription eyewear.
I suggest you wear the safety glasses marked with “+” when working with epoxy.
These are the ones that have passed the impact test. These lenses are made of plastic and they don’t react with epoxy.
But you should wash any epoxy which gets on the glasses as soon as possible so that it doesn’t bond to the surface at all.
Furthermore, if you are constantly working outdoors, you should go for polycarbonate frames and lenses with an anti-reflective coating. These are long-lasting and will stop glare interference with your ability to see with the safety glasses on.
5- Purchase only an approved epoxy resin
The important precaution you need to take is to buy resin which is recommended for your specific use and project. This means the epoxy resin you choose should comply with the ASTM D-4236 standards within the USA.
This standard states that the epoxy resin has undergone a test by a toxicologist and it is recommended to be safe for various art projects.
It doesn’t mean you can forget all the safety protocols and also that you can eat it or rub it on your skin.
But remember, when buying you may be ordering from an overseas supplier who doesn’t come under this obligation. So, it’s good to demand a data safety sheet from the company. If it doesn’t state the compliance, then pick a different resin.
6- Have proper ventilation around your work area
When you work with a product like epoxy which gives off fumes, you should pay more attention to the ventilation of the room. This can be done in various ways like:
a) Keep the windows open: The higher the number of windows in a place, the better for you. So, it’s good to work in a room that has more windows. Though in winters, it may not be the best option for you, it is still better than breathing in the fumes.
In the lowest stance, open at least one window on either side of the room to allow proper airflow through the work area.
b) Switch on the ceiling fan and do not use AC: If you are unable to open the windows, then the ceiling fan can assist in drawing the fumes from the area. If possible, you can even set up some additional desktop or standing fans in the work area to push fumes away from you.
Air conditioning will move the air of the room around, and the smell of epoxy will be caught in the system that may take more time to evaporate.
Final Thoughts
Resin is toxic and can cause serious health issues if you inhale the fumes from the mixture while working in your workspace.
Plus, with a few wrong steps, you can turn your complete project into a huge mess that is impossible to fix.
So, make sure that you’re following all the guidelines, manufacturer’s instructions, and steps when pouring your project.
Also, care you take all the safety precautions when you’re mixing your resin, including working in a clean and well-ventilated area, using a respirator, rubber gloves, and eye protection, and disposing properly of all resin materials.
Share the post "12 Pro Tips to Pour Your First DIY Epoxy Resin Project"
Is your house slowly starting to look like a serial hoarder lives in it? We all have stuff lying around Read more

The color pink is the favorite girl color which is most admirable to them. In fact, a color like baby Read more

Have the bright sunny days of summer motivated you to liven up your tired decor? Are you yearning to create Read more

Tough to wear out, long-lasting, simple to clean, and stylish, UPVC windows are undoubtedly one of the most popular choices Read more

Douglas Becker (aka Painter Doug) has over twenty years of experience as a painter in Adkins, Texas. At present, he resides in Florida with his family.
From painting multi-storeyed houses, condos, and apartments to large commercial buildings and small offices, he had served various customers in areas not only in Adkins but also in Southwest Florida, Sarasota, Naples, and many more. To know more about him check here.