
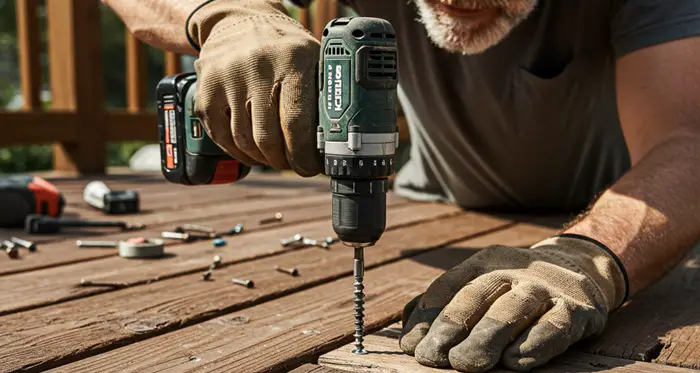
If you’ve ever tried screwing into regular wood filler and watched it crumble like a stale cookie, you’re not alone. Because not all wood fillers are created equal, if you’re planning to drill and twist in a screw, there are only certain types that are strong enough to hold screws reliably.
Products like epoxy resin and epoxy fillers can work very well if you need to drill and screw into repaired wood. Once you fill the epoxy hole filler, let it dry, and then drill or screw into it. It will become even tougher than the wood itself. If required, you can then paint it over.
That’s the reason DIYers, as well as professionals, use it to repair doors, windowsills, stairs, furniture, and whatever other wooden objects need fixing.
Remember, some wood epoxy products are of better quality than others, but they all serve the same purpose. You will, however, need to use the epoxy for fixing your wood hole properly, or else the screw will not hold for long.
Before I get into more details on how to use epoxy filler for screwing into wood, let’s discuss what exactly this compound is and what it is made of…
What's Here in the Article:
What is a Wood Epoxy Filler?
Simply put, the wood epoxy filler is a combination of plastic compounds (such as resin or polymer) used to create a durable and resilient polymer material.
You can use epoxy-based wood fillers to repair damaged areas in wood, fill in rotted chunks, rebuild corners that have seen better days, or even replace entire sections that termites thought were their buffet.
Once cured, it becomes tough as nails—ready to be sanded, painted, drilled, and yes, even screwed into like it was born for it.
Benefits and uses
Epoxy wood filler isn’t just a patch job—it’s a full-on power upgrade for your wood.
It’s formulated to be resistant to water and chemicals, so the wood can remain protected from environmental threats when you want to use it outside. Plus, it also gives the wood more strength and longevity to your outdoor wood repair projects.
Whether you’re fixing furniture, door frames, or weather-beaten decks, it bonds deep to reinforce the structure—not just the surface. And the best part? You can sand it, screw into it, paint it, or stain it like nothing ever happened.
No mixing, no drama—just open, apply, and boom: a pro-level repair with zero fuss. DIYers love it, and pros swear by it. If your wood’s looking weary, epoxy filler is the superhero it didn’t know it needed.

How Firmly Can Epoxy Hold the Screws?
The purpose of filling the epoxy is to replace part of the wood that has been rotten or damaged. Sometimes you may want to create a new screw hole or just want to replace the screw hole with a new one when it loses a thread.
When filling the damage for screwing into epoxy, you certainly want the screw to hold firmly and for long.
So, the question that really matters while doing the job is – how good is epoxy at holding those screws?
Well, it will depend on factors like the type of screws you will be using for your job and the load you will be putting on.
For example, if you plan to drill self-tapping screws into the epoxy resin, it’s recommended to create a pilot hole first. But, if you plan to use self-drilling screws, they can be screwed into hard epoxy filler without a pilot hole.
The epoxy filler may also not hold the screws (and tend to crumble) if you use it for jobs like filling the screw holes of door hinges. This is because door hinges deal with constant stress and movement, and repeated opening and closing can work the screw loose over time.
Epoxy, while tough, lacks the natural fibers and flexibility of real wood, so it doesn’t always grip screws well under dynamic load. For hinge repairs, it’s often better to use a wood dowel and glue combo — basically giving the screw something more ‘woody’ to bite into.
How to Repair Old Screw Hole Using Epoxy Filler?
Using wood epoxy filler agent for repairing the damaged wood surface isn’t rocket science.
However, before you use it, watch the screw hole depth carefully—the existing hole must be deep enough to hold the screw completely.
Epoxy wood fillers can typically fill holes up to 1–2 inches deep in a single application, depending on the product.
For larger or deeper holes, you can apply the filler in thick layers—just let each layer cure before adding the next. Some heavy-duty epoxy fillers can even handle gaps as wide as 3–4 inches if reinforced with mesh or backing materials.
If your existing screw hole has been stripped but is still deep enough for a screw, then you can take the following steps:
Step 1: Prepare
Start with preparing your surface, which means removing any loose paint, stain, or loose wood chunks around the area you are working. If required, sand the area lightly using fine sandpaper.
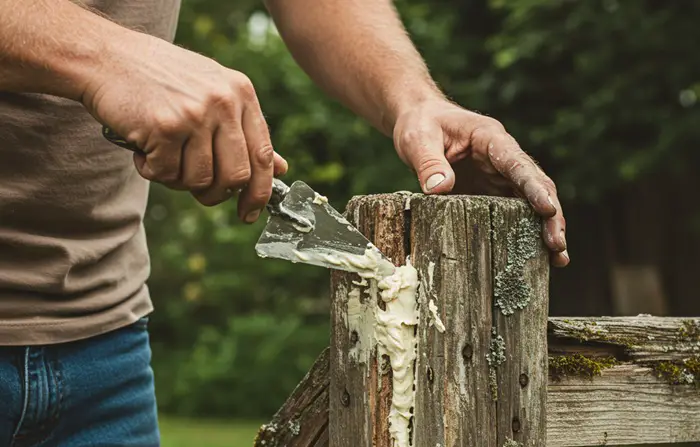
Step 2: Fill epoxy
Fill the entire wood hole with epoxy making sure there are no bubbles left behind. Wait until the epoxy is completely hard and cured. It will usually take about 24 hours.
Step 3: Drill pilot hole
Before screwing, you will need to drill a pilot hole smaller than your screw. The purpose of this smaller hole is to prevent the drill bit from skipping over the epoxy surface.
Step 4: Screw in
Now, you can insert the screw into the hole tightly and enjoy the results. Since wood epoxy does not rot like regular wood, you shouldn’t have to worry about filling the same hole with epoxy ever again for drilling in a nail or screw.
Step 5: Primer and Paint Over
Once you have the screw in place, apply a bit of wood putty over the screw to level the surface. Depending on your project, you can now apply your preferred primer and paint over it.
Pro tip: For massive voids, use a wood block or dowel to take up space first, then use epoxy to seal and strengthen—it saves filler and boosts stability.
Tips for Finding the Right Epoxy Hole and Gap Filler
Finding a compatible wood epoxy should not be too challenging because most of them are formulated for screwing.
If you are unsure how to verify the compatibility, ask someone at your local hardware store for assistance. They can help you choose the best wood epoxy for your needs.
In general, you don’t want the wood epoxy to harden too much because it could cause problems later on.
Also, keep in mind that some epoxies tend to crack or break if they harden too much but that doesn’t mean the epoxy should be too elastic either. An overly elastic epoxy will weaken the joints, so you don’t want that.
If you can find a healthy balance between hardness and elasticity, then you’ll have a fine wood epoxy at hand. It will be an epoxy that does not crack over time and can hold the screw well in place for long.
I conducted a comprehensive evaluation of leading epoxy wood fillers to identify the most effective options available. After considering factors such as bonding strength, application ease, curing time, and finish quality, you can select the optimal product for your woodworking needs from these.
| Product Name | Key Strengths |
|---|---|
| PC-Woody Wood Repair Epoxy Paste | Best Overall – Excellent durability, strong bond, versatile across indoor/outdoor applications |
| Abatron WoodEpox Wood Replacement Compound | Best for Large Holes – High-volume fill, great for restoring rotted or severely damaged wood |
| Abatron LiquidWood | Best Liquid Epoxy Filler – Deep-penetrating, restores structural integrity before filling |
| J-B Weld Wood Filler | Best for Exterior Use – Weather-resistant, long-lasting performance in outdoor conditions |
| Minwax High Performance Wood Filler | Best for Small Holes & Indoor Repairs – Precision application, fast-drying, ideal for indoor touch-ups |
Remember that there are few cost-effective wood fillers like Elmer’s wood filler and Bondo that many woodworkers use for driving screws. While these may work great for smaller repair jobs, in my opinion, they are not as strong and tough as epoxy. So you should avoid using them for larger projects.
Wood Epoxy Filler vs Liquid Epoxy Resin – What’s Better?
Wood repair isn’t just a job—it’s a craft. And like every good craftsman, you need the right tool for the right mess. Enter our two contenders: Epoxy Wood Filler (the dependable putty pal) vs. Liquid Epoxy Resin (the smooth operator). Both are champions in the wood-fixing arena, but each plays a very different game.
Epoxy Wood Filler – The Handy Patch-Up Pro
Think of it as the peanut butter for your wooden toast—ready to spread and fix those unsightly cracks and dents.
- Purpose: Your go-to for patching up wood boo-boos—cracks, gouges, knots, and minor imperfections.
- Form: A thick, pre-mixed paste. Basically, the spackle of the woodworking world.
- Application: Slather it on with a spatula or knife. Once it’s dry, sand it smooth like nothing ever happened.
- Durability: Tough as nails and unbothered by moisture or chemicals.
- Versatility: Tint it to match your wood or keep it au naturel—your call.
Liquid Epoxy Resin – The Jack-of-All-Trades
This one’s the alchemist of the two—equal parts science and sorcery. Mix it up and it can do almost anything except make your coffee.
- Purpose: Multi-talented marvel—fills, coats, sticks, and even gets artistic with decorative designs.
- Form: A dynamic duo—resin and hardener. Mix them like a potion and watch the magic begin.
- Application: Pour it, brush it, or embed stuff in it. Just remember: it’s not a one-and-done squeeze tube.
- Durability: Built to last through storms, spills, and sunshine. Moisture, chemicals, UV rays? Pfft.
- Versatility: From crystal-clear coatings to funky tinted finishes—you’re only limited by your imagination (and maybe your patience).
So, Who Should You Call? If you need a quick fix for wood cracks and imperfections, call in epoxy wood filler—it’s low-fuss, fast, and fabulous. However, if you are looking to go full creative or need extra muscle, liquid epoxy resin is your artsy, high-performance sidekick. Either way, your wood projects are in for a serious glow-up.
What Should You Do if Wood Epoxy Doesn’t Work for Holes?
Wood epoxy is the best solution in most circumstances where you have cracked wood. But if a previous screw has stripped out the threading in an existing screw hole and the hole is too small, you cannot fill the hole with enough epoxy to secure your screw.
You cannot re-screw the same hole that had its threading stripped out, either.
There are a few alternative solutions to this screwing problem. They are as follows:
1) Larger Screw
If your current screw has been stripped out of a screw hole, you can replace it with a slightly bigger screw.
It can be a little bit longer and wider than the initial screw. Make sure you use a new screw as the replacement. That way, it will ensure the screw is stiffer and more likely to stay secured to the hole.
Another thing to watch for is the threads. It is better if the new screw has fewer threads per inch than the original screw.
You’ll see that when you try to screw it into the existing hole, it will be easier for the threads to cling to the wood in the stripped hole. You don’t want the screw to be too big, or else the wood will split. We recommend you choose a replacement screw that is only a few gauge sizes higher.
Don’t be too forceful with the screw if the hole is already damaged. It could cause the damage to get worse if you do that.
2) Use Toothpicks
When you need to screw into a piece of softwood, you should try using toothpicks to make it easier. Place a few drops of liquid glue into the screw hole and add wooden toothpicks into it until the hole is filled.
Now snap off the toothpicks and sand over the surface to smooth it out. With the toothpicks secured into the hole, you can screw the screw into them.
3) Hardwood Plug
Most hardware stores sell something called hardwood plugs. They can conveniently be used to fill screw holes, so you can screw them into them.
For instance, purchase 1/2-inch hardwood plugs at your local hardware store. Now drill 1/2-inch holes where needed. Fill the holes with plugs of equal size.
Use wood glue to secure the plugs in the holes. Give the glue 24 hours to harden before drilling the screws into the plugs.
Screw Repair Kits May Work If All Fails
If all else fails, a screw repair kit may work if you have no craftsman skills. Unfortunately, most of these kits contain a few plastic anchors and a little bit of glue.
You’re supposed to glue in the anchors and insert the screws into them. However, many users find the anchors to be weak and unsatisfactory.
On top of that, screw repair kits cost a lot of money to buy. That is why they might not be the best solution for most people.
You should only try to use a screw repair kit if you’re not a handy person at all. Total newbies and non-DIYers will probably benefit the most from a screw repair kit. Everyone else with basic DIY skills should be able to handle the other three methods mentioned on this list.
Final Thoughts
Anytime you need to replace damaged or rotted areas of your wood, you can fill in those gaps or holes with epoxy wood filler. It is basically a replacement for the wood that got damaged so that you can screw it into it.
The thing you need to remember is not all wood epoxies are formulated for holding screws and nails firmly. So, before you attempt to fill a wood hole with the best epoxy, make sure it is compatible with the screws you need to drill into and the condition of wood itself.
There are many circumstances where you can drive screws into wood epoxy and it works pretty well. When working, just make sure the depth of the hole matches the size of the screw. That way, the screw can become engulfed in the epoxy completely.
Share the post "What Wood Filler Can You Drill or Screw Into?"
Is your house slowly starting to look like a serial hoarder lives in it? We all have stuff lying around Read more
The color pink is the favorite girl color which is most admirable to them. In fact, a color like baby Read more

Have the bright sunny days of summer motivated you to liven up your tired decor? Are you yearning to create Read more

Tough to wear out, long-lasting, simple to clean, and stylish, UPVC windows are undoubtedly one of the most popular choices Read more

Douglas Becker (aka Painter Doug) has over twenty years of experience as a painter in Adkins, Texas. At present, he resides in Florida with his family.
From painting multi-storeyed houses, condos, and apartments to large commercial buildings and small offices, he had served various customers in areas not only in Adkins but also in Southwest Florida, Sarasota, Naples, and many more. To know more about him check here.