
With overtime usage, wood-burning stoves can deteriorate to such an extent that it becomes important to repaint them.
Especially if you want to enjoy its benefits (when the weather cools down), you should condition and remodel the finish to bring it back to its prior glory.
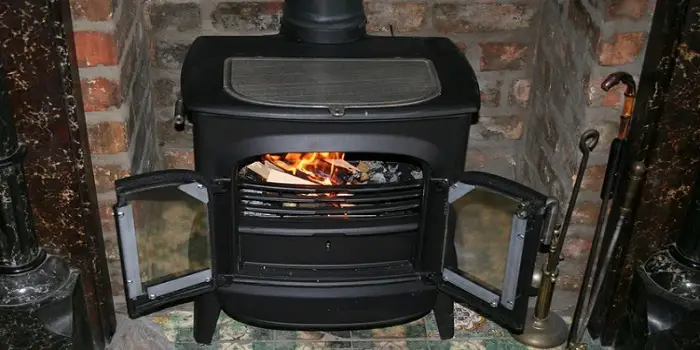
Typically, when it comes to painting a wood-burning stove, two kinds of finishes can be done:
The first is a painted finish.
Majorly seen on pressed metals and cast-iron stoves, these finishes can simply be repainted with products like High-Temperature Resisting Paint.
The other one is a vitreous enamel finish.
You can usually identify it with a smooth, glossy finish. Such a kind of finish cannot be easily repaired and shouldn’t be painted on. It is because the high-temperature-resistant paints do not easily stick to these vitreous enamels.
What's Here in the Article:
How to Paint a Wood Burning Stove?
When you repaint your wood-burning stove, it’s like giving it a stylish makeover, restoring its charm, and shielding it from rust.
This saves you money, letting you play with colors to match your décor, and doing the planet a favor by reusing instead of replacing.
But before you start, make sure you clean and prepare the stove for painting.
Preparing the wood stove for paint
The steps you will need to follow are as follows…
Step. 1
Switch off all the naked lights before letting any embers in the stove end down and cool completely.
Get rid of any ash as it will only stick to the paint making it less effective.
Step. 2
Switch off all the power and clean your stove with the help of soapy water.
Make sure you get rid of all the dirt, especially near the fire door, as the paint will never work on the soot.
Plus, if there is any rust and old paint on it, sand the surface gently (using a wire brush or steel wool) to remove that as well.
Minor cracks in the stove (if present) should also be repaired using furnace cement. This is easily available at a wood stove retailer near you.
Let the stove dry completely and ensure there is no dampness or grease left behind.
Step. 3
Cover the areas (like walls and furniture) around the stove as well as the floor surfaces with a newspaper so that they don’t get stained with paint drips or overspray.
If the sealing compounds on the flue require replacement, then do it. Make sure you let it dry before you start to paint the stove.
Step. 4
If you see any paint peeling off, then cautiously get rid of it as well. And rub the surface below with the help of an emery cloth.
Step. 5
Disassemble or cover the handles and fire door glass.
Open the windows of the room for fresh air to come in while you are painting the stove, especially if you are using an aerosol.
If you have kids or elderly people in the room, move them out. It will help you in doing the job faster without their intervention.
Ideally, you should prepare and paint the stove outdoors, like in your backyard. But if not possible, make sure you keep the area ventilated.
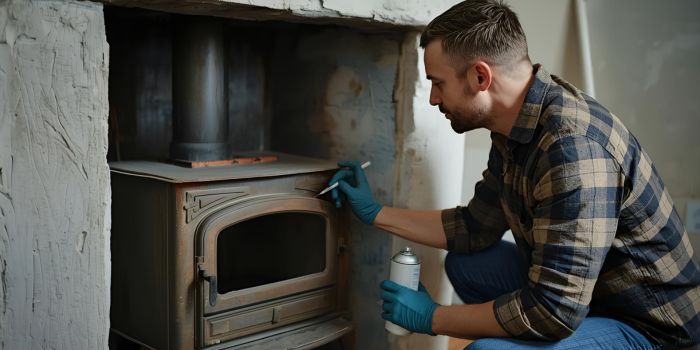
Applying heat-resistant primer and paint
Usually, heat-resistant paint is accessible at online stores as a liquid for straightaway application via brush or in the form of an aerosol spray.
You may find aerosols easier to use but remember to do not overspray as it can contaminate the fire surrounding if proper care is not taken.
Keeping this in mind, you should select the method of application which is best suited for you:
Painting your cast-iron parlor stove is easy if you follow the step-by-step instructions. This will ensure that you use your heat-resistant paint well without getting any wasted.
Step. 1
First of all, apply a high-temperature primer prior to painting.
You can use a Rust-Oleum Automotive High Heat Primer Spray Paint for this purpose. This comes with anti-corrosion properties and will ensure proper adhesion of paint.
Step. 2
Once the primer has been applied, remove the lid of Rust-Oleum Heat Protective Enamel paint and stir it nicely.
Use a 1-inch or a 2-inch brush that is in paintable condition to paint the stove.
If you are using aerosols (like Rust-Oleum 2000 Degree High Heat Spray Paint), shake it well.
Continue to shake it for at least a minute or two till you hear the aerosol rattling.
Step. 3
Commence from the top and apply the heat-resistant paint to the flue.
Paint down from the top edge to the stovetop, making sure you don’t over-apply the paint.
A single coat is all which is needed, and over-painting can cause thick sticky layers, which result in the peeling of the paint fast.
If you are using an aerosol, hold the can at least 13- 15 inches away from the surface and spray gently.
Start by spraying in a horizontal manner and then go vertical.
Do not overspray. Lighter coats are always recommended.
Step. 4
After you have painted the top of the stove, start coating the sides before you reach out to the front.
Now open the fire door and paint the edges along with the stove’s face. Make sure you don’t get the paint on the glass while painting the door.
If you do it then let it dry and then use a knife scraper blade to scrape it down.
Step. 5
Lastly, paint the supporting legs of the stove. If needed, do some touch-ups using a brush and let the stove dry completely for about 12-15 hours.
If you are using aerosols, make sure you empty the paint and dispose of the can properly after you are done with the painting.
Clean your paintbrushes (if you have used them) with a paint thinner.
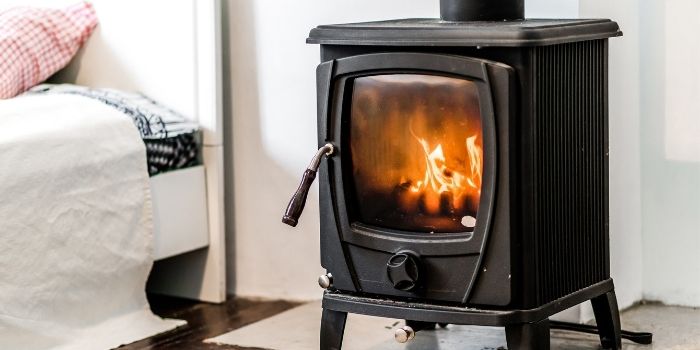
What color to paint your old wood burning stove?
If you are thinking of changing the color of your parlor stove, you can find a wide array of heat-resistant paint colors.
These may include aerosols from light shades (such as pale ivory) to several dark shades of black.
Usually, the stove ends up getting finished in black, and that is obviously good!
When picking other colors, remember that lighter shades will be more susceptible to showing up spots from soot.
So, if possible, avoid them.
While painting, it is possible that you may notice some color differences between the original paint and the newly painted surface.
So, it is advised to paint the full stove rather than going for touch-ups in some areas.
Should You Paint the Inside of a Wood Stove?
In most cases, you should not paint the interior of a wood stove because the area is exposed to extremely high temperatures and direct flame, which can quickly cause paint to blister, peel, or release harmful fumes.
Instead, manufacturers typically recommend treating the inside with a high-heat protective oil to help prevent rust.
If you notice significant rusting, you may consider applying a specialized high-temperature, rust-resistant coating. However, it is essential to ensure that the product is explicitly formulated for high-heat applications to maintain safety.
Additionally, many wood stoves use interior accessories such as firebricks, which not only protect the stove walls but also improve its appearance and performance.
Painting vs. Polishing an Old Wood Stove: What’s Better?
Stove polish (also called stove black) is a waxy finish that can provide a silvery or metallic finish to the stove.
Unlike high-temperature stove paints that are available in various different colors, polish comes only in black.
While paints are highly versatile and durable, stove polish can be easy to apply without creating any mess.
Plus, polishing the woodstove will not require much preparation if the surface is already prepared.
However, if the surface of your wood stove has deteriorated, it’s important to clean, repair and prepare as you have done with the painting above.
Once you have prepared the surface, you can apply the polish to the stove by wiping it over using a damp cloth.
Unlike paint, the polish does not require any primer to be applied. So, you can apply it directly over the surface.
Once applied, the polish can take 3-4 days to get completely cured.
Although stove polish is relatively easier to apply, it comes with a few disadvantages.
Some of them include:
- Polish can become less water-resistant over time
- It does not provide long-lasting protection from rust or scratches – it can work only for a few weeks
- Although it can be used on cast iron and steel stoves, it’s not recommended for previously painted surfaces and sandblasted areas
When and How to Light Your Burning Stove After Repainting?
Heat-resistant paints should be given at least 24 hours to dry before you light the stove.
This will allow them enough time to cure, making sure that it does not peel away fast under high temperatures.
Also, ensure you have removed any masks or paper that you may have put on while painting the stove.
Before you light up your wood-burning stove, inspect the gaskets.
They may be worn out, and you may need to change them if they are not tight.
Once you have lighted the stove, open the windows in your room, as some smoke may get released when you light the stove for the first time after painting it.
It is suggested to move out all the occupants of the room while you are doing this.
After an hour, you will see the stove at its highest operating temperature as the paint has fully cured and the fumes drastically reduced.
It’s still suggested to keep the room properly ventilated so that no fumes are exhausting the atmosphere.
For the next few times, whenever you use the stove again, see that you have sufficient ventilation in the room this will avoid any potential paint odor.
Final Thoughts
Before the season starts and you plan to refinish your wood stove – you have a couple of options available.
Mostly wood-burning stoves are primed and painted with heat-resistant spray primers and paints. These come with a flat black finish and can typically be bought online at stores like Amazon or from where you bought your stove.
While polishing can be an alternative and fast solution, it’s not much durable and effective.
No matter which one you choose, it’s good to prepare the surface well, and once all is done, allow proper time to cure. This will help reduce the harmful fumes and odor while making sure that you enjoy the winters to the fullest.
Share the post "How to Clean and Repaint Old Wood Burning Stove?"
You can bring new life to the interior of your home just by adding a new coat of paint to Read more
Wood blinds are highly energy-efficient and can add a lot to the warmth of your room interiors. These can also Read more
Concrete houses appear more durable and stronger, but timber-made or timber & concrete fusion house designs are making a stance Read more
Although dealing with epoxy is not at all difficult, you are prone to make mistakes that can arise due for Read more

Douglas Becker (aka Painter Doug) has over twenty years of experience as a painter in Adkins, Texas. At present, he resides in Florida with his family.
From painting multi-storeyed houses, condos, and apartments to large commercial buildings and small offices, he had served various customers in areas not only in Adkins but also in Southwest Florida, Sarasota, Naples, and many more. To know more about him check here.