

There are many different types of paint on the market.
While most are familiar with latex and acrylic, new trends in eco-friendly or environmentally safe paints have been on the rise.
Such paints are not only attractive because they protect the environment but also because they do not create pollutants that affect the health of those living inside.
Chalk paint has been a popular choice, but another that is on the rise in clay paint.
What is clay paint, the differences from other paints, and how will it be used to help you make the best-informed decision about this type of paint?
What's Here in the Article:
What is Clay Paint?
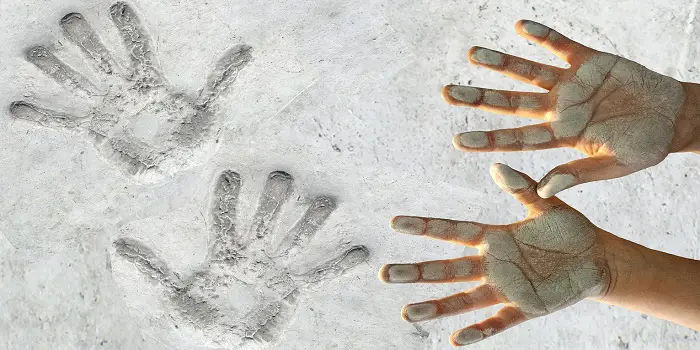
As the name suggests, this type of paint is made from clay.
Natural mineral pigments are present in the water-based solution that creates a pleasing type of paint that is safe for use inside the home.
You can find clay paints in over 60 different colors, which means there is plenty to choose from for different rooms in your home.
This type of paint creates a natural, subdued look that is most noted in Native American cultures who used clay paints to decorate their homes.
Adobe, stucco, whitewash, and lime plaster should come to mind when thinking about how clay paints will look.
Plus, there are brighter colors available when you want some variety.
Benefits of Clay Paints
There are numerous advantages that clay paints offer for your home.
The natural ingredients and unique color texture make them a great choice for covering surfaces.
The drying time for clay paints is from six to twelve hours, which is considerably less compared to some other paints.
But the advantages do not stop there.
- Average Coverage: 5L for every 50 square meters
- Little to No Odor: Unlike chemical-based paints that have toxic properties
- Water-Based Formula: Breathable and easy to apply
- Strong Matte Finish: Softens yet enhances the light in any room
- Durable: Often takes fewer coats than chemical-based paints
- Free of Acrylic and Oil
- Versatile
One big advantage that comes with paints like Earthborn Claypaint is their ability to withstand very high temperatures.
Since these paints come with high clay content and do not contain acrylics or oils, they are heat resistant and do not discolor or flake at high temperatures.
Clay paints can be applied with a roller or brush just like any other paint.
This is what makes it a great alternative if you want natural paint that does not contain any toxic properties.
How are Clay Paints Used?
Preparing the clay paint is simple.
But applying it can be tricky to get the right finish.
So, before you start painting large areas on your walls, it is best to start with small areas to ensure that the paint will work well.
Start with a small, unassuming area of the wall, something that you normally would not see, and apply what you have mixed.
Let it dry overnight and check on it the next day.
If you like it, you can proceed to paint your walls.
If not, then you will need to change your mixture consistency to either thicker or thinner, depending on the results.
Once you are satisfied, you are ready to paint.
Step 1- Getting Started
Using clay paint is just as simple as making it.
You will need plenty to paint the drywall that you want to cover.
You’ll also need a paintbrush as a paint roller is not well-suited for applying clay paint to surfaces.
Once you have placed the clay paint on your brush, paint it on the wall using an X pattern or move diagonally.
This pattern will accentuate the texture of the clay paint.
Step 2- Apply Two Coats
You’ll want to apply two coats for maximum effect.
Paint the first coat, let it dry, and then paint the second coat on top.
First Coat:
Before applying the first coat, you’ll need to prepare the surface.
This means cleaning the wall, taping the trim and areas you do not want to be painted, and placing drop cloths on the floor.
The good news about clay paint is that you can apply it directly over the old paint.
If the old paint is slick or glossy, you should remove it by sanding it first.
A brush that is 4” wide should do the job of applying the paint to the surface.
Remember to keep the paint thick so that it will stick properly to the wall.
This means avoiding adding excess water.
It will become apparent why the second coat is needed once you have finished with the first coat.
Once it has dried, you will see how inconsistent it is on the wall, with some areas being almost transparent while others are relatively thick.
Do not panic; this is how the first coat is supposed to be.
Second Coat:
Once the first coat has fully dried, add the second coat.
This will even out the paint considerably as the thinner areas become thicker.
You should continue to use the diagonal or X pattern when applying the paint.
Watch for any thin spots, and be sure to cover them.
Let the second coat dry and stand back from the wall so you can see if there are any areas that need to be painted again.
Given the thickness of the clay paint, two coats should be enough.
But if you can still see the drywall underneath, you’ll want to apply a third coat.
Step 3- Wipe and Finish
You are not quite done even when the second coat of paint has dried.
This is because the paint itself will look a bit rough and will need to be finished.
To provide a finish for your paint, use a tile sponge or plastic lid.
When using a tile sponge, it should be damp but not wet.
Now, wipe the sponge on the wall from top to bottom using horizontal strokes.
Keep the drop cloths in place because you will be removing the larger particles of sand from the paint.
Wipe a second a few times, and once you see it is smoother, proceed to the next section.
Do not overwork the paint, or you will have to paint it again.
You will probably have to clean out your tile sponge a few times as you are wiping the paint.
The result will be that the paint should look smoother and the marks from the brush should be removed as well.
If you want to use a plastic lid or disc, that will require a little more effort compared to the tile sponge.
This will mean working in smaller areas first and using a spray bottle with water, and using semi-circular motions.
Finally, if the wall will be exposed to moisture, such as in a kitchen or bathroom, you will need to apply a finished coat of glue.
Otherwise, you can enjoy your new clay paint walls.
Where to Use?
Clay paints are well-suited for most surfaces such as wood, MDF, bare plaster, stone, and gypsum board.
The Earthborn clay paint sticks to other paints, so you can use them on a painted surface as well – if you desire.
However, if the surface is not absorbent (like melamine surfaces or laminated kitchen cabinets), you will need to sand it well and apply primer before applying the paint.
The effect of using clay paints is to transform the appearance of the material into the older or time-worn surface that is most pleasing.
While mostly used for interior walls, they are well-suited for outdoor use as well.
This is because clay paints have a breathability factor that makes them perfect for augmenting older homes.
The solid, earthy colors available provide a tone that is timeless.
However, a more important factor is that clay paints absorb moisture which makes them perfect for bathrooms and kitchens.
Also, their extremely low VOC content makes them suitable for baby cots and toys for kids.
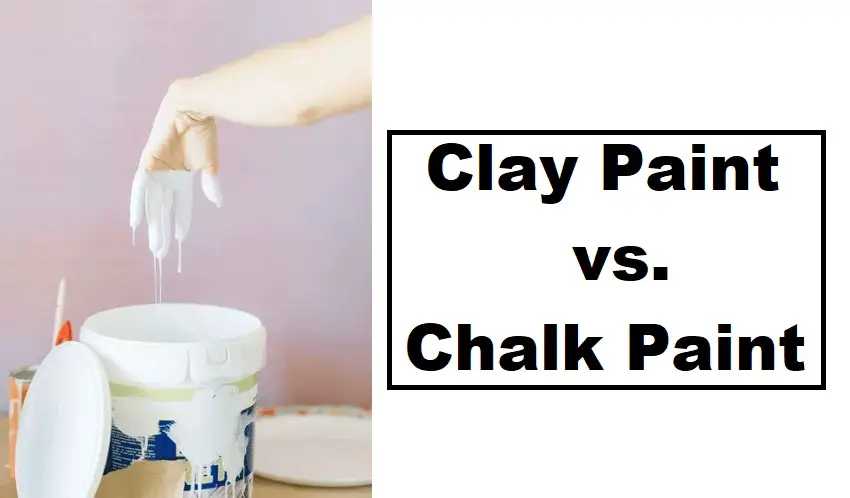
Is Clay Paint Same as Chalk Paint?
When talking about clay vs. chalk paint, it is good to understand that these two paints are not the same but different.
The biggest difference lies in the type of finish you get with them.
Unlike chalk paints, clay paints can very easily offer a long-lasting flat matt finish, and it doesn’t need a sealer (like wax or other top finish) for protection.
While chalk paint has its advantages, clay paint matches up quite well.
For many, clay paint may be a better alternative.
a) No Sealant:
The biggest downside to chalk paint is that it needs to be sealed in wax.
Otherwise, it tends to dry and fall apart over time.
Clay paints do not require any sealant and last for years under normal use conditions.
b) Thickness:
Because clay paints tend to be thicker, they are perfect for covering older walls that have imperfections.
It also works well for covering limed walls, whether old or new.
c) Flat, Matte Finish:
If you are looking for a gorgeous matte finish, then clay paint is generally superior compared to chalk.
Another advantage of clay paints over chalk is how clay paints tend to absorb moisture, making them superior to chalk as they can help dry out a room.
Can You Make Your Own Clay Paint at Home?
For those who are looking to spice up their interior walls, making DIY clay paint is a great way to create a new, vibrant appearance.
When starting, there are three ingredients to making clay paint.
- Clay
- Sand
- Wheat Paste
You can choose to dig up clay in your yard, assuming there is clay present.
Or, you can save yourself some digging and purchase powder clay in a bag from your local hardware store.
The sand you can acquire from a store or from many locations such as a nearby river or beach, depending on how much is needed.
It is possible to create clay paint without sand, but it will lose its unique texture if you do so.
Below are the steps you will need to follow when making your own clay paint at home…
1- Dig
The clay and sand you select should be of fine particles; the smaller, the better.
For clay that you dig up, sift it so that any larger stones or particles are removed.
The advantage of using clay from your yard is that it gives a local flavor to the walls that people will recognize.
2- Mix the Clay
Once you have dug up the clay, put it into a bucket and add water.
Use a power drill and add a paddle to the end.
Place the paddle in the bucket and turn on the drill to mix the clay and the water.
This will break up the clay into smaller particles.
Once broken up, let it sit overnight so the clay can absorb the water.
You may need to mix it a second time the next day.
The consistency should be that of wet yogurt before you move to the next step.
3- Sift the Clay
Now, sift the clay using a window screen.
This will remove any larger particles present, filling the container below with fine clay.
The window screen you use should be 1/16” gauge.
Use a pool trowel to push the clay through the screen.
If you have a wheelbarrow underneath, that will make it easier to catch the clay and then use it for your paint.
Of course, you can skip this step if you purchase powdered clay, as it will be ready to use.
4- Sand
You can dig the sand up, obtain it from a nearby water source, or purchase it in a store.
You will need to remove the larger particles as with the clay.
This will require a screen that is of a smaller gauge than you used for the clay.
A grease splatter protector usually has a very fine mesh and may work quite well in sifting the sand until you only get the finest particles.
If you want to save yourself some work, “play sand” can be purchased for the perfect size.
You do not need to process the play sand, which is designed for sandboxes so your kids can play and proceed to the next step.
5- Wheat Paste & Mix
Now you are ready to make the wheat paste which can be done relatively quickly.
Heat four cups of water until they reach a boil.
As the water is heating up, mix one cup of white flour with two cups of cold water.
Stir until all the larger chunks are gone.
When the water reaches a boil, add the mixture to it and stir.
Reduce the temperature to low or medium heat and keep stirring until the mixture becomes thick.
You will need to be careful about not burning the bottom of the mixture.
Once it has thickened, you can take it away from the heat.
6- Mix Together & Use
With the wheat paste ready, you can mix it with the clay and sand to create your paint.
You will need to stir until the mixture becomes almost as thick as peanut butter.
It will be too thick for you to use a paint roller. You will need to use a wide paintbrush.
Once it is ready, you can start to paint your drywall.
Final Thoughts
Clay paint offers advantages that go beyond variety of color, ease of use, and durability.
Easy to create, clay paint can adhere to various surfaces, including drywall, if you mix it the right way.
So, if you are considering a home improvement project and want to paint your home in an Eco-friendly way, there can be no better options than clay paints.
Just try them, and I am sure you will going to love them.
Share the post "What is Clay Paint – The Benefits and How to Use it Right?"
When working on a paint project, it is the materials you choose/use which determine its success and validity. This sentence Read more
Storage heaters and radiators aren’t popular anymore as they used to be. I have one old piece installed in my Read more
The purpose of a primer is to provide a surface sticky enough for the paint to adhere properly. The paint Read more
There are many similarities between latex and enamel-based paints. Being used on interior and exterior surfaces, they come in a Read more

Douglas Becker (aka Painter Doug) has over twenty years of experience as a painter in Adkins, Texas. At present, he resides in Florida with his family.
From painting multi-storeyed houses, condos, and apartments to large commercial buildings and small offices, he had served various customers in areas not only in Adkins but also in Southwest Florida, Sarasota, Naples, and many more. To know more about him check here.