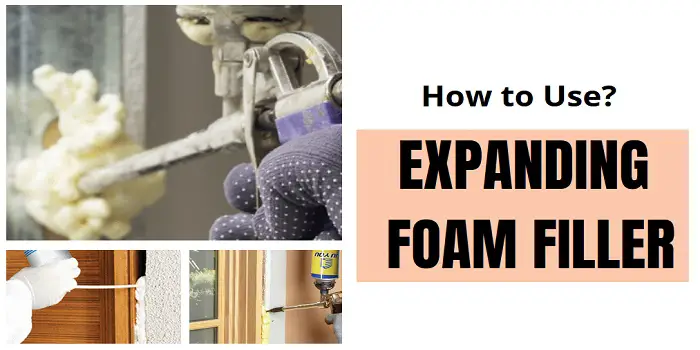
Expanding foam filler is a type of polyurethane foam for those who create, fix, or restore items in a DIIY way at home.
This foam expands as it is applied, filling the space and hardening to form a solid, durable bond.
It’s commonly used in situations where there are large gaps or irregular spaces that other fillers may not easily fill.
Using expanding foam filler on wood is pretty straightforward.
- It comes in a can that can be quickly applied to the hole, crack, or pore.
- Once applied to the wood cracks, it expands to fill the gap.
- When it dries, you can sand or trim away the excess and then paint over.
For creating a more energy-efficient home, expanding foam filler is a good product to have around because you can use it to seal gaps around pipes, wires, and other openings, improving insulation and preventing drafts.
However, there are different types of expanding foam available, so you will need to consider the options.
Making the best-informed choice starts with understanding how the product is used and for what projects (wall, wood, pipes, etc).
So, let’s dive in straight…
What's Here in the Article:
How is Expanding Foam Filler Used?
Expanding foam is ideal for filling large cracks and voids in wooden structures, such as door frames, window frames, or joints. Here’s a step-by-step process to use this product in your home…
Step 1. Put on the Protective Gear:
Expanding foam filler can be difficult to remove from the skin, and it may cause irritation.
Additionally, the chemicals in the foam can be harmful if they come into contact with your skin for extended periods. So, be sure to wear gloves and goggles when using the product.
Also, protect surfaces around your work area with a drop cloth or plastic to prevent the foam from expanding onto unintended areas.
Step 2. Clean the Area:
The next step to using a fix and filling the expanding foam is to clean the area in which the expanding foam filler is to be used.
Use a brush to sweep away any surface dust, dirt, or debris. Then, spray lightly with water and wipe away the area so that it is clean.
Because expanding foam filler needs a little water to properly cure, you do not have to dry the surface before applying the product.
Step 3. Spray the Foam:
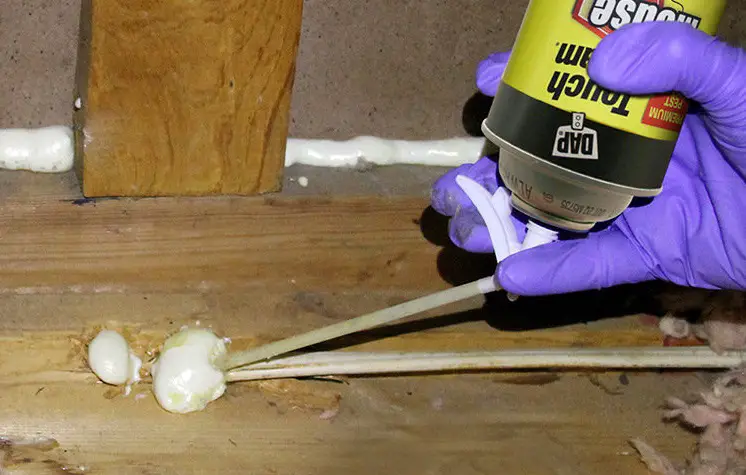
Hold the can upside down. Place the nozzle into the area that should be filled and press the trigger.
Remember that the foam inside will expand to double the volume that is applied. So, fill each hole or crack about halfway up and then stop.
Let the foam expand until it reaches the top. If not, add up to half the remaining area that needs to be filled.
Step 4. Mist with Water:
Once the foam has reached the desired level, mist it with water. You should do this for each layer of foam that you apply.
Once completed, let the foam fully cure, which under most circumstances should take about 60 minutes.
Step 5. Trim & Sand:
Once the foam fully hardens, trim away the excess using a hacksaw.
Once the excess has been removed, you can sand the top to get a smooth finish. Then you can paint, stain, or plaster over the top.
You can put a regular wood filler over expanding foam to fill small holes if they are visible.
But remember, if there is a wood rot present, it will not fix that beneath the expanding foam or polystyrene. Using wood filler over in that case will be pointless as the rot will still be there.
Where Should You Not Use Expanding Foam?
Most expanding foam fillers are made from latex or polyurethane. It is combined with a polyol resin and isocyanate so that it can expand on contact.
When the mixture inside the can is sprayed, its contact with the air will cause it to expand and dry.
If it has yet to dry and you need to remove it, acetone will do the job. But if it has hardened, you will need to scrape the product away using a file, knife, or other appropriate tools.
While expanding foam filler feels like a product you can use for most projects that require holes, cracks, or openings to be sealed, there are exceptions.
a) Heat:
Expanding foam filler is flammable. So it should be kept away from sources of heat such as certain types of lighting, electrical boxes, and outlets near the walls.
b) Doors & Windows:
Some expanding foam sealant products may warp or distort materials like wood. Thus they should not be used on doors or windows because they may affect how they open and close.
Instead, look for specific expanding foam products designed for such uses.
c) Insulation:
In small quantities, expanding foam fillers can seal gaps that help insulate the home. But if you have a much larger area to cover, there are other, far better products that will provide insulation.
So, you should use standard insulation products for your home or for large areas that need to be covered.
The Best Expanding Foam Fillers You Can Use for Your Project
There are specific expanding foam fillers designed for use on wood windows, doors, and metals.
Most importantly, the filler you choose should match the project. For example, areas that are outdoors (like concrete, brick, stone, and plaster) or part of a water feature should be waterproof.
Here are some of the expanding foam filler products designed to cover specific situations, so be sure to choose the right one.
1- DAP: This type of expanding foam is best suited for sealing up openings in your home.
It can resist entry from mice and rats and is approved by the EPA. It does take up to four hours to dry, but it is quite good at sealing up holes in the exterior.
2- Loctite: Perfect for small cracks and holes, Loctite can be used on many types of materials. Plus, it is resistant to ultraviolet or UV rays.
3- Red Devil: Compared to Loctite this foam will expand to three times its initial size when sprayed.
So, it’s good to cover larger holes and cracks. It is also waterproof as well, making it perfect for sealing against the elements.
4- TotalPond: For ponds, waterfalls, water fountains, and the like, TotalPond is the perfect expanding foam filler.
It will increase three times its original size and will fully harden within 24 hours. Also, it’s waterproof and designed for use with all types of water features.
5- Gorilla: Gorilla weatherproof expanding foam filler is a waterproof product that can quickly squeeze into gaps and fill them tight.
It’s an ideal solution for filling large cracks and holes in wood, stone, brick, and metals. The good thing is that the product can be easily cut, sewn, painted, and sanded once you have applied it tightly.
6- Wickes: Wickes is a popular brand in the UK, and the green-colored expanding foam manufactured by them is available in a 0.75 L nozzle type can for easy application.
It’s easy to use, fix and fill hard-to-reach areas. And can be applied for insulating against heat, sound, and moisture.
You can use the product for interior as well as exterior purposes, where it can expand up to 30 times its original volume.
Final Thoughts
Expanding foam fillers are great to have in your tool kit when you are repairing or renovating your home. The foam will fill holes and gaps by expanding quickly, so the item can be repaired and painted if desired.
Of course, you can also search for many other types of expanding foam products (besides the one I have discussed above) if you have a particular project in mind.
Remember to read the label and follow all instructions before applying expanding foam sealant.
Plus, be sure to research to fully understand what the foam product does, how it works, and any quirks it might have before purchasing.
Share the post "How to Use Expanding Foam Filler for Wood Before Painting?"

Douglas Becker (aka Painter Doug) has over twenty years of experience as a painter in Adkins, Texas. At present, he resides in Florida with his family.
From painting multi-storeyed houses, condos, and apartments to large commercial buildings and small offices, he had served various customers in areas not only in Adkins but also in Southwest Florida, Sarasota, Naples, and many more. To know more about him check here.

