
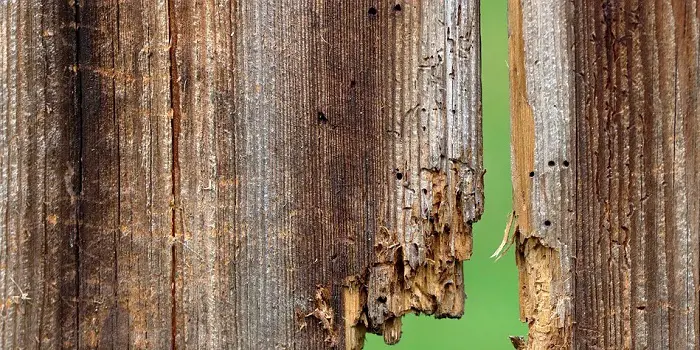
Rotten wood at home or in the yard is not an appealing sight for anyone.
If your furniture, paneling, flooring, or other outdoor wooden items start rotting, you need to do some wood restoration.
Restoration can be more time and cost-effective than entirely replacing the wood.
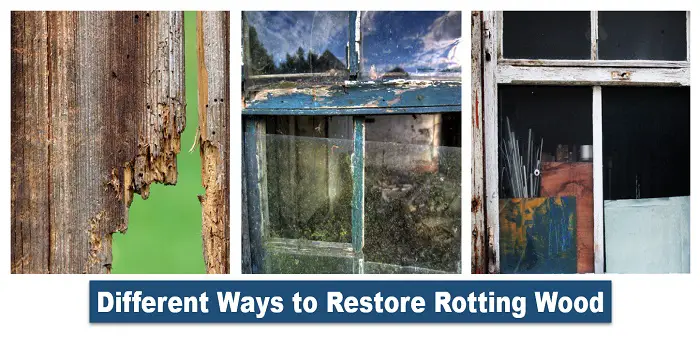
Here is your complete guide to repairing rotting wood without replacing it.
But before you plan to repair it, it’s good to confirm whether you should really seal the wood or remove it.
What's Here in the Article:
Removing or Repairing the Wood?
Many individuals mistake just sealing the wood from where it has rotted.
However, that is not a long-term solution.
If you want to restore wood, you need to remove the source of the rot.
To remove the source of the rot, you have to use a tool such as a saw, sandpaper, claw hammer, or even a grinder.
That’s because the only way you can remove the rot is by cutting it, just like you would do with a tumor in the body.
There is a method you have to deal with rotten wood.
Once it starts rotting and crumbling, you need to remove the deadwood and replace it with filler.
Doing so will allow you to restore the wood successfully so that it remains usable for a long.
Why do You need to Seal the Rotting Wood?
You need to remember that the early stages of rot can be sealed.
However, as the rot gets worse, you will have to opt for removal because sealing will not work to fix the problem.
If you are facing early rot, sand the wood until you see it bare.
To save time during this process, you can utilize a power sander or an angle grinder with a sanding wheel.
Once you have done sanding thoroughly, use a wood sealer or hardener.
It will kill the fungi that caused the rot in the first place.
If you didn’t know before, wood rot is generally caused by a type of fungi that penetrates the wood.
It starts eating the wood from the inside and makes it worse over time if not controlled or repaired.
Once you use the sealer or hardener, it will kill the fungi forever, i.e., the source of the rot.
How to Seal the Rotting Wood Without Removal?
To start your wood restoration, you will need to remove the deadwood and then fill it.
You can start this process by taking a claw hammer and raking away the crumbled and brittle wood.
Keep in mind not to hit the wood too hard.
If you do this with too much force, you may damage the wood completely.
That’s why it is important to handle it carefully.
Once you have done the job with the hammer, you need to sand down the rest of the wood.
After this process, it is time to utilize fillers.
Here are four different filler methods you can choose from to fix the wood:
Method 1. Wood Filler
Wood fillers are one of the most widely used methods for replacing wood.
The filler is created from glue and wood fibers, and it is a great way to restore rotted wood.
That is because the consistency is just like clay.
You can mold it into any shape you want and fill the rotten wood.
Besides that, many individuals use it because the sanding process is easy.
It adapts to the wood easily, and you will save time and effort during sanding.
However, you need to remember that harder wood fillers are not the ideal choice for load-bearing pieces of wood.
That means you don’t want to use wood filler if you are trying to restore a chair’s leg, the rafters of the house, or anything else that bears weight.
Another thing you need to keep in mind is to check the labels.
Many commercial wood fillers contain latex.
Latex is resistant to natural degradation and moisture.
It is much stronger than most wood. It resists impact better than any other type of filler.
The best part is that you can make wood filler at home.
All you need is glue and a lot of sawdust.
You have to mix these two to get the right consistency for filling wood.
The trick is to use less glue initially.
After that, you can add more to reach the consistency you want.
Once your mixture is right, you can start using it as a wood filler.
Method 2. Polyester Filler
Polyester fillers or Bondo are also popular for people who restore the wood.
However, many might say that the stuff is hard to use as it does not stick to wood or other types of fillers.
It is still a powerful filler that can be utilized for heavy-duty work.
The best part is that once it is dry, it becomes incredibly hard. That means the surface will become much more durable than before.
Many people also use polyester filler for car body repair and refinishing.
Method 3. Epoxy Filler
Epoxy has gained much popularity recently.
It is used by many repairs and restoration businesses and other industries.
That is because it is a tough solution for filling the cavities in wood. Epoxy is also water-resistant.
The best part is that epoxy is so tough that you can even screw or drill into it just in case you want to make a fresh hole or repair an existing hole that has lost its thread.
Some epoxies are as strong as steel. This quality makes the filler incredibly durable as it can be sanded and then painted too.
However, there are some downsides to using epoxy filler.
Firstly, it will degrade in sunlight with time.
That means you should not use this type of filler for outdoor furniture or wooden projects.
There is a solution to this sunlight problem, though.
You can just use a primer that is UV-resistant and then paint the surface for additional protection.
Many people stay away from using epoxy fillers because they are more time-consuming.
You need to understand how this medium works properly before you can start using it.
It is also more expensive than other methods.
However, it is one of the best ways to utilize to restore wood if you have the time and money.
One thing you need to remember is that epoxy must cure for at least twenty-four hours.
If you touch or do anything during this period, you will have difficulty cleaning up the mess as working with epoxy is not easy.
Method 4. Wood Patching
Last but not least, you need to do some wood patching.
That means you will have to patch the missing area with another piece of wood if you can’t use the filler options.
If you don’t want to use fillers, this is an ideal choice.
The process of wood patching will become much easier if you utilize a saw to cut the area square.
Doing this will allow you to use a square-ended piece of wood to fit in the gap.
The method is simple and convenient.
All you have to do is remove all the old and dead wood and use a saw or grinder to cut the gap.
After that, cut a fresh piece of wood the size of the gap and fix it with wood screws and glue.
Keep in mind not to use wood screws that are too thick – thick wood screws will end up damaging the wood.
That is why you need to handle it carefully and delicately.
Once you are done, just ensure no gap between the new and old wood.
Gaps will hinder the strength of the wood.
How Can You Prevent the Wood from Rotting at First Place?
When you take care of things, they last.
That is why you should prevent the wood from rotting in the first place.
Before you start the wood restoration, you should use an anti-rot treatment.
The anti-rot treatment with borate will ensure that the fungi are killed completely.
The best part is that it will also act as protection against termites.
Doing so will enhance the life of your wood as it will last a long time.
When doing outdoor projects, you must remember to prevent and preserve the wood from rotting.
For this, you need to ensure that screws & nails, and countersunk are plugged with filler.
Besides that, it needs to have a sloped surface, so water doesn’t accumulate.
Lastly, you need to use some kind of wood preserver or sealer on the wood. It is the best preventative tip for wood rot.
The sealer will isolate the wood from external elements, which means the fungi will starve.
If you don’t want to use a sealer, you can also use other hard coatings or shellacs.
However, good shellac is incredibly expensive, so it is better to use a sealer to prevent the wood from rotting again.
Final Thoughts
Restoring wood is much better than replacing it entirely.
However, you need to use these prevention tips while restoration so wood stays healthy for a long time.
Many people don’t think it is a simple process, so they opt for replacement.
However, with these tips, you will be saving time and money.
It will prevent further damage, and you will extend the life of wood for decades.
So, what are you waiting for?
If there are rotten wood pieces in your home, start working on them now.
These DIY methods don’t take long, and you will be saving a lot of money in getting the job done.
Share the post "4 Easy Ways to Repair Rotting Wood (Without Replacing It)"

You can bring new life to the interior of your home just by adding a new coat of paint to Read more

Wood blinds are highly energy-efficient and can add a lot to the warmth of your room interiors. These can also Read more
Concrete houses appear more durable and stronger, but timber-made or timber & concrete fusion house designs are making a stance Read more

Although dealing with epoxy is not at all difficult, you are prone to make mistakes that can arise due for Read more

Douglas Becker (aka Painter Doug) has over twenty years of experience as a painter in Adkins, Texas. At present, he resides in Florida with his family.
From painting multi-storeyed houses, condos, and apartments to large commercial buildings and small offices, he had served various customers in areas not only in Adkins but also in Southwest Florida, Sarasota, Naples, and many more. To know more about him check here.