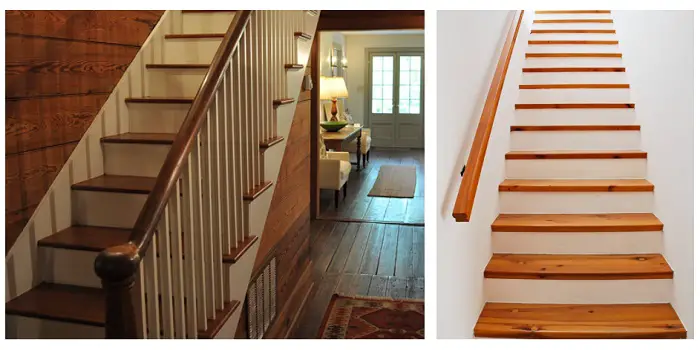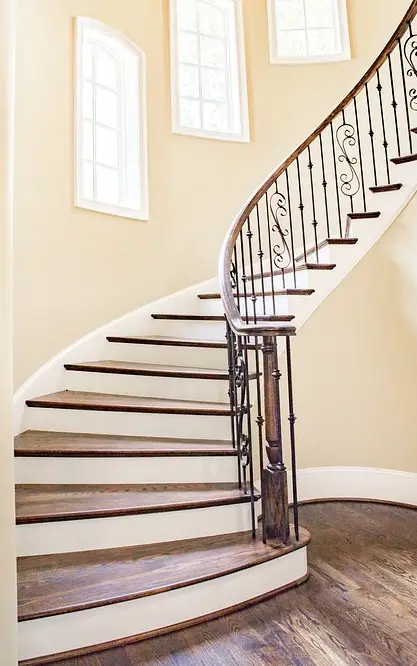
Poorly maintained hardwood staircases (particularly the risers) can say a million words about how much you care about your property.
The stair risers are the visible vertical part of the step while the tread is where the feet land to go up or down the stairs. Since the risers are seen when looking at the stairs from the bottom floor, they play a crucial role in the overall aesthetic of your home.
You can of course use carpet or tiles for covering the treads, but using paint for the riser is often recommended because it can be touched up easily and changed when desired.
In other words, if you want to give your hardwood stairs a new look without heavy investment, then repainting the stair risers and treads with a different color or pattern will do the job.
What's Here in the Article:
How to Paint Wood Stair Risers?
Investing time in maintaining or upgrading stair risers not only enhances visual appeal but also reflects pride in your home’s upkeep.
Whether you choose to DIY paint the risers or hire a professional painter, ensure that the right steps are followed to get the best-desired results.
Step 1. Prepare the stairs
Preparing your staircase before painting is essential to ensure the paint is applied evenly and smoothly.
- Start by removing the carpet from the stairs if you have it installed
- Then remove any nails or staples
- Next, clear all the dirt and debris from your staircase using a vacuum
- If you have a baby or pet at home, consider placing a baby gate at the top and bottom of the stairwell
Step 2. Protect the steps
After you have cleaned the stairs, cover your hardwood steps with some old newspapers or plastic sheets.
IMO, plastic sheets will work better as you do not need to worry about the paint drips with them. But the plastic sheeting can cause slips and falls, so you must be extra cautious when using them.
When covering with a protective covering, make sure you extend the sheet from the riser’s base to the step’s nose. If also required, tape off the edges properly with painter’s tape.
Step 3. Sand the stairs
Using 60 to 80 grit sandpaper, sand the stair risers lightly, including the corners.This will help remove the old paint (or varnish).
Plus, it will help in better adhesion so that the new primer and paint on wood are correctly received.
Step 4. Clean and let it dry
After sanding, vacuum or wipe the stairs using a damp cloth to make them dust-free.
If you have used a damp cloth, let the surface dry for an hour. But be sure that you do not wet the wooden stair risers, as applying primer paint on a damp surface may trap the moisture that can appear as ugly stains later.
Step 5. Prime the stair risers
Using natural bristle brushes, apply the primer to the stair risers in the direction of wood grains.
It’s good to use a heavy-duty primer for MDF or plywood stair risers as it can hold up to foot traffic very well. Apply at least two coats of primer to ensure that the paint sticks well and deliver a smooth finish.
Do not forget to wait for a few hours between the two primer coats and allow enough time to completely dry the primer before you paint.
Step 6. Apply the paint on the risers
Using a foam brush or a mini roller, apply two coats of paint to the risers. While starting from the top of the stairs you should patiently work your way down to the bottom so that you do not get stuck upstairs.
The best paint for stair risers is the one that is designed for painting floors and porches. As these paints are meant to withstand foot traffic, they are highly durable and can last for a long.
When choosing the paint for stairs, you can also opt for non-toxic paints (like Rust-Oleum chalky finish floor paint) with low or no volatile organic compound (VOC) content.
Step 7. Final touch-ups and cleaning
After you have applied the paint on the risers and they have dried, it’s good to recheck each riser if they need any repair.
If required, make the repairs and final touch-ups using a small detail brush. After all is set, remove the tape and protective sheets carefully.
Tips and Warnings
- Plan your painting job early morning or when everyone is out for work.
- Apply the paint slowly and carefully to the risers making sure there are no drips on the stair.
- If you choose to paint your stair in more than one color, use masking tape to mark your design first.
- You can also use stencils to add designs to your stair risers. And paint them in different contrasting colors.
- Instead of applying a single thick coat of paint, apply multiple thin coats. This will dry sooner and will last much longer.
- Before walking or using your stairs, ensure that the paint is completely dry. The longer you wait, the stronger the paint will get.
Should You Polyurethane Painted Stairs?
Painted stairs look fantastic—at first. But stairs are basically the most high-traffic, overworked surface in your home. Without a protective topcoat, all that beautiful paint will wear down faster than a teenager’s patience during a family road trip.
So, when you have already painted your stair risers, it’s good to add an extra layer of protection by applying a coat of polyurethane over it. It adds a hard, protective layer that shields the paint from scuffs, scratches, shoes, and overenthusiastic pets doing zoomies. Plus, a coat of polyurethane on your stair risers will also give the hardwood a glossy sheen that makes it easy for you to do all the cleaning.
With all that said, it’s important to know that applying polyurethane to stair risers can be tricky, especially at times if you need to use your staircase while the finish is still drying. So, you will need to plan to get around this problem.
Below are a few easy steps you will need to follow when you need to apply a coat of polyurethane to your stair risers…
Step 1 – Gently sand each stair riser with 120-grit sandpaper to make the surface smooth. Vacuum the fine dust and wipe the surface with a cotton cloth.
Step 2 – Slowly invert the can of polyurethane about 8 to 10 times as you work. Avoid shaking the can as it will create bubbles that can hamper the finish.
Step 3 – Using a paintbrush, designed to be used with oil-based paints, apply a thin, even layer of polyurethane. It’s good to maintain a wet edge (overlaps each stroke) while you work. This will prevent lap marks.
Step 4 – Continue applying the polyurethane to the next steps down the stairs. When all the steps are done, allow 6 to 12 hours to dry the poly. The recommended time will depend on the wood type and the brand of polyurethane you have used. So, check the label for instructions.
Step 5 – When the polyurethane is dried, sand the surface once again using 220-grit sandpaper to dull the shine. Next, apply the second coat of poly to each stair riser as you have done before and allow it to dry.
Step 6 – Sand again to dull the sheen and then apply the final coat of polyurethane. Let it dry for about 24 hours, and do not sand this final coat.
Keep in mind that a freshly coated polyurethane may take about 30 days to cure completely. So, avoid using your rugs or stair carpets for about 2-3 weeks.

What Color to Paint Your Wooden Stair Risers?
Stair risers, when painted white, tend to highlight the natural oak wood of your stairs. Plus, it also makes your staircase and other surrounding areas look more spacious.
But that does not mean you always have to use white color to paint your wooden stair risers.
Instead, you can choose darker colors like brown, blue, dark gray, and even black to repaint them. These dark colors create a dramatic appearance when applied to the risers, especially when it’s offset by white along the walls.
There are other choices you can make for stair risers depending on the location in your home. For example, bright, beautiful colors are the perfect way to augment stair risers that lead to a playroom or child’s bedroom.
You can paint bold stripes such as blue or yellow over white on the risers. You can also paint circles, stars, or dots over white to create that unique, colorful appearance.
If you want to use even more colors, try creating a rainbow effect with a different color on each riser.
If bright, colorful furnishings dominate the home décor, you can augment that effect by using strong colors on your stair risers.
A chevron pattern using cream or gray can bring out the stairs in such an environment.
You can also use paint to create the appearance of different materials such as leather, plaster, or marble. This will add to the look of your home.
Satin vs. Flat Finish for Stair Risers?
Satin paint or flat paint isn’t a type of paint, but it’s a type of finish.
No doubt, the satin or semi-gloss finish is more flexible than the flat as they can dry to a harder finish that is relatively easy to clean. When applied correctly it also covers all the flaws like dings or dents on your stairs. Also, it can withstand common wear and tear and is therefore much more durable. Keeping all that in mind, you should use satin paint on the wooden stair risers.
Remember that satin paint is different from flat paint as it contains 30 percent of the gloss that is mixed with the paint. The glossy effect you get with a satin type of sheen pairs nicely with all wood tones. But, if you want to get a flat non-glossy look on your stair risers, it’s good to use flat paints instead.

Should You Paint the Risers or Stain the Treads First?
Many times homeowners prefer to apply wood stain on the treads of their staircases instead of using carpets or tiles because stained wood offers a timeless, elegant look that enhances the natural beauty and grain of the wood. It’s also easier to clean and maintain compared to carpet, which can trap dust and stains, or tiles, which can crack or become slippery.
If you plan to do so, you should generally paint the risers first after cleaning up your stairs, then stain the treads. Using this strategy, you will be able to remove any paint drips you get on the treads before you stain them.
Plus, painted risers will be much easier to protect from getting stained when you stain the treads.
For staining your hardwood stair treads after you have painted the risers, follow these simple steps…
- Starting from the top steps, apply the stain to the treads using a brush
- Allow enough time to soak up the stain on the treads before you move down the steps
- Keep a rag in your hand to wipe away the stain, just in case it drips on the stairs
In most cases, you will need to apply two coats of stain to the stair treads but it may vary depending on the design, condition, and type of wood material.
Once you have applied the stain on the treads and allowed it to dry, you can apply a good floor finish (like clear oil urethane) to the treads if you want.
Should Stairs Match the Flooring That’s Upstairs or Downstairs?
When it comes to deciding whether your stairs should buddy up with the flooring upstairs or downstairs, it really depends on your grand design ambitions—and whether you’re team matchy-matchy or bold and contrasty.
If you’re aiming for a smooth, elegant transition that whispers “I have my life together,” then syncing your stair treads with the floor above or below can do wonders. It creates that lovely visual flow, perfect for open-concept homes or anyone who enjoys pretending they live in a high-end design magazine.
But if you like to spice things up or give your guests a reason to say, “Ooh, interesting choice,” going with a contrasting stair finish might be more your speed. Think of it as putting a statement necklace on your house—it stands out, draws the eye, and shows you’ve got style and guts.
At the end of the day, it’s all about what makes your heart (and your floors) happy. Whether you go for harmony or high drama, just make sure it feels intentional—and maybe doesn’t clash harder than socks with sandals.
No matter what type of paint or stain you choose, freshly painted stair risers, mainly those painted white, are susceptible to black scuff marks very soon. These become noticeable even from far away and can become very difficult to clean if left ignored for a long time.
All you require is a few minutes and you can remove scuff marks very easily. Here are a few easy steps you can follow to keep the white stair risers clean…
- Take a piece of rag and moisten it slightly in all-purpose cleaner
- Rub this moistened rag over the dirty stair risers in gentle circular motions
- Take another rag piece and dampen it with water
- Lightly wipe the stair risers and make sure you rinse off all the cleaner
- Finally, wipe the stair risers with a clean towel and allow them to dry naturally
- If you see any further black marks, repeat the process once again
Final Thoughts
The stairs are as much a part of your home as the foyers, hallways, and all the other rooms in your home. Hence, your efforts in repainting the visible parts like stair risers should be to compliment your home décor and not detract from it.
Scuffed, dirty, or chipped risers can make the entire staircase—and by extension, your interior—appear neglected. On the other hand, clean, well-painted, or stained risers can give your space a polished, welcoming look.
Black, white, and brown are the truest neutral colors that work with just about any other color. But you can paint your wood stair risers in any color if you want to choose something different to provide balance.
Share the post "How to Paint Your Hardwood Stair Risers (7 Easy Steps)"

Douglas Becker (aka Painter Doug) has over twenty years of experience as a painter in Adkins, Texas. At present, he resides in Florida with his family.
From painting multi-storeyed houses, condos, and apartments to large commercial buildings and small offices, he had served various customers in areas not only in Adkins but also in Southwest Florida, Sarasota, Naples, and many more. To know more about him check here.


