
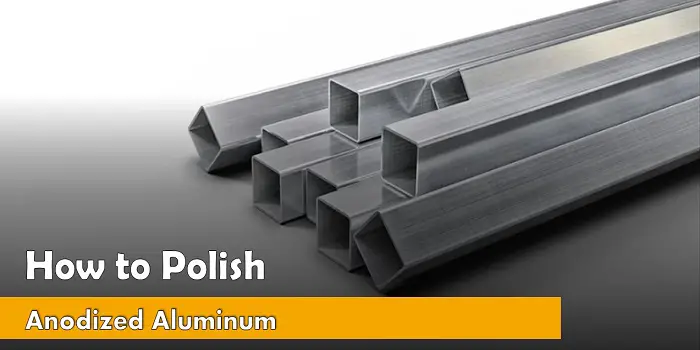
Aluminum’s already a star—lightweight, strong, and doesn’t rust like its moody cousin, steel. Toss it into an anodizing bath, and it gets a superhero upgrade: tougher, shinier, and nearly weatherproof.
This anodized armor doesn’t just boost durability—it makes painting and dyeing way easier. Paint sticks better, lasts longer, and looks smoother on anodized surfaces. Or skip the brush altogether and go for dye—anodized aluminum absorbs it beautifully, unlike its plain, stubborn counterpart.
Another bonus? Corrosion resistance gets a serious upgrade. The hardened surface stands up to chips, cracks, and whatever the weather throws at it. Just keep the anodized layer intact and it’ll stay good-looking for a solid 10–20 years.
Of course, nothing lasts forever. Even anodized surfaces eventually wear down and can get scratched, but with the right care and cleaning you can stretch its life and style for the long haul.
But let’s be frank, polishing scratched anodized aluminum isn’t exactly a walk in the park. However, with the right tools and a little know-how, you can bring back the shine. In this post, we’ll walk you through simple, safe steps to restore that anodized surface without ruining its protective layer. Got a dull, tired-looking alloy item?
Let’s give it the glow-up it deserves!
What's Here in the Article:
Repairing Scratched Anodized Aluminum
Over time, scratches, swirl marks, and environmental grime can leave your once-glossy aluminum looking more “vintage” than sleek. A good polish brings back that fresh-off-the-factory-floor shine.
But it’s not just about looks. Polishing helps evict stubborn stains and chemical residue that basic cleaning can’t handle. Plus, it smooths out rough spots, making the surface easier to clean and maintain—great news for anyone using anodized aluminum in high-performance spaces like cars or aircraft.
Bonus: some polishing compounds leave behind a thin protective layer, helping fend off future wear and tear. So you’re not just reviving the finish—you’re extending its lifespan, too. Now that’s what we call a glow-up with benefits.
How to do it correctly—let’s get into those details…
Step 1. Clean the surface
Before you tackle those scratches, start with the basics: give your anodized aluminum a good cleanup. Wipe away dirt and debris with a soft towel—those scratches aren’t going anywhere yet, but at least you won’t be grinding in extra grime while fixing them.
Next, bring out the big guns—a high-pressure rinse. A pressure washer (or a strong spray nozzle) will blast off any lingering gunk. Then, mix a couple of drops of mild dish soap in water and scrub gently with an abrasive sponge.
Leave harsh cleaners out as they’ll do more harm than good. Instead, go the natural route by sprinkling some baking soda which makes a great backup cleaner.
Now that your aluminum’s squeaky clean, it’s ready for the next step in its scratch-removal makeover.
Step 2. Rinse & dry
After scrubbing, rinse off any soapy leftovers with clean water and dry the aluminum with a soft towel. If the surface still looks grimy or the scratches are too deep, it’s time to bring in the big guns—stripping the anodized layer.
Suit up with rubber gloves and goggles, because we’re dealing with sodium hydroxide (a.k.a. drain cleaner). Mix one tablespoon of the cleaner per gallon of water in a pan, then carefully dip the aluminum in. No scrubbing is needed—the solution does the heavy lifting, eating away the anodized layer and exposing the raw aluminum beneath.
For bigger pieces that won’t fit in a dip, just apply the solution with an abrasive sponge. Once done, rinse thoroughly with water until all traces of the solution are gone. Now you’ve got bare aluminum, ready and waiting to shine with a proper polish.
Step 3. Sand & polish the aluminum
Start with 800-grit sandpaper and give that aluminum a smooth makeover—by hand or with a sander, your call. Just make sure to cover the entire surface evenly, no patchy jobs here.
Once it’s looking matte and uniform, you’re ready to move on to the glam part: buffing.
Grab a buffing pad (a machine helps, but elbow grease works too) and go in slow, circular motions. After a good buff, wipe it down with a soft cloth and inspect your masterpiece. If everything’s gleaming, it’s time to bring in the polish.
Apply an anodized aluminum cleaner or aluminum polish (or even your toothpaste). Follow the label’s lead, use a soft cloth, and rub it in circular motions to lift off any lingering stains or grime.
Once you’re done polishing, grab a clean microfiber towel to give your aluminum a final wipe-down, leaving behind nothing but a smooth, shiny surface.
Now step back and admire your work—your anodized aluminum is looking as good as new, gleaming and ready to turn heads.
How to De-Anodize Aluminum Surface?
There can be instances when you do not like the anodized finish on your vintage aluminum canisters or window frames. You may also want to get rid of the anodized finish if it’s tarnished, weathered, or outdated and you do not want to get it fixed.
Fortunately, there are ways to remove this finish without the need to buy and use expensive products. A drain cleaner is one good household cleaning agent that can help you get the job done.
A typical drain cleaner will contain sodium hydroxide, which is a powerful chemical that can efficiently remove the aluminum’s outer coating simply by deoxidizing it.
- Start by putting your rubber gloves on for protection
- Fill a large bucket with water and add a tablespoon of drain cleaner for every gallon of water
- Now put your aluminum pieces into this solution for 5-6 minutes
- Finally, remove the pieces, rinse with clean water and allow them to air dry outside
Another common household method for stripping anodized coatings involves the use of sodium hydroxide (NaOH), also known as caustic soda or lye, which is a key ingredient in many oven cleaners.
You can use the oven cleaner by carefully applying it to the anodized surface, allowing sufficient contact time for the coating to loosen, and then thoroughly rinsing the part with water.
A few other options for removing anodizing from aluminum include sandblasting, abrasive blasting, soda blasting, a heat gun, mechanical polishing, or the electrolytic removal method. All these will require varying degrees of specialized equipment, technical skills, and safety precautions.
Therefore, the choice of method will often depend on factors such as the size and shape of the part, the desired finish, the available resources (equipment and expertise), and the level of risk one is willing to undertake.
Are Anodizing Touch-Up Pen & Kits Any Good?
For fixing light scratches and repairing damaged black anodize on aluminum there are a variety of products like touch-up pens and kits available on the market. These products require no heating and expel no toxic fumes while repairing the scratches on the metal parts. Plus, it won’t chip or rub off like traditional paint.
I would say it’s much better than using a black marker – if you are trying to fix the issue that way.
With that said, it’s good to know that some of these kits may contain solutions and chemical ingredients that may be toxic in nature and can cause issues, especially if you are trying them on your anodized cookware.
If you really want to use them for metal finish restoration, I should say that I doubt their efficacy over professional repairing.
I haven’t used them before and have also heard about the negative reviews these products have all over the internet. So, I recommend that you should try them first only in an inconspicuous area where the scratches are minor.

Why Am I Seeing a Haze Effect When Polishing Aluminum?
When polishing aluminum, you may sometimes notice black stuff or a haze effect that looks weird. This is caused due to the residue deposits of the metal you are cleaning and polishing. The more you polish, the more it produces the residue, so the effect may not stop ever.
The best strategy to get rid of this black residue is to wipe off the excess polish with a paper towel once you have done the finish the way you like.
Vinegar is also an effective, powerful ingredient that can help you clean dirt, stains, and grime from aluminum without scratching and hazing.
- In a bucket, add warm water and white vinegar in a ratio of 2:1
- Soak the tarnished aluminum pieces in this vinegar mixture for about 30 minutes
- Take them out, rinse them with clean water, and let them dry completely
Not only for smaller pieces (such as tarnished pots, pans, or cookware), but you can also use this remedy for restoring anodized aluminum shower doors, trims, window frames, chalky aluminum siding, aluminum rims of your car wheel, etc.
Can I Refurbish My Old Anodized Aluminum Surface Using Paint?
Absolutely, if you want to give your old worn anodized aluminum metal a new look without using harsh chemicals, painting over it can be one great way.
- Start by rubbing and cleaning the surface by wiping it with a damp cloth.
- Let the surface dry and then cover any areas you don’t want to be painted with masking tape.
- Apply etching primer which helps the paint stick and gives you a nice, even surface.
- Once the primer is dry, grab your paintbrush and apply the paint. It’s best to use a paint specifically designed for metal surfaces, such as epoxy or acrylic-based paint as they offer higher durability and a good finish.
- Wait several hours for the paint to dry, and then apply a second coat to get a deeper color and richer finish.
- Once the paint is dry and the final coat is applied, it’s a good idea to add a clear protective topcoat, such as a clear acrylic sealer, to help protect the paint and the aluminum surface from wear and tear.
Note: Paints for aluminum can be toxic, so do not use them to paint your anodized aluminum cookware or other pots that touch the food items.
Final Thoughts
Anodizing also means you get a proper aluminum surface that will last longer and is far more friendly to painting which only means it will be even more durable. You will just need to make sure that you keep the polish intact by wiping and spraying the surface often.
Polishing scratched anodized aluminum is all about patience and the right tools. By using a gentle abrasive pad, specialized polishing compound, and a little elbow grease, you can restore that sleek, shiny finish and make those scratches disappear like they never existed.
Just remember to always go slow and steady—after all, we’re trying to polish, not polish off the surface. Once you’ve worked your magic, don’t forget to finish up with a protective coating to keep that aluminum looking sharp for the long haul.
Share the post "How to Polish Scratched Anodized Aluminum?"
You can bring new life to the interior of your home just by adding a new coat of paint to Read more
Wood blinds are highly energy-efficient and can add a lot to the warmth of your room interiors. These can also Read more
Concrete houses appear more durable and stronger, but timber-made or timber & concrete fusion house designs are making a stance Read more
Although dealing with epoxy is not at all difficult, you are prone to make mistakes that can arise due for Read more

Douglas Becker (aka Painter Doug) has over twenty years of experience as a painter in Adkins, Texas. At present, he resides in Florida with his family.
From painting multi-storeyed houses, condos, and apartments to large commercial buildings and small offices, he had served various customers in areas not only in Adkins but also in Southwest Florida, Sarasota, Naples, and many more. To know more about him check here.