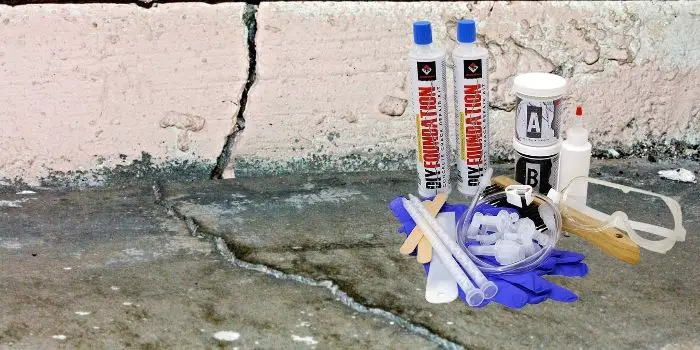
Foundation cracks typically arise from environmental conditions, construction practices, and material properties. Key causes include soil movement, poor construction, water issues, thermal expansion, tree roots, settlement, vibrations, design flaws, and aging.
Soil movement, especially in expansive soils that expand when wet and contract when dry, can shift and crack foundations. Poor construction practices, such as inadequate soil compaction and low-quality materials, weaken foundations, making them prone to cracks.
Water-related issues, including hydrostatic pressure from accumulated water and poor drainage, can exert pressure on foundations, leading to cracks. Temperature fluctuations causing thermal expansion and contraction can also contribute to this problem.
Preventing foundation cracks involves proper site assessment, using quality materials, ensuring effective drainage, and conducting regular inspections to catch early signs of trouble.
What's Here in the Article:
Types of Foundation Cracks
Remember that not all foundation cracks need immediate repair, as their severity and implications can vary. Here’s a brief overview to help determine when a repair is necessary:
- Hairline Cracks: These are typically small and narrow cracks that appear as a normal part of the curing process in concrete. They are usually not a cause for concern unless they widen over time.
- Vertical Cracks: Often caused by the natural settling of a building, these cracks are usually less serious if they are narrow and evenly spaced. They should be monitored for changes.
- Diagonal Cracks: These can indicate differential settling, where one part of the foundation is moving more than another. Depending on their width and progression, they may require attention.
- Horizontal Cracks: These are generally more serious as they can indicate significant pressure on the foundation walls, often from soil or water pressure. They usually need prompt repair.
- Stair-Step Cracks: Found in brick or block foundations, these cracks follow the mortar joints and can suggest settling or pressure issues. The severity depends on the size and movement of the crack.
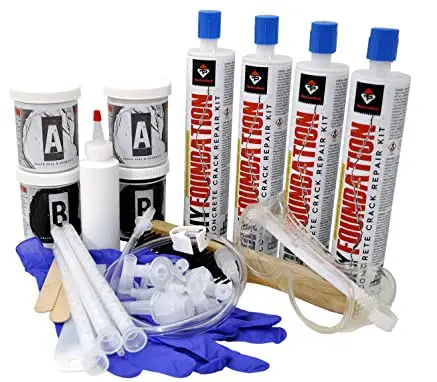
Radonseal DIY Foundation Crack Repair Kit
If you’re seeing some cracks in your concrete foundation wall, you are not the only one. Most homes, old or new, will eventually develop foundation fissures.
If the fractures aren’t leaking right now, it will only take a little time until they do because external waterproofing membranes degrade as time passes.
If the crack in your basement is presently leaking, this is the time to fix it to prevent more damage and mold growth using a Radonseal crack repair kit.
Radonseal crack repair and healing kits have a secret weapon up its sleeve. For the time being, it’s comforting to know that this kit eliminates the necessity for drilling to fix a concrete break.
You simply need the Radon crack sealer kit’s polyurethane formula.
It’s worth noting that the recipe has a low viscosity which makes it simpler to maintain and inject. Also, there is enough product to cover approximately ten feet of crack with a single kit which is sometimes a drawback if you have a large project to repair.
Most significantly, it is capable of easily penetrating voids, making it ideal for fixing hairline fractures. The substance also adheres tenaciously to concrete, whether wet or dry.
It is, nevertheless, still flexible enough to allow for the natural motions of the concrete. The price is also quite reasonable, making it an ideal pick if money is tight.
Besides naturally protecting from water, dirt, and gases, one of the finest features of this kit is that the formula will inhibit radon, a radioactive gas that has been linked to cancer.
Tips for Application
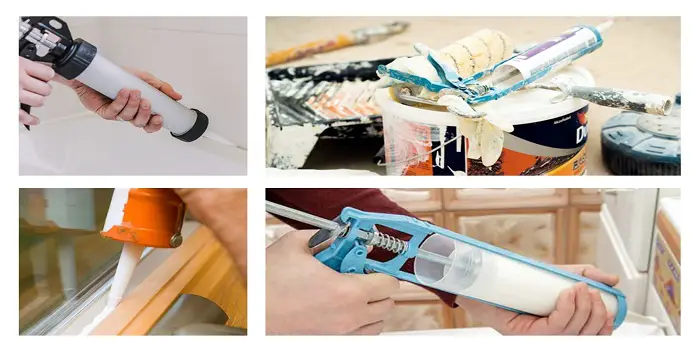
Remember that while injecting the filler from the Radonseal foundation cracks repair kit, you must exercise extreme caution while squeezing the caulking gun since just 20 pounds of pressure is required to allow the polyurethane to penetrate microscopic hairline cracks.
As a general rule of thumb, it’s best to work on each port for 2-4 minutes. Depending on the type of crack, below are some suggestions for using this filler:
Corner cracks:
Fold the injection base, then hold the port from the corner until the glue adheres well.
Actively leaking cracks:
Working just after the leak has stopped will prevent the surface from sealing. If you are not confident enough to do the high-pressure injection, you can engage a contractor to conduct the task for you.
Hairline cracks:
Heat the polyurethane to lower viscosity, which will make it simpler to inject into fine hairline fractures. Simply fill a kettle halfway with boiling water and immerse it for around 15 minutes.
Why Use Radonseal Crack Repair Kit Over Others?
Many house owners have discovered after wasting tons of money and time that products such as hydraulic cement, caulk, and compounds for patching do not endure forever when it comes to mending a gap in a basement wall.
Caulk loses adhesion and connection with the foundation over time.
Hydraulic cement has poor adhesion to concrete and is a hard substance (similar to patching compounds) which makes it crack and spill again. As we know, concrete has natural movements and hindrances that will cause such damage.
All of these waterproofing fixes are only intended to be short-term “band-aids.”
But that’s not the case with the product known as the Radonseal crack repair kit. You can rely on this product to do a good job if you have non-structural cracks that need to be waterproofed and sealed.
You may also easily prevent leaks and additional cracks from developing if you use this low-pressure injection kit on leaky, damp, and moist cracks.
Preventive Measures to Avoid Foundation Cracks in the Future
Preventing foundation cracks involves a combination of good construction practices and ongoing maintenance.
Proper site assessment is crucial; this includes conducting thorough soil tests to understand its properties and ensuring the site is well-prepared with appropriate grading to facilitate drainage away from the foundation. Using high-quality materials and reinforcing the foundation adequately with steel rebar or mesh can significantly enhance its strength and durability.
Effective drainage systems are vital in preventing water-related foundation issues. Installing gutters and downspouts to direct water away from the foundation, ensuring the ground slopes away from the structure, and considering French drains in water-prone areas can help manage water around the foundation.
Waterproof coatings can also prevent water infiltration while managing vegetation by planting trees and shrubs away from the foundation to help avoid root intrusion and soil water imbalance.
Regular maintenance is key to early detection and prevention of foundation problems. Routine inspections can identify minor cracks before they become significant issues, and maintaining consistent soil moisture with soaker hoses during dry periods can prevent soil from contracting and expanding excessively.
Hiring experienced contractors for construction and periodic professional inspections can further ensure the foundation remains stable and crack-free over time. By combining these strategies, homeowners can significantly reduce the risk of foundation cracks and maintain their home’s structural integrity.
Share the post "How to Fix Foundation Cracks By Yourself?"

Douglas Becker (aka Painter Doug) has over twenty years of experience as a painter in Adkins, Texas. At present, he resides in Florida with his family.
From painting multi-storeyed houses, condos, and apartments to large commercial buildings and small offices, he had served various customers in areas not only in Adkins but also in Southwest Florida, Sarasota, Naples, and many more. To know more about him check here.

